Estimated reading time: 6 minutes
Table of contents
If you want to learn how to resize an image in Lightroom, we’ve compiled a list of helpful hints. This method is applicable to all software versions. The only differences are the names of the options and the location of the buttons.
Photo resizing is especially useful if you want to publish the same image on multiple platforms or have it printed.
In a Few Clicks, Resize an Image in Lightroom
If you are a blogger or like to share photos on social media, I recommend watching the tutorial on how to resize images in Lightroom.
This option is also useful if you need to enlarge the image for printing purposes. Learn how to quickly resize photos in Lightroom Classic CC by reading this article. Alternatively, you can use apps to reduce the size of your images or use an online image cropper.
Select Desired Files
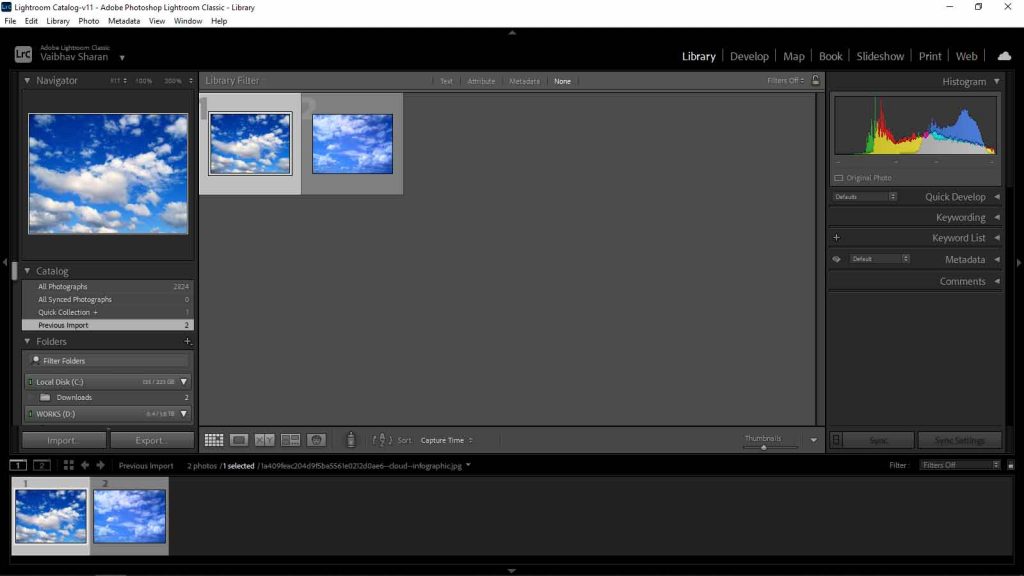
Lightroom allows you to resize photos before exporting them. To enter the Library module’s grid mode, press “G.” Then, while holding Ctrl, select the desired images by clicking on their thumbnails (Cmd for Mac users).
To select multiple images side by side, you can hold down Shift + Ctrl + Click for Windows or Shift + Cmd + Click for Mac.
This method is appropriate for recently edited Lightroom photos.
Go to the Export Section
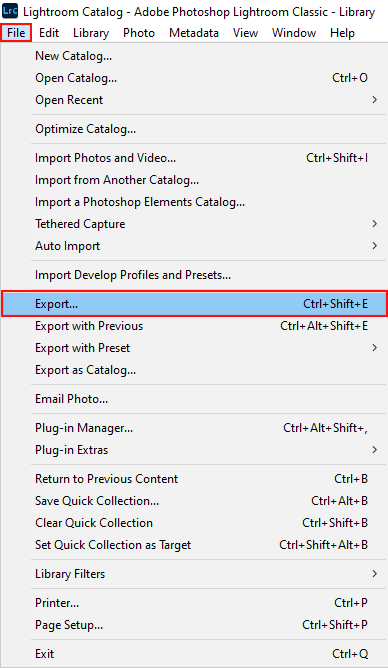
After you’ve chosen your images, navigate to the Lightroom Export dialogue box. You can either use the Export button or the keyboard shortcut Ctrl + Shift + E.
I recommend making a folder ahead of time where you will save your images. Choose a location that is easy to get to. You can use photo organizing software to keep your files organized.
Export Folder Configurations
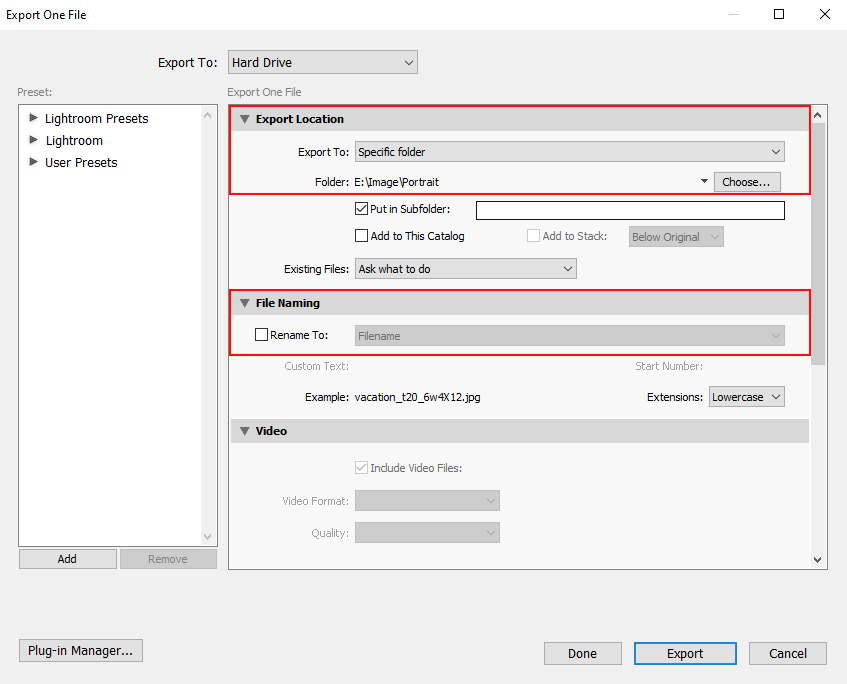
In a new window, you can configure the main export settings. To save files, go to the top bar and select the newly created folder. Users can also save files to the desktop and then check “Put in Subfolder” to enter a new name during the export process. You can set the “Ask what to do” option for files that are already in the export folder so that the system does not make changes automatically.
To change the names of exported files, use the “Rename To” option under the “File Naming” section. Alternatively, you can rename files during import, so this option is unnecessary. This method allows you to keep both system and export files with the same name.
If you need to re-extract a photo, you will know which file to use. The “Extension” option isn’t very important, so I recommend setting it to “Lowercase.”
Define File Settings
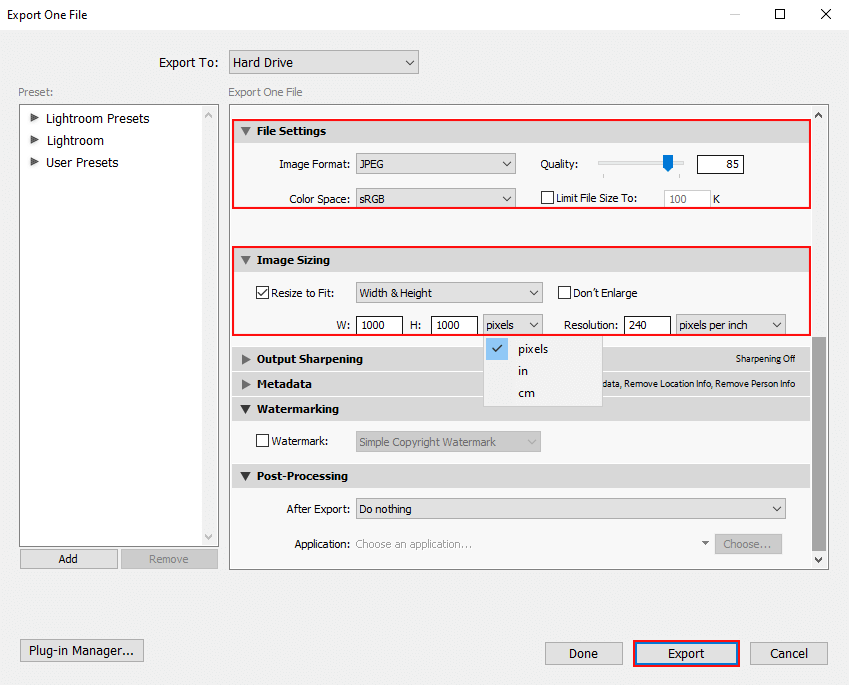
This option should not be overlooked because it aids in the management of file quality and the setting of important parameters. If you’re going to post files on the internet, I recommend using the JPEG format. The “Quality” indicator will appear, and it should be set between 65 and 90. Select sRGB in the “Color Space” settings. It works well on the majority of web-enabled devices. Uncheck the “Limit File Size To” box.
The final image size is referred to in the “Image Sizing” section. You can enter any values you want. Large numbers should be avoided because they increase file weight. Cropping picture apps can be used if you edit on your phone.
The final image size is referred to in the “Image Sizing” section. You can enter any values you want. Large numbers should be avoided because they increase file weight. Cropping picture apps can be used if you edit on your phone.
“Resolution” is the most difficult option for users. If you are exporting files for use in a digital environment, this setting is meaningless. You are free to enter any value. This value will be saved as a print reference in Lightroom.
Remember that you can still change the DPI while printing. If you want to resize an image in Lightroom for both printing and web posting and get a good result, I recommend using a professional service.
Adjust Additional Parameters
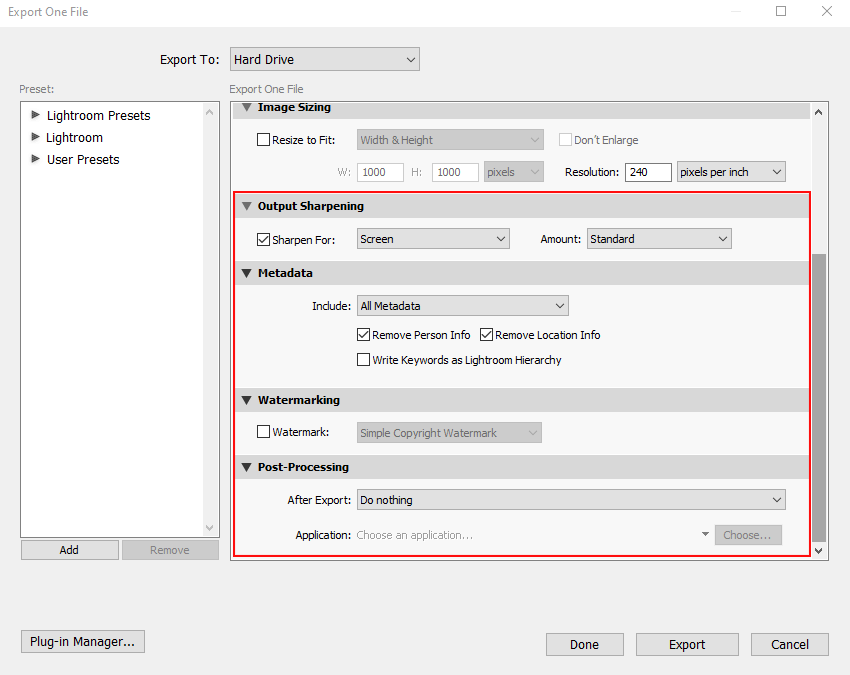
Navigate to the “Output Sharpening” section to set the sharpness level. The final steps are named “Metadata,” “Watermarking,” and “Post-Processing.”
When exporting files to the web, I recommend minimizing the amount of photo metadata that is extracted along with your image. This will help protect your privacy, as well as the camera settings, Lightroom settings, and GPS location. Only copyright information and contact information, in my opinion, should be included.
You can also use the created watermark to make your images stand out and protect your files from theft by third parties.
Go to the “Output Sharpening” section to set the sharpness level. The final steps are “Metadata,” “Watermarking,” and “Post-Processing.”
When exporting files to the web, I recommend minimizing the amount of photo metadata extracted along with your image. This will help protect your privacy, including camera settings, Lightroom settings, and GPS location. I believe that only copyright information and contact information should be included.
You can also use the created watermark to make your images stand out and protect your files from being stolen by third parties.
Note: If you want to make some adjustments to the photo just let me know. I can do it for you at a very low cost. You can hire me to edit your photo.
LATEST POST
- What is Midjourney
 Discover the capabilities of Midjourney AI, learn how to effectively utilize the platform, and explore the advantages and disadvantages of the Midjourney AI image generator across its different pricing options.
 - Brand identity elements
 In the vast marketing universe, imagery is pivotal in establishing and nurturing a brand’s identity. A brand’s visual choices are not merely aesthetic decisions but strategic moves that can significantly influence perception and performance. This Picfixs article explores the intricacies of selecting imagery that complements and enhances a brand’s essence, ensuring it resonates with the… Read more: Brand identity elements
 - 100 Best Mountain Captions and Mountain Quotes for Instagram
 Ready to scale new social media heights? Look no further than this treasure trove of 100 exhilarating captions and quotes, handpicked for your Instagram mountain posts!
 - Symmetry in Photography: A Creative Approach with Examples
 Delve into the enchanting realm of symmetry in photography as we showcase mesmerizing examples on our website. Experience the allure of perfectly mirrored images!
 - 11 Quarantine Photoshoot Ideas to Try at Home for Amazing Photos
 Looking for unique photoshoot ideas during quarantine? Explore the 11 creative suggestions that will help you capture unforgettable moments at home.