Estimated reading time: 5 minutes
Table of contents
Sometimes there are extraneous people or objects in the frame that must be removed. People or objects like this can detract from the main subject or ruin the composition. You’ll learn how to remove objects in Lightroom with minimal effort in the post below. Continue reading to learn how to use Lightroom’s Spot Removal Tool to remove tiny spots, figures, and blemishes.
STEP 1. Go to the Develop Module
To begin, open Lightroom and import RAW files into Lr. Then, on the editor’s toolbar, click on the Develop module near the Crop tool.
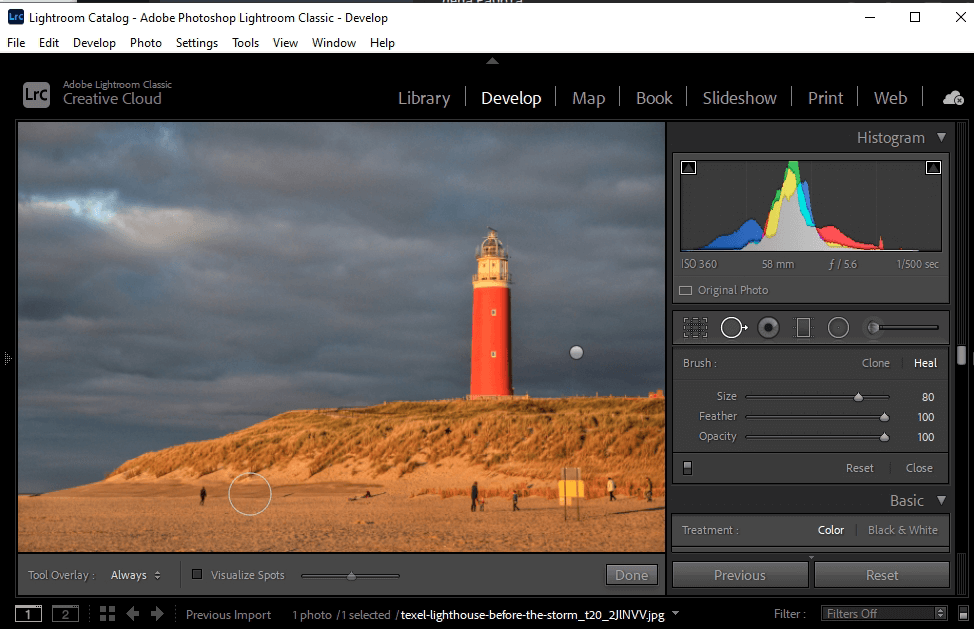
STEP 2. Grab the Spot Removal Tool
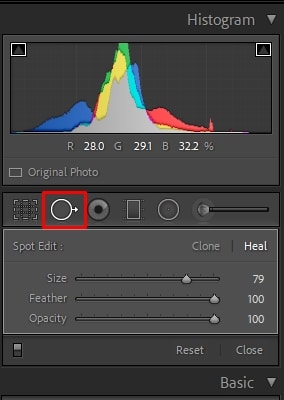
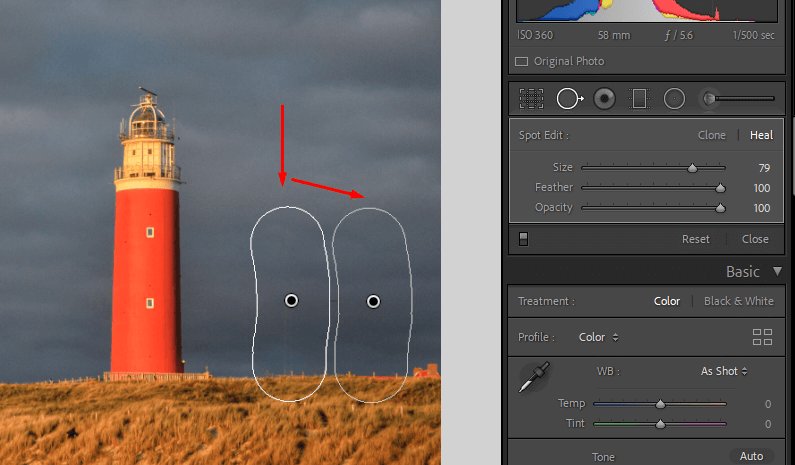
When removing objects in Lightroom, the Spot Removal tool is required. It can be found in the Develop module, along with other tools for editing photos in Lightroom. On the right panel, select the Spot Removal tool. You can also use the Q keyboard shortcut. You must learn how to use its adjustment sliders in order to get the most out of it.
Size. Defines the size of the area that will be replaced. You can use the slider or the [or] keys on the keyboard to change the brush size (make it bigger or smaller). You can also do it with the help of the scroll wheel.
Feather. Defines whether your brush has sharp edges or blends with the picture. In general, users choose the feather between 50 and 100.
Opacity. Determines whether the area you are going to replace is partially visible. The opacity is always set to 100.
When you remove objects in Lightroom, zoom in on the chosen area to better see and control the pixels you are going to copy. It will help you notice any mistakes made at previous stages.
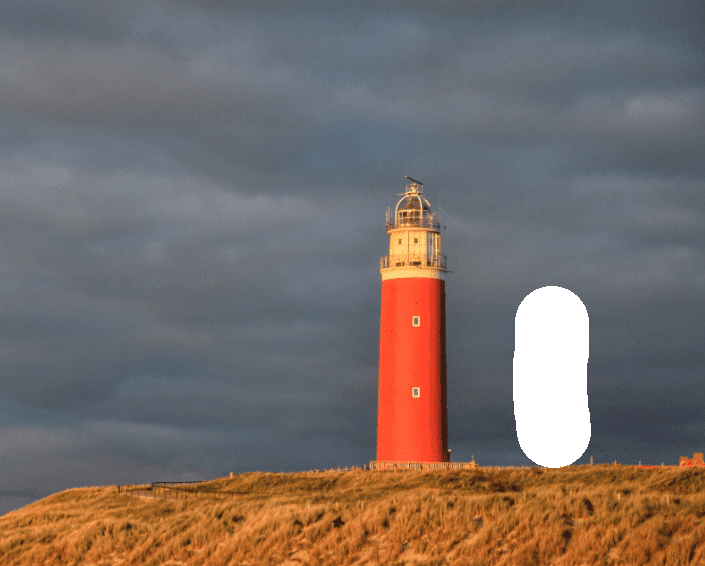
STEP 3. Make a Selection over the Object

After adjusting the settings with the sliders, you must select the area surrounding the object. You can accomplish this by making a circular selection or by using a brush.
Hover your cursor over the area you want to edit, then click and drag. You’ll notice a white border around your selection. The sampled zone to be cloned is indicated by a white marquee with an arrow pointing from it.
STEP 4. Adjust the Source Spot
After you’ve selected the object with the brush, the program will automatically fill in the surrounding pixels. Lightroom can handle this task well in most cases, but you can always choose any other area manually.
If you know how to remove objects in Photoshop, you will be able to complete the task more successfully in Lightroom. Lightroom’s Spot Removal tool is similar to Photoshop’s Clone Stamp and Healing Brush tools. Cloning and healing are both options for Spot Removal.
Clone ‒ Choose “clone” if you want to copy a specific area of your picture to the area that you want to enhance.
Heal ‒ Use “heal” if the texture, lighting, and shading of the sampled area match the area you want to edit.
Whether you use a clone or heal tool, you will see a pin on the edited area. You can hide or show the pins by pressing H on the keyboard. Plus, you may reset the tool and start again by creating a new selection.
STEP 5. Done
There are no extraneous objects in the shot, as seen in the before/after sample. Now that you know how to remove objects in Lightroom, you can move on to more difficult tasks. In Lr, you can learn how to remove glare from glasses.
Make use of the best Lightroom export settings for Instagram and save the image to your computer. Please contact us if you are unable to obtain realistic results. We will quickly edit your photos at a low cost and remove objects of any size.
LATEST POST
- What is Midjourney
 Discover the capabilities of Midjourney AI, learn how to effectively utilize the platform, and explore the advantages and disadvantages of the Midjourney AI image generator across its different pricing options.
 - Brand identity elements
 In the vast marketing universe, imagery is pivotal in establishing and nurturing a brand’s identity. A brand’s visual choices are not merely aesthetic decisions but strategic moves that can significantly influence perception and performance. This Picfixs article explores the intricacies of selecting imagery that complements and enhances a brand’s essence, ensuring it resonates with the… Read more: Brand identity elements
 - 100 Best Mountain Captions and Mountain Quotes for Instagram
 Ready to scale new social media heights? Look no further than this treasure trove of 100 exhilarating captions and quotes, handpicked for your Instagram mountain posts!
 - Symmetry in Photography: A Creative Approach with Examples
 Delve into the enchanting realm of symmetry in photography as we showcase mesmerizing examples on our website. Experience the allure of perfectly mirrored images!
 - 11 Quarantine Photoshoot Ideas to Try at Home for Amazing Photos
 Looking for unique photoshoot ideas during quarantine? Explore the 11 creative suggestions that will help you capture unforgettable moments at home.
Note: If you want to make some adjustments to the photo just let me know. I can do it for you at a very low cost. You can hire me to edit your photo.