
Estimated reading time: 6 minutes
Table of contents
Many users want to know the best Lightroom export settings for Instagram because photos published in their news feed are frequently blurry and appear to be of lower quality than the original. The issue is that this social media network employs an image compression algorithm that reduces the resolution of a photograph, thereby making it smaller.
Fortunately, you can keep the quality of your photos by editing them in Lightroom before uploading them to Instagram. The main goal is to prevent Instagram from affecting the quality of a photo by resizing, cropping, and compressing it.
Top 7 Lightroom Export Settings for Instagram
Despite the fact that Instagram’s reduction algorithm was designed for good, Instagram photographers must use specific Lightroom export settings for Instagram to preserve image quality.
Using these settings, you can ensure that your images look great when you post them to Instagram. Furthermore, all of these options are available directly in the Lightroom Mobile app.
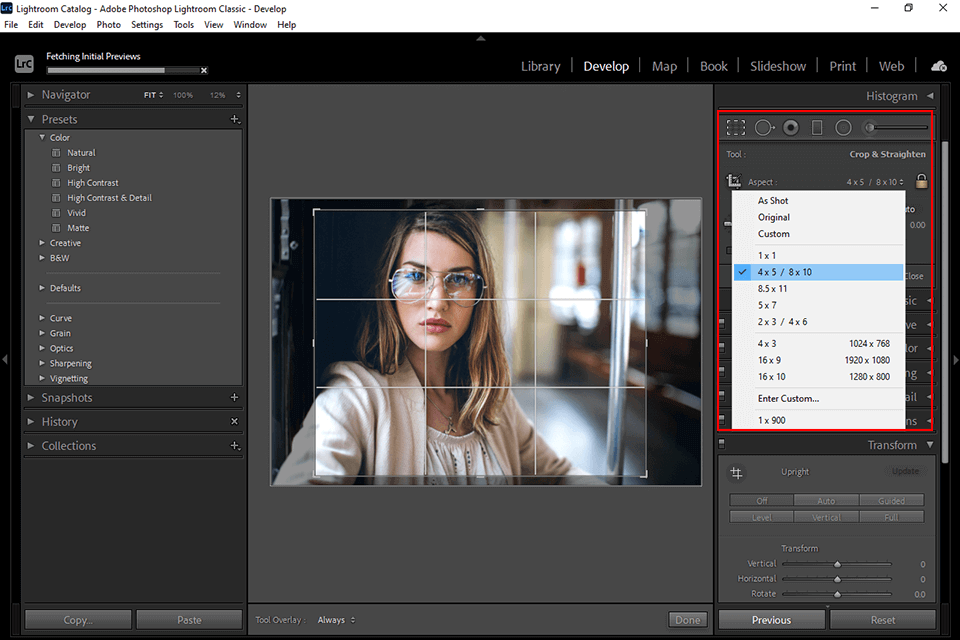
1. Crop the Image
The first step is to crop a photo so that it fits the Instagram format. You must pay close attention to the ratio of an image’s side lengths. Instagram accepts ratios ranging from 1.91:1 to 4:5, but for best results, go with 4:5.
Instagram supports the largest pixel size (4:5). Not only is it popular among Instagram users, but it also offers a variety of image editing options.
Landscape images appear relatively small in the feed due to the vertical display aspect ratio of mobile phones, which makes them appear uninteresting.
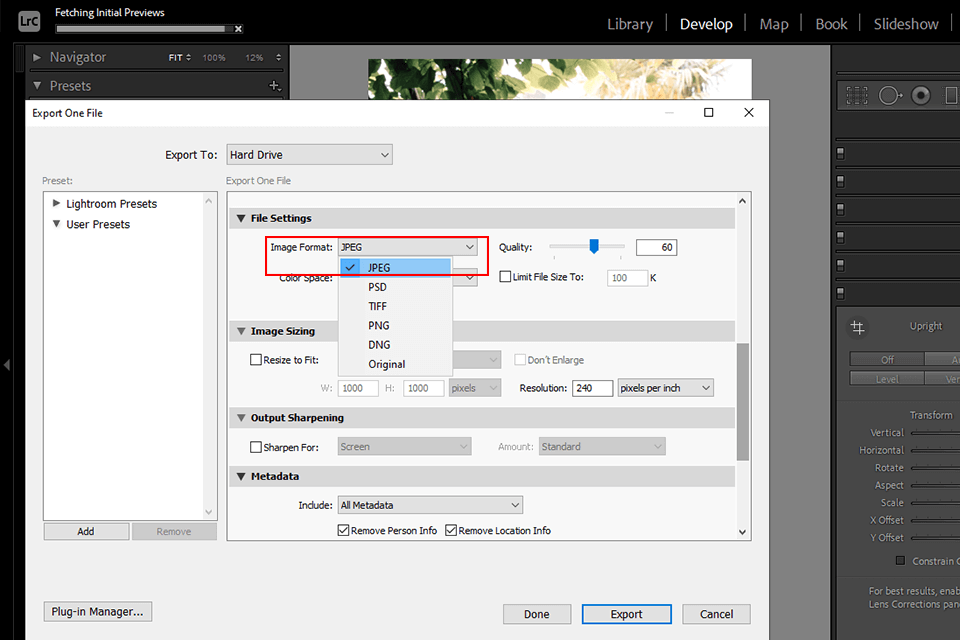
2. Choose a Suitable File Format
One of the most important Lightroom export settings for Instagram is the file format. You should shoot RAW if you want to get more information about your file while editing it. You must import RAW files into Lightroom before proceeding with editing, which is usually very simple.
Importing a RAW file to any social media platform, however, is not a good idea, not only because it is quite large, but also for a variety of other reasons.
After you’ve finished editing an image, you can save it in either JPEG or PNG format. We recommend JPEG because Instagram does not preserve background transparency. However, when using the PNG format, the image’s quality will not suffer.
3. Use an sRGB Color Space
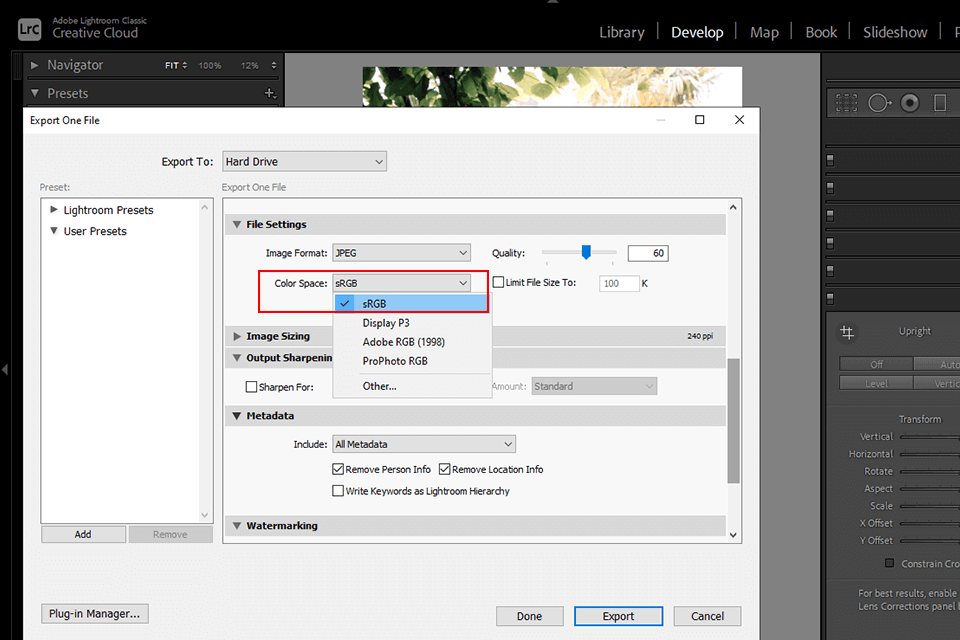
The sRGB colour spaces have a significant impact on the success of a Lightroom export to Instagram. Images uploaded to your profile may appear blurry and desaturated if you ignore this setting.
When exporting images from Lightroom, you must select one of several colour spaces. However, you should be aware that the majority of social media networks for publishing images, including Instagram, use sRGB colour spaces for displaying images.
Calibration, rather than a specific colour space, explains the difference in colours represented by a laptop and a phone screen. The only way to control the situation is to export images in sRGB colour space.
4. Set the Heights Quality
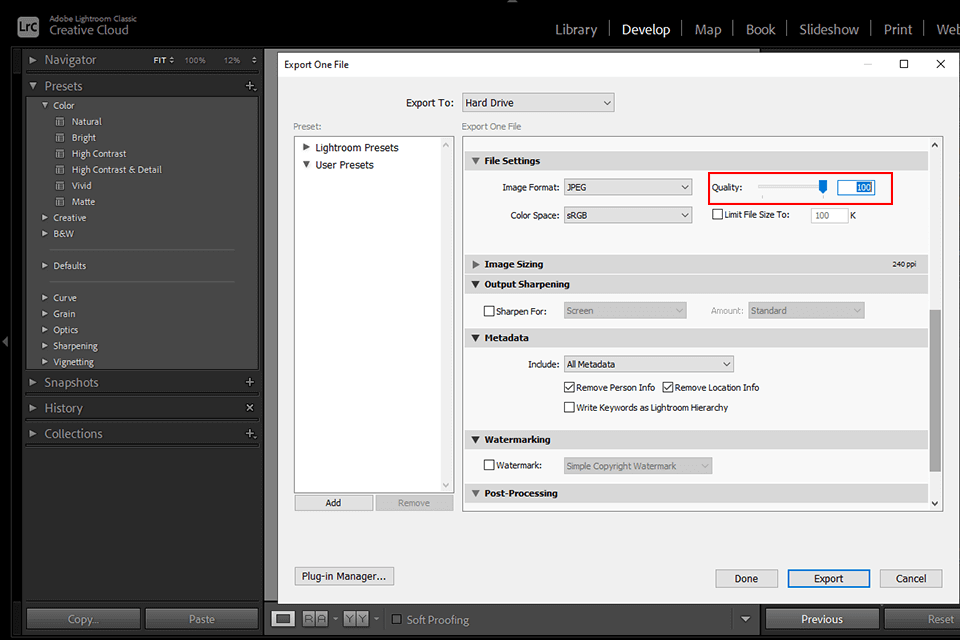
You can achieve complete control over compression by uploading your image in TIFF format. You can choose the image quality if you use the JPEG format, which is best for Instagram.
It should be noted that high-resolution files are quite large. Such images, however, are less susceptible to the compression imposed by Instagram.
5. Export at Double 1080px Wide
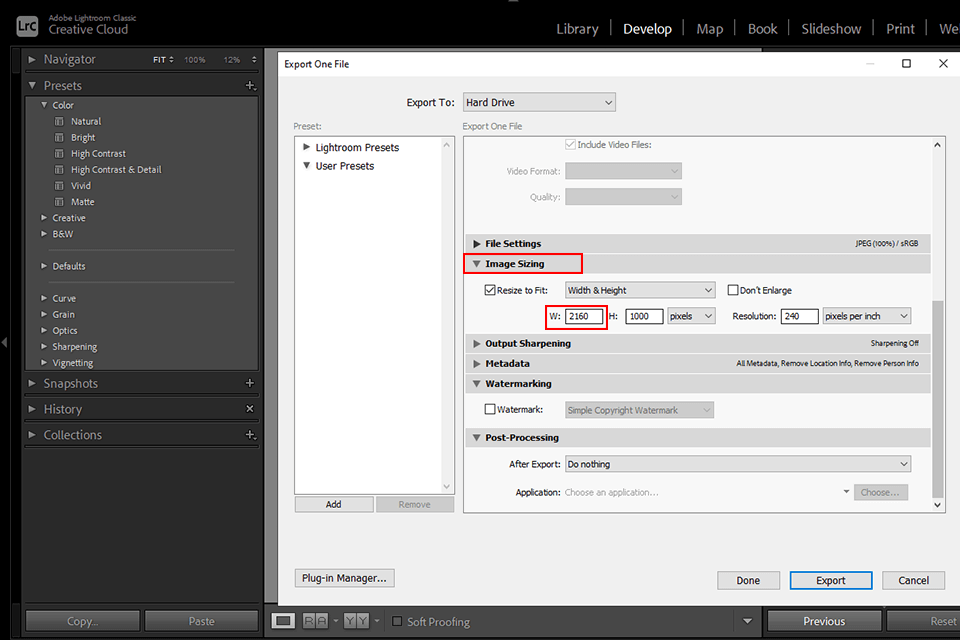
Photos on Instagram are typically displayed at a resolution of 1080px. According to the developers, if you upload images that are equal to or less than 1080px in size, the resizing process is skipped.
We recommend exporting at double the 1080px width because Instagram will soon enlarge the size of the displayed images. The application saves a 2x version of the image so that the original file can be easily restored.
However, the main reason is that reducing the size two or four times is always safe for any background resizing work. You may even get a sharper image at times.
6. Take Care of Resolution
When choosing the best Lightroom export settings for Instagram, keep the resolution of a picture in mind when saving it for later sharing. When you import an image with a resolution greater than 1080p, Instagram automatically resizes it. As a result, images will be displayed in lower quality.
If the photo you intend to upload has a lower resolution, Instagram will stretch it to at least 320 pixels wide. Typically, such resizing results in a blurry and unappealing image. Take these guidelines into consideration to maintain the quality of your photos.
7. Sharpen for a Phone Display
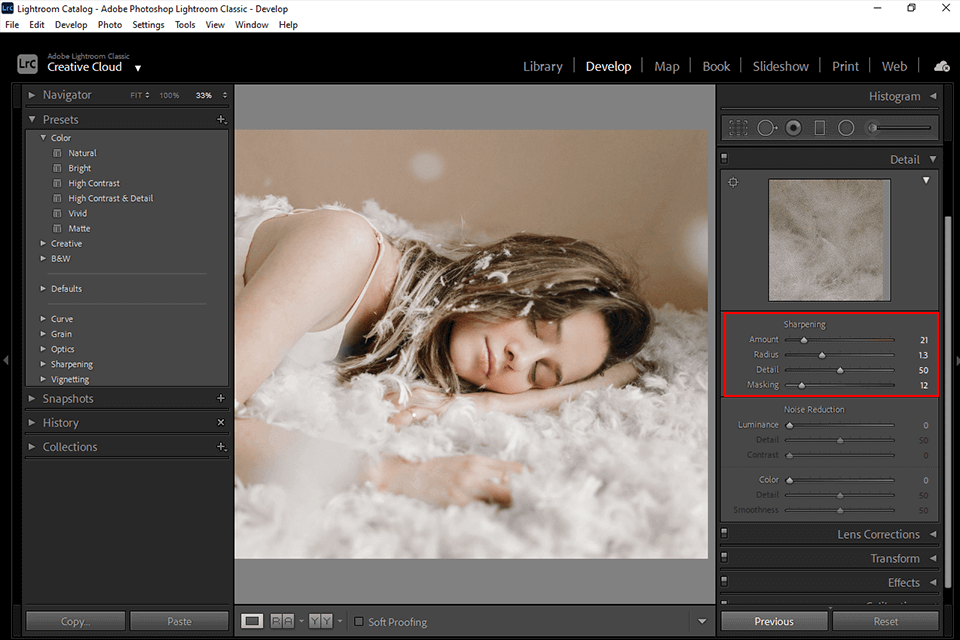
Sharpness is one of the most important factors to consider when looking for a high-quality image. Images with more detail are more appealing. If you want to print your images or keep them digital, you should sharpen them.
Sharpening levels are typically different depending on whether the image will be printed or displayed on the screen of a smartphone. Keep in mind that the device you intend to use to view a photo has a significant impact on its quality.
Note: If you want to make some adjustments to the photo just let me know. I can do it for you at a very low cost. You can hire me to edit your photo.
LATEST POST
- What is Midjourney
 Discover the capabilities of Midjourney AI, learn how to effectively utilize the platform, and explore the advantages and disadvantages of the Midjourney AI image generator across its different pricing options.
 - Brand identity elements
 In the vast marketing universe, imagery is pivotal in establishing and nurturing a brand’s identity. A brand’s visual choices are not merely aesthetic decisions but strategic moves that can significantly influence perception and performance. This Picfixs article explores the intricacies of selecting imagery that complements and enhances a brand’s essence, ensuring it resonates with the… Read more: Brand identity elements
 - 100 Best Mountain Captions and Mountain Quotes for Instagram
 Ready to scale new social media heights? Look no further than this treasure trove of 100 exhilarating captions and quotes, handpicked for your Instagram mountain posts!
 - Symmetry in Photography: A Creative Approach with Examples
 Delve into the enchanting realm of symmetry in photography as we showcase mesmerizing examples on our website. Experience the allure of perfectly mirrored images!
 - 11 Quarantine Photoshoot Ideas to Try at Home for Amazing Photos
 Looking for unique photoshoot ideas during quarantine? Explore the 11 creative suggestions that will help you capture unforgettable moments at home.