The number of people offering photography services is rapidly expanding, so if you want to stand out from the crowd, you must entice clients with additional offers. You could, for example, edit their photos and then arrange them in a thematic collage.
Before you begin creating a collage in Lightroom, you must first devote time to the preparatory stages.
Lightroom wasn’t designed for this purpose, so you’ll need to make some adjustments and switch from one menu to the next to get started. However, if you follow the steps outlined below, you will have no problems.
Step 1. Import the Photos
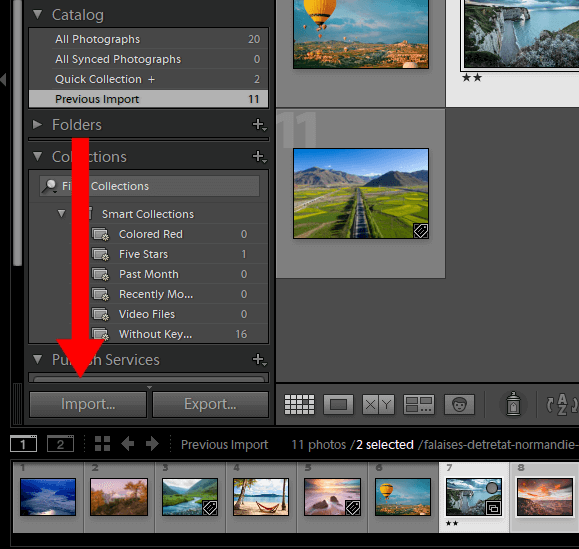
First, select the images you want to include in the collage and import them into Lightroom. The procedure is very simple and quick. Make certain that you enter the settings that you want to use.
If you are serious about photography and want to broaden your knowledge, you should also learn how to import RAW files into Lightroom.
Step 2. Editing Stage
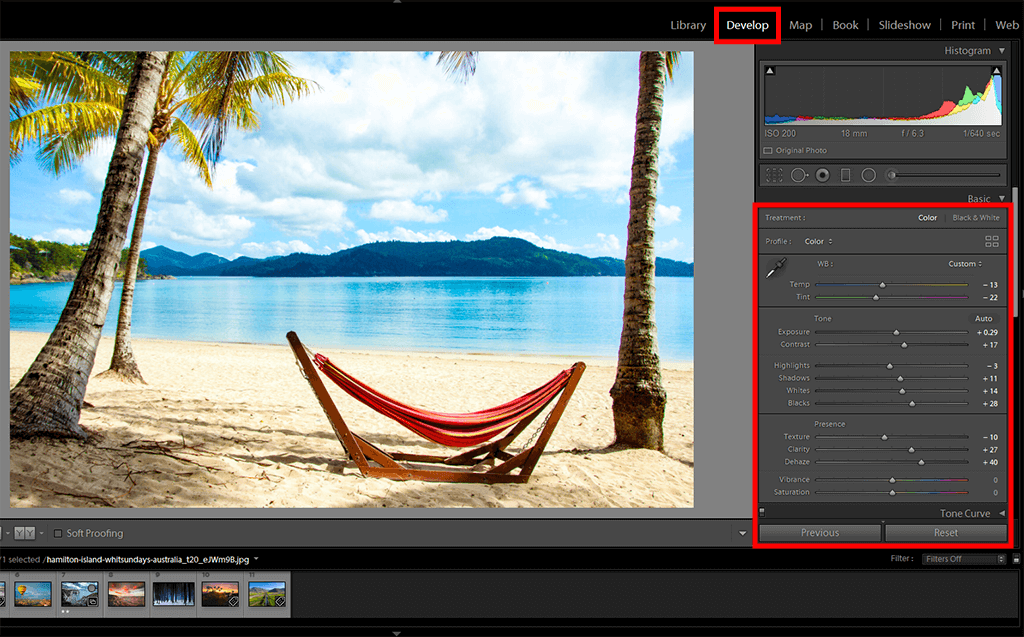
Your Lightroom photo collage must include high-quality images, which means you must edit your photographs. Fortunately, this software has a batch processing mode that allows you to improve multiple images at once.
Step 3. Find the Print Module and Set Dimensions
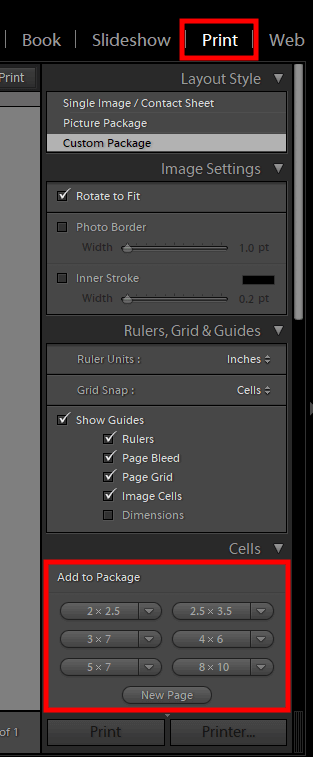
The Print module in Adobe Lightroom isn’t widely used, but it contains all of the tools needed for collage creation. If you start the program but can’t find it, navigate to the “Boo” and “Web” tabs – it’s located between them. Alternatively, you can gain instant access by pressing Cmd+P (Mac) or Ctrl+P (Windows).
I recommend using a template for a specific purpose so you can set dimensions ahead of time. If you don’t know the exact size of a future Lightroom college, choose a larger JPEG format that can be downsized without affecting the quality. If you do it the other way around, you will end up with a low-quality collage.
When you start arranging cells, you can always return to a window with dimensions and make the needed changes.
Step 4. Add the Photos to the Layout You Created

When the layout is complete, you can begin filling in the blanks with imported photos. Using the drag-and-drop method, the program allows you to do it in a very short amount of time. Simply place images in the boxes and rearrange them as many times as you like to create an appealing composition.
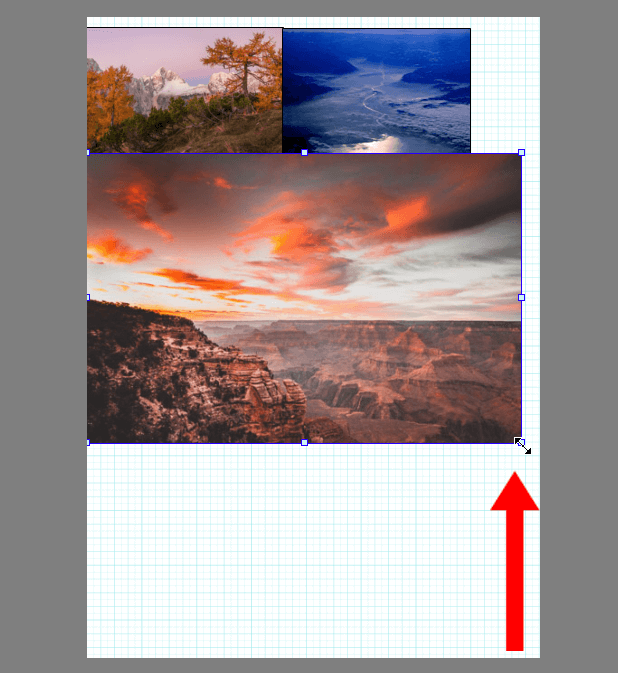
Step 5. Reposition Your Photos

For accurate cropping, repositioning within a cell is required. You can do this by dragging a file while holding Cmd (Mac) or Ctrl (Windows).
If the cropping results do not meet your expectations, you must re-create the entire layout. That is an annoyance, but the entire process of creating a collage in Lightroom entails making compromises.
Step 6. Add a Text
You can complement a photo with a related text via the Identity plate menu.
Step 7. Add a Border
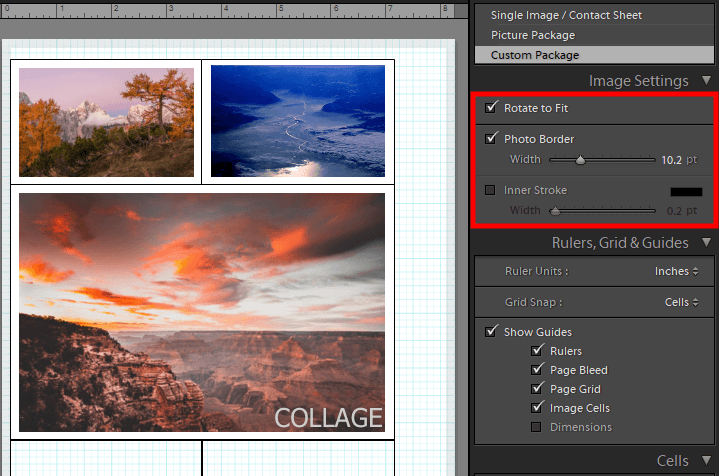
To make your college easier to understand, separate images with a white border. Popular Instagram bloggers frequently use this method. Furthermore, by using a border, you can visually divide photo groups into thematic cores.
Open the Image Settings panel on the right and check the Photo Border box to add a border. It is also possible to add an Inner Stroke, but this will obscure a portion of the image. Click “OK” if this does not ruin your collage. Keep in mind that the color of a Photo Border is fixed and cannot be changed. However, things are different with Inner Stroke, which you can recolor however you want.
To remove distractions and preview your collage, switch off Image Cells and Dimensions in the Rulers, Grids & Guides panel.
Step 8. Saving Your Collage Template
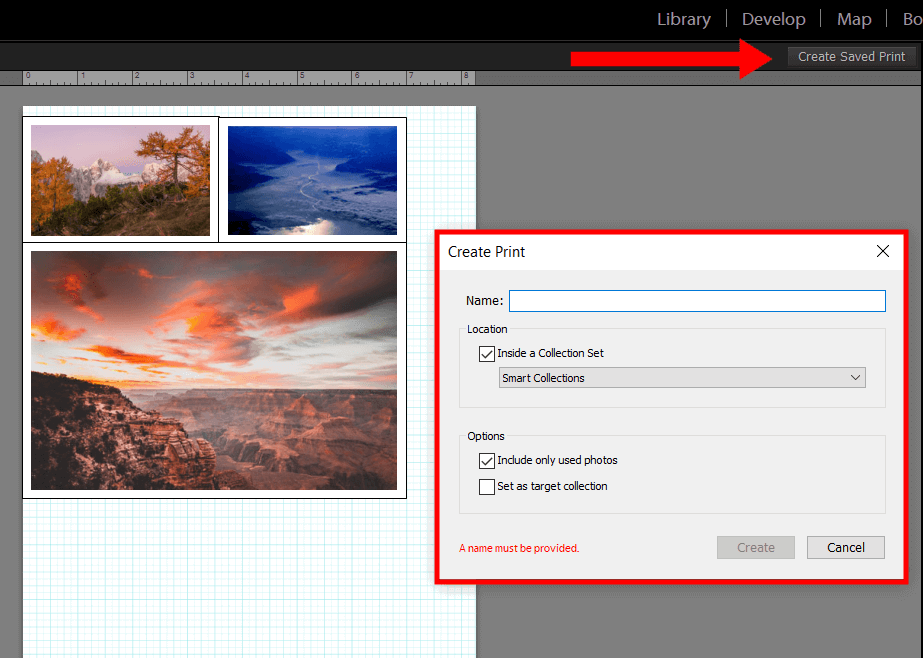
If you have completed all of the preceding steps and are pleased with the outcome, you can save it as a template and use it for future projects. Navigate to the Template Browser panel and click the “+” sign to the right of the Template Browser. Though Adobe Photoshop includes templates, many experts also use Lightroom templates to speed up their work.
There will be a dialogue box where you can enter the name of your Template and select the folder where it will be saved. Save it to the User Templates folder, which Lightroom creates automatically, for easier access. Of course, you can create a new folder; just remember its name and location.
If you want to change your template and want to save the alterations, right-click on the file’s name in the User Templates folder (or your custom folder) and choose “Update with Current Settings”.
Note: If you want to make some adjustments to the photo just let me know. I can do it for you at a very low cost. You can hire me to edit your photo.
LATEST POST
- What is Midjourney
 Discover the capabilities of Midjourney AI, learn how to effectively utilize the platform, and explore the advantages and disadvantages of the Midjourney AI image generator across its different pricing options.
 - Brand identity elements
 In the vast marketing universe, imagery is pivotal in establishing and nurturing a brand’s identity. A brand’s visual choices are not merely aesthetic decisions but strategic moves that can significantly influence perception and performance. This Picfixs article explores the intricacies of selecting imagery that complements and enhances a brand’s essence, ensuring it resonates with the… Read more: Brand identity elements
 - 100 Best Mountain Captions and Mountain Quotes for Instagram
 Ready to scale new social media heights? Look no further than this treasure trove of 100 exhilarating captions and quotes, handpicked for your Instagram mountain posts!
 - Symmetry in Photography: A Creative Approach with Examples
 Delve into the enchanting realm of symmetry in photography as we showcase mesmerizing examples on our website. Experience the allure of perfectly mirrored images!
 - 11 Quarantine Photoshoot Ideas to Try at Home for Amazing Photos
 Looking for unique photoshoot ideas during quarantine? Explore the 11 creative suggestions that will help you capture unforgettable moments at home.