Sometimes you want the photograph you’re taking to look professional, but the light is too low or the shadows are too harsh. In these cases, you may want to use ring light photography to achieve a soft, even light for a portrait or macro photograph.
What is a Ring Light?
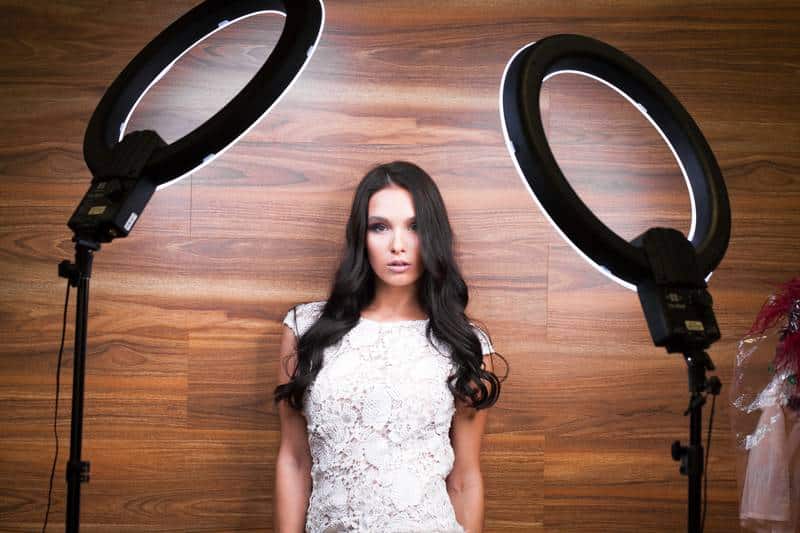
A ring light is a type of flash or continuous light source that is designed as a circle that can be attached directly to the camera lens, like a lens hood, or it can be used as an off-camera flash. It’s essentially a ring of small LED bulbs that are specifically designed to distribute light evenly. They are also made of warm, white bulbs that are intended to simulate daylight in an indoor setting.
Ring lights come in a variety of sizes, and the larger sizes can be used to fill in areas of dark shadows with light in the same way that a flash would. Ring lights are available in two configurations: one that provides continuous light and the other that functions similarly to your flash. Either of these can be used to capture stunning portraits or well-lit macro shots.
What are the Best Uses for a Ring Light?
Ring lights can be used for a number of reasons, including the following:
- Portrait Photography
- Macro Photography
- Food Photography
- As a Softbox
- As a Key Light
- To Expose Details
Let’s take a closer look at these uses.
Portrait Photography with Ring Lights
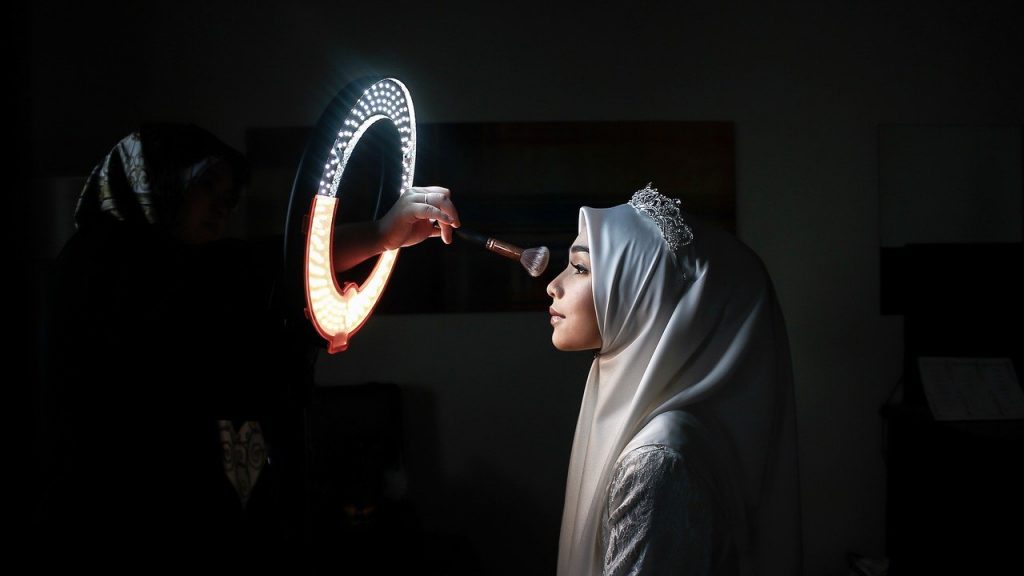
Ring light photography is most commonly used in portraiture. Using a ring light immediately helps to eliminate harsh shadows, and for portrait photography, you want to provide an even light that falls softly on your subject’s face.
A ring light’s circle of light broadens the source of light, illuminating the face from above, below, and directly in front of your subject. They also bring out the subject’s natural skin tone because they mimic daylight.
Using a ring light creates an interesting effect as well, as it produces a circular reflection in your subject’s eyes. If you look closely at most fashion magazines, you’ll notice that ring lights are frequently used, as evidenced by this telltale reflection in the eyes.
How to Use Ring Lights for Macro Photography
Ring lights are also commonly used in macro photography. The primary advantage of using a ring light like this is that it eliminates harsh shadows. A small, portable ring light is ideal for macro photography, and you can wrap it around your lens to avoid distracting shadows as you get closer to your subject.
Another great feature is that these lights are small and easy to transport, so if you’re going on a nature hike and want to take some macro shots, you’ll be able to easily bring these with you.
Food Photography
Ring lights are ideal for food photography because the soft light allows you to illuminate the food from all sides while also creating an editorial look for blogs and restaurant marketing. However, using a ring light for food photography is most beneficial when used off-camera to light your subject from the side. So, if you’re going to use it for this, you should get a handheld ring light or one with a stand.
Getting Started with Ring Light Photography
So, you’ve learned a little bit about how to use these lights, but how do you get started? The first step is to decide whether you want to buy a ring light or make one yourself. If you want to use ring lights as a continuous light source, it’s fairly simple to make one yourself. You can make one yourself for around $20 by using LED lights and low-cost materials. Here’s a list of everything you’ll need:
- White LED strip;
- White plastic drain hose;
- White gaff tape;
- Scotch tape (optional).
Begin by folding the LED strip so that it has lights on both sides; if the strip does not have an adhesive back, you can use Scotch tape to fix this. After folding the strip, thread it through the drain hose and secure it with white gaff tape. Now, shape the drain hose into a circle and seal it with white tape. Simply plug in the LED strip, hang the light on your camera, and begin taking photos.
If you don’t want to make your own ring lights, here are a few things to look for when purchasing the right ring light for you. There are numerous models on the market, and ultimately, it will come down to your photographic genre, budget, and how much you intend to use it. The following are the most important factors to consider:
- Price–Most ring lights start around $100, but if you’ll be using it frequently, or if your photographic genre is portraiture, macro photography, or food photography, you should consider investing more in this type of lighting.
- Build quality–Of course, lower-priced models are more likely to be of lower build quality. Sturdier, higher-quality ring lights will cost you more, but they will also last longer. Consider your general habits and the location where you usually work. If you work frequently in the studio, your equipment may not take as much abuse as it would if you worked outside of the studio.
- Accessories required–also It’s important to consider whether you’ll need any additional items for the ring light you’re considering. For example, you might want to know if replacement bulbs are expensive or difficult to come by. Do you require a light mount? What about a power supply? Being fully informed will allow you to make a more informed decision.
- Light settings–You might want to know if you can adjust the light, and if so, how many settings it has and if they are sufficient for your needs. It’s also a good idea to look into the options for adjusting the light temperature.
- Size/portability–Finally, think about the ring light’s size and portability. This is especially important if you shoot macro photography outside of a studio. If you primarily shoot portraits or food photography, larger ring lights on a weighted stand should be considered.
When getting started with ring light photography, it’s critical to consider all of these factors. It’s a type of lighting that can help you capture beautiful photographs, but you must consider your personal style as well as what you require for your specific photographic niche. There are a variety of ring lights available on the market, as well as the DIY option. The ring light that is best for you is determined by your specific situation. Whatever you decide, ring lights can add stunning lighting to your images and are well worth the investment.
How do I install a ring light?
There are several alternatives. As previously stated, you can wrap it around your camera lens, but you can also mount it and point it directly at your subject or set it off to one side. Indeed, you should experiment to see what produces the best light for the shot you want and for your subject.
How do you change the brightness of a ring light?
The camera’s exposure meter is linked to dedicated flash ring lights, which aids in any adjustments. You’ll have to decide whether to attach larger ring lights to a light stand or hold the camera by hand with larger ring lights that mount to a light stand. Keep the camera lens in the center of the ring light opening if holding it by hand for a direct lighting effect. Using your camera’s controls, adjust the exposure. Color temperature can be changed by attaching filters to the ring light. Diffusers can also be used to create a softer light.
How can a ring light be used to bring out more eye color?
The key to taking good photographs of eyes is to properly light them so that they have great catchlights. A ring light can do this very well, and they are responsible for the iconic circular catchlights. By getting close to your model’s face, the ring light will create circular catchlights that will really bring out the eye color.
Can you use a ring light without it being your primary source of illumination?
Yes, ring lights can be used as a softbox or as a fill light to illuminate dark shadow areas. They do not have to be the main light, but they can be used as such.
Note: If you want to make some adjustments to the photo just let me know. I can do it for you at a very low cost. You can hire me to edit your photo.
LATEST POST
- What is Midjourney
 Discover the capabilities of Midjourney AI, learn how to effectively utilize the platform, and explore the advantages and disadvantages of the Midjourney AI image generator across its different pricing options.
 - Brand identity elements
 In the vast marketing universe, imagery is pivotal in establishing and nurturing a brand’s identity. A brand’s visual choices are not merely aesthetic decisions but strategic moves that can significantly influence perception and performance. This Picfixs article explores the intricacies of selecting imagery that complements and enhances a brand’s essence, ensuring it resonates with the… Read more: Brand identity elements
 - 100 Best Mountain Captions and Mountain Quotes for Instagram
 Ready to scale new social media heights? Look no further than this treasure trove of 100 exhilarating captions and quotes, handpicked for your Instagram mountain posts!
 - Symmetry in Photography: A Creative Approach with Examples
 Delve into the enchanting realm of symmetry in photography as we showcase mesmerizing examples on our website. Experience the allure of perfectly mirrored images!
 - 11 Quarantine Photoshoot Ideas to Try at Home for Amazing Photos
 Looking for unique photoshoot ideas during quarantine? Explore the 11 creative suggestions that will help you capture unforgettable moments at home.