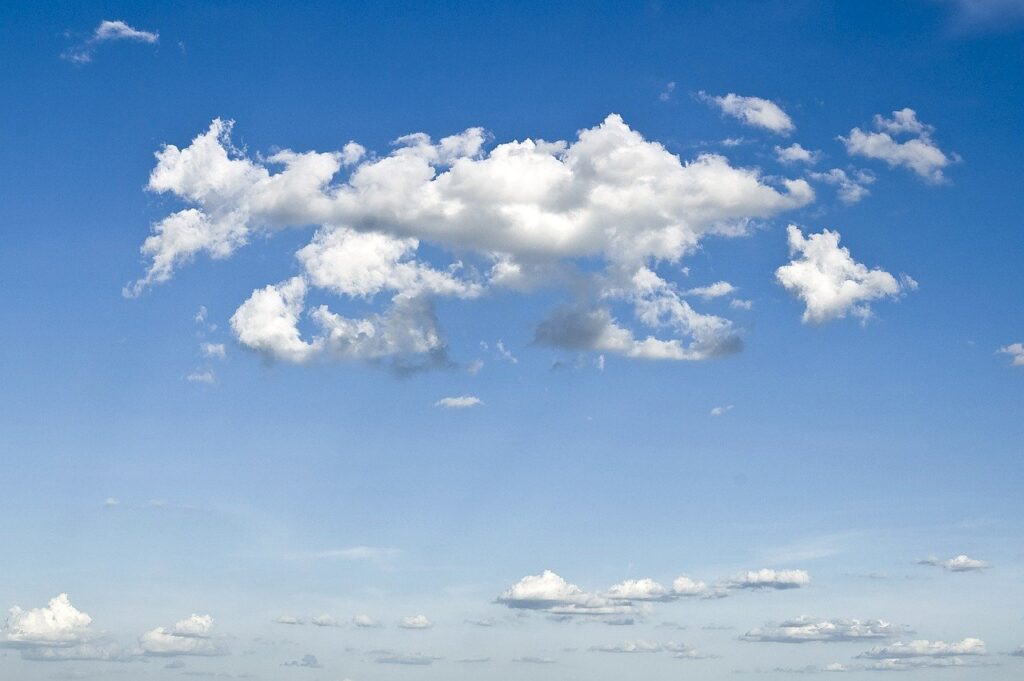
Nature often rewards us with incredible opportunities to photograph sunrises, sunsets, and sunbeams breaking through the clouds, creating breathtaking vistas. As a landscape photographer, I tend to wait for cloudy and stormy days because clouds make photos so much more dramatic and lifelike. Without clouds, sunrises and sunsets often seem boring, forcing us to cut out the sky and focus on foreground elements instead.
On the contrary, if you are witnessing a sunrise or sunset with hazy clouds, a thunderstorm illuminated from below with colored rays, creating a fiery scene including The cloud in your photo will make the scene so much more colorful and vivid. . In fact, clouds can be so beautiful that they can become the main element of your photo composition.
Note: If you want to make some adjustments to the photo just let me know. I can do it for you at a very low cost. You can hire me to edit your photos
In this article, I will not only talk about the cloud photography process but also focus on how to make clouds look much more dynamic and dramatic in your photos. Because clouds come in all forms and forms, they are grouped into different fantasies. categories such as cumulus, cumulus, stratigraphy, and stratigraphy. And each of these categories contains different types of species and varieties that one can observe. For example, clouds over Mount Rainier are classified as “lenticular” and can appear in different shapes throughout the year, sometimes resembling a saucer or mushroom.
In the photo below, the lenticular clouds around Mount Herard in the Great Dunes National Park appear in layers, covering the two peaks and creating a stunning and dramatic scene: otherwise, the clouds, in the two photos wouldn’t make it into my portfolio, perhaps forcing me to focus on something different and cut out most of the sky. In short, clouds are a much more essential part than you might think.
So what is the best way to photograph clouds? Let’s walk through the process and demonstrate some of the techniques I personally use to photograph clouds.
Weather Conditions
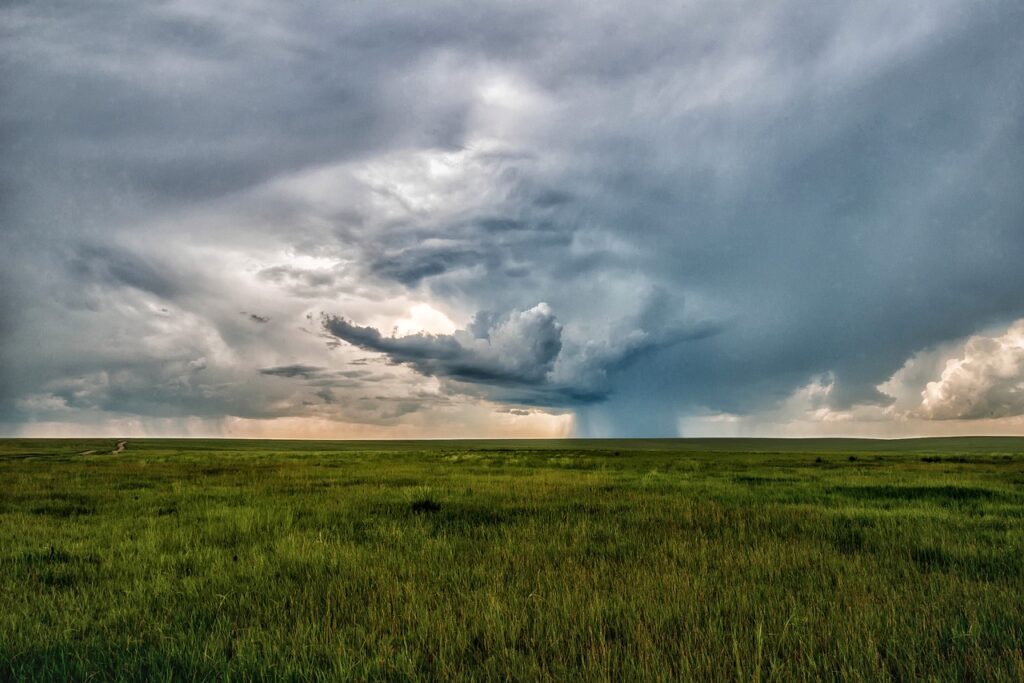
One of the first mistakes many beginners make is waiting for good weather, trying to avoid bad weather at all costs. I remember the early days when I used to look at the weather forecast, and plan my trip only when I knew I would be safe from storms, rain, and wind. Over time, I realized that my best photos were taken in bad weather – stormy days lead to incredible clouds, especially at sunrise and sunset.
For example, the clouds over the top of Mount Herard above were captured when I was in complete agony, walking over the dunes on an extremely windy day, able to reach speeds of up to 40-50 miles per hour! That day I went with my friend Sergey and he was a bit scared, kept telling me we had to go home.
I waited for the sun to set and this is my last photo of the day, hand-held with my Nikon D700 using panoramic photography. Therefore, you will have a much better chance of capturing something beautiful if you go out on cloudy, mostly cloudy, and stormy days. But be careful on stormy days – if gusts exceed 80 km/h or there is a risk of tornadoes or hurricanes, it’s better to stay at home.
Polarizing Filter
If you don’t have a polarizing filter yet, it’s time to buy one! As explained in my post, using a polarizing filter can help separate clouds from the sky and darken the sky. Simply attach the polarizing filter in front of your lens, then rotate it until you see the effect in the viewfinder. At right angles, a polarizing filter can make a huge difference and really “pop” the clouds in the sky, by preventing some of the light waves from entering the lens. If you’re new to photography and want to learn more about using different types of filters, check out my in-depth article on lens filters.
Graduated Neutral Density Filter
When photographing clouds at dusk and dawn, the exposure range of the scene may be too large for your camera to capture. If you expose in the cloud, you run the risk of underexposing the foreground elements. And if you expose in the foreground, you run the risk of overexposing or “blowing out” the clouds. When it comes to such high dynamic range situations, there are two ways to capture the scene: using the High Dynamic Range (HDR) technique or using a graduated neutral density (GND) filter.
Personally, I tend to avoid using HDR because it’s very difficult to make it look natural and it takes a lot of time and effort to make it look good. With a GND filter, you usually don’t have to worry about the exposure distance, as the filter will help reduce the exposure distance and you can recover the rest in post-processing. It’s all a matter of personal preference, so I’m not here to say that one technique is better than another.
Since most natural scenes don’t have a straight horizon and include mountains, trees, and other elements, I recommend using a soft border GND filter. You will need a filter holder to be able to move the filter up and down, as explained in my referenced article above about lens filters. If your budget is limited and you can only buy one GND filter, use a three-point GND filter (commonly known as Soft-Edge 0.9 GND). With a three-stop difference, you can easily see the effect in the viewfinder.
The only thing you need to be careful about is the transition area – if you have tall trees or mountain tops, the tops of the subjects can become too dark for the scene. Sometimes, you’ll be seen as an opportunity to polish your foreground element(s). In such situations, removing your GND filter or inverting it to darken the foreground can actually result in better looking and more appealing!
Exposure Length
If you have moving water in the foreground, you can use a very long exposure to create a “smooth” look. However, clouds often move very quickly, especially when very low, so a long exposure can completely ruin your image, eliminating all cloud shapes. If that is your intention and you are trying to capture a surreal sky, then do it by all means. However, if you want to highlight the clouds as separate elements, it is better to use a shorter exposure time.
There is no magic formula for the shutter speed as it all depends on what you are trying to do and how dark the scene is, so shoot and zoom in to see if you are blurring the clouds.are not. Obviously, if you are dealing with low light situations and long exposure times, you will need to use a tripod. If you are unsure of the right exposure, another trick is to frame your photos. Shooting with three stands one stop apart can give you more options in post-processing, even when using a graduated ND filter.
Composition
Every as soon as in a while, clouds shape in the sort of manner that they could appear thrilling and attractive on their own. However, regardless of the temptation to seize simply the clouds, I urge you to strive which includes foreground factors in the scene. While clouds honestly may be the most important thing detail of the scene, they frequently serve higher as backdrops instead. I generally tend to examine them as sky “fillers”, so earlier than resorting to taking pictures of them alone, I frequently go searching and attempt to consist of something thrilling.
And when you have sincerely not anything around you and you’re looking at an empty area, even which includes a completely small part of that area will frequently make a distinction and supply the scene a scale. When the clouds are patchy and separated, it’s miles crucial to well body your shot so you aren’t slicing something off.
If there’s a huge patch of clouds, attempt to suit it to your scene without slicing it – zoom out or step back, if necessary. Also, I usually advocate for our readers and workshop individuals to provide a scene with a few “breathing” areas. Try now no longer to vicinity the patchy clouds too near the threshold of the body. Whether you’re photographing the clouds with the aid of using themselves, or which includes clouds as a part of composition whilst photographing landscapes, don’t overlook approximately the fundamental regulations of composition. Rule of thirds, main lines, symmetry, and so forth can all play a massive position in impacting the general sense of the image.
If clouds appear lovely and colorful, you can lead them to the primary detail of the scene and expend 2/three of the framing area or extra. If they’re simply patchy clouds that upload to the scene, lessen their presence to no extra than 1/three of the body and use them as “fillers” instead. If you’re suffering with composition and want a little help, Romanas has written a few super composition articles for novices earlier.
Post-Processing
Photographing clouds isn’t just about your camera – you can make the clouds look much more spectacular if you’re willing to take the time to post-process your photos. If you’re having a hard time making your cloud/landscape shots more interesting, you probably need some help with post-processing! While there are many ways to enhance the clouds in your photos, I’ll show you the fastest way to increase the drama of your scene and make the clouds “float” in Lightroom. Let’s go through quick steps to improve cloudy photos in Lightroom.
Here’s the “before” RAW image I imported into Lightroom: As you can see, the photo looks pretty flat. A bit of color is present in the clouds and has some strokes, but not enough to make an impact. Now, let’s see what I can do in Lightroom with just a few clicks: There’s now a lot of sharpness, color, and contrast, making scenes come to life.
Best of all, it only took me a minute to make these adjustments! All I had to do was drop a graduated filter into Lightroom and then add Contrast, Clarity, and Saturation to the clouds. The “Clearness” setting is key here – it’s what effectively pops the clouds out of the sky and makes them look distinct. As you can see, I also added some clarity to the overall image so that the other parts of the scene (the lake) are also isolated.
Be careful when experimenting with the Clarity setting – it can create halos around buildings, peaks, and other objects, so in these situations, it’s best to use a brush adjust and cover only the sky with clouds. In the end, switching to a “Standard” or “Landscape” camera profile can also make a big difference, as explained in my article on how to get precise Nikon or Canon colors in Lightroom.
Sometimes if the clouds appear too bright, simply reducing the exposure by about a stop in the Gradation Filter settings can make a huge difference! Here’s a screenshot from Lightroom, showing the changes above: If you’re having trouble making the sky bluer, check out this tutorial for how to do it. Just be careful when using blue on clouds – it’s best to use Lightroom’s adjustment brush and only apply the effect to the sky. You can also check out my landscape photography post-processing guide for more tips on post-processing photos in Lightroom. And if you want to take it to the next level, I invite you to try Google’s Nik Collection, specifically its “Viveza” software that can be used to selectively add “structure” to the clouds, making them much more alive.
Note: If you want to make some adjustments to the photo just let me know. I can do it for you at a very low cost. You can hire me to edit your photos
latest post
- What is Midjourney
 Discover the capabilities of Midjourney AI, learn how to effectively utilize the platform, and explore the advantages and disadvantages of the Midjourney AI image generator across its different pricing options.
 - Brand identity elements
 In the vast marketing universe, imagery is pivotal in establishing and nurturing a brand’s identity. A brand’s visual choices are not merely aesthetic decisions but strategic moves that can significantly influence perception and performance. This Picfixs article explores the intricacies of selecting imagery that complements and enhances a brand’s essence, ensuring it resonates with the… Read more: Brand identity elements
 - 100 Best Mountain Captions and Mountain Quotes for Instagram
 Ready to scale new social media heights? Look no further than this treasure trove of 100 exhilarating captions and quotes, handpicked for your Instagram mountain posts!
 - Symmetry in Photography: A Creative Approach with Examples
 Delve into the enchanting realm of symmetry in photography as we showcase mesmerizing examples on our website. Experience the allure of perfectly mirrored images!
 - 11 Quarantine Photoshoot Ideas to Try at Home for Amazing Photos
 Looking for unique photoshoot ideas during quarantine? Explore the 11 creative suggestions that will help you capture unforgettable moments at home.