
Estimated reading time: 10 minutes
Table of contents
Novice users frequently Google this question because the process can be difficult if you are still learning the software. You can focus on a specific element by zooming in and out of an image. You can, for example, zoom in on a person’s face to remove wrinkles. If you’re looking for a detailed and easy-to-understand guide on how to zoom in and out in Adobe Photoshop, keep reading until the end.
METHOD 1. Adjust the Zoom Level
Novice users frequently Google this question because the process can be difficult if you are still learning the software. You can focus on a specific element by zooming in and out of an image. You can, for example, zoom in on a person’s face to remove wrinkles. If you’re looking for a detailed and easy-to-understand guide on how to zoom in and out in Adobe Photoshop, keep reading until the end.
1. Check the Current Zoom Level
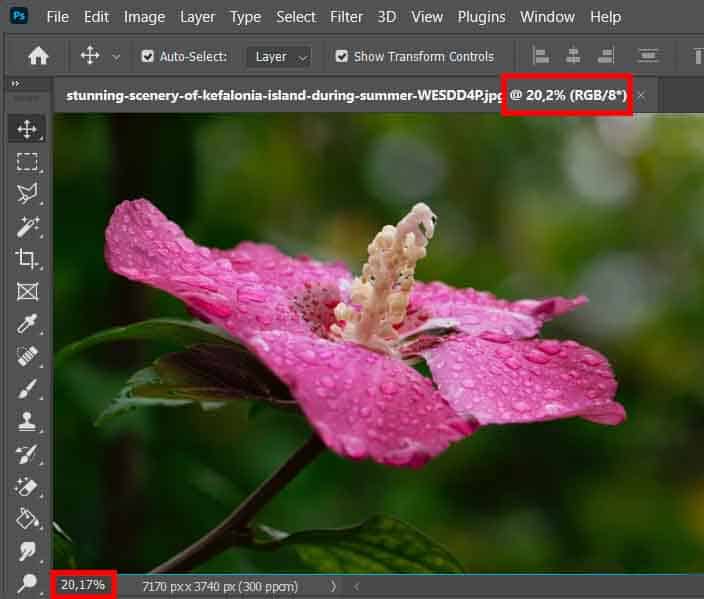
Before you begin zooming in on Photoshop, you must first understand what the current level is. In the program, open your file. The current zoom level is displayed in two places in Ps: on the document tab, just above the image to the right of the file name, and in the lower-left corner of the document window.
2. Alter the Zoom Level
The zoom level displayed in the document tab at the top is only for informational purposes. As a result, changing the value there is impossible. To make the changes, go to the lower-left corner of the screen.
If you don’t know how to add a specific effect to images or if you simply don’t have the time to do it yourself, use the image editing services provided by FixThePhoto. Experts can bring any idea to life in the shortest amount of time.
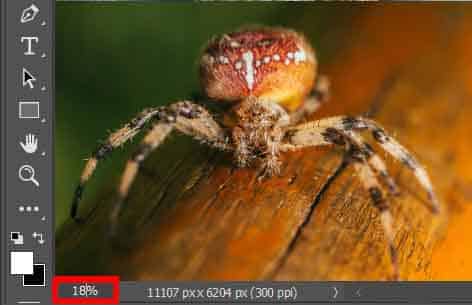
Enter a new value after clicking the current zoom level. You don’t need to add a percent symbol (%) because Photoshop does it for you. To save your changes, press Enter (Windows)/Return (Mac).
Note: If you want to make some adjustments to the photo just let me know. I can do it for you at a very low cost. You can hire me to edit your photo.
3. Keep the Zoom Level Field in Focus
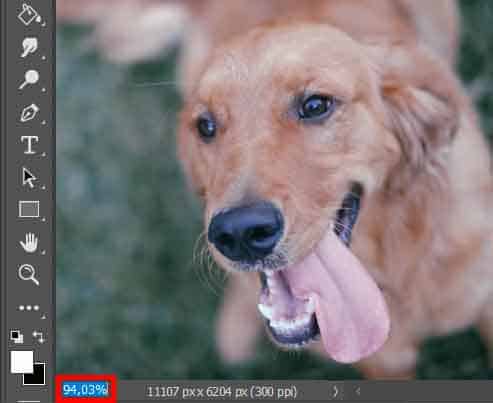
People who are just learning how to use zoom Photoshop frequently run into the problem of the Zoom area losing focus after a new value is applied. As a result, they must select the current value again before entering a new value. Fortunately, resolving the issue is simple.
To accept the value, simply hold down the Shift key while pressing Enter (Windows)/Return (Mac). The zoom level will be retained.
METHOD 2. Change the Zoom Level Using a Slider

This is yet another method for zooming in Photoshop without much difficulty. In fact, this is the quickest and most straightforward method of completing the task, and it is certain to satisfy novice users.
Hover your mouse over an input field, then press and hold the Ctrl (Windows)/Command (Mac) keys (Mac). The mouse cursor will be transformed into a slider icon (a small hand with an arrow pointing left and right).
Click the input field, hold down the mouse button, and drag left/right in 1 percent increments to increase or decrease the value. Alternatively, on the Windows keyboard, press Shift + Ctrl, and on the Mac, press Shift + Command. Drag to change the value by 10% increments.
METHOD 3. Use the Toolbox
If you look through the menu tools, you’ll find some that are useful for zooming in/out. To make a specific image part larger or smaller, use the commands in the Menu.
1. Use the “View” Menu

To change the zoom level, open the “View” menu and select Zoom. Several options are grouped together here that allow you to control the size of the image preview.
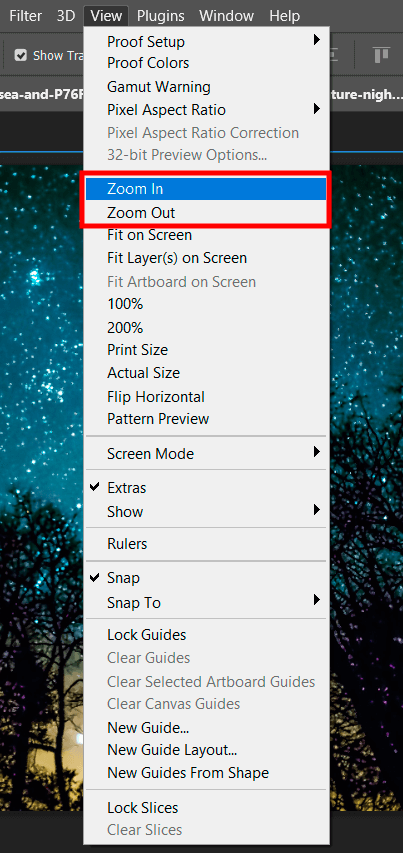
The first two options are “Zoom In” and “Zoom Out,” which can be controlled with Photoshop keyboard shortcuts. The first is intended to zoom in, while the second has the opposite effect.
STEP 2. Zoom Tool
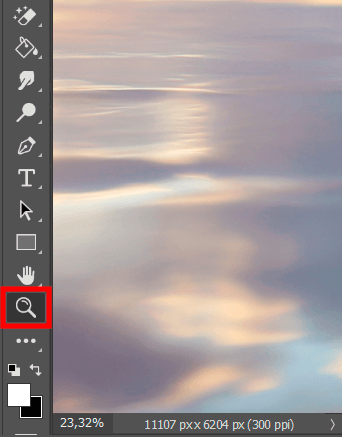
Click the magnifying glass icon at the bottom of the toolbar on the left side of the screen to access the “Zoom” tool. You can also get instant access by pressing Z.
STEP 3. 100% Image View
You can get the most accurate result possible by using the 100 percent image view option. As a result, a program displays one pixel of an image by using one pixel of a monitor. The size of a photograph determines its magnification.
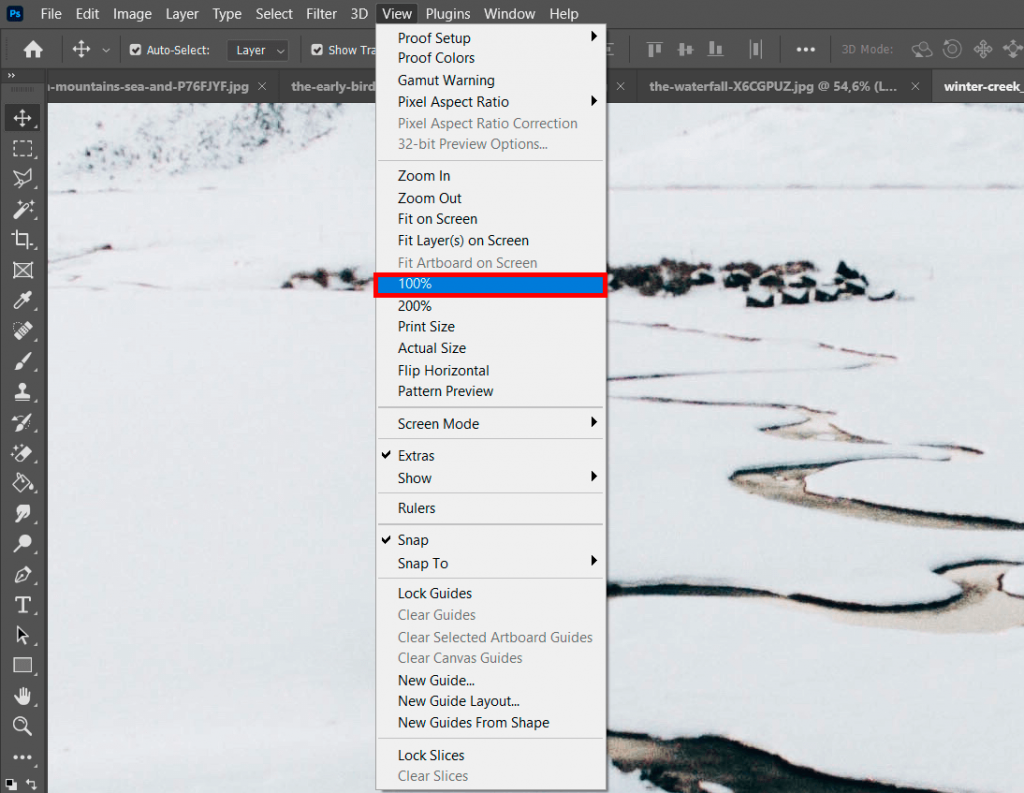
Using the instrument is a breeze. Click the “Zoom” tool, or go to “View” on the menu bar and select “100%”. Another method is to click Ctrl/Cmd + 1.
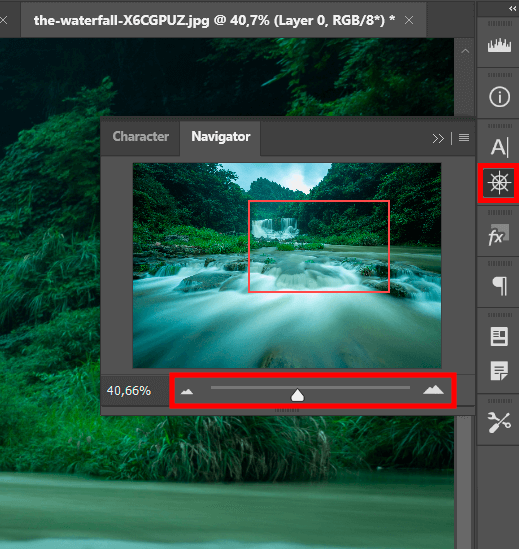
STEP 4. Use the Navigation Panel
To see zoom in Photoshop, use the navigator panel. On the right side of the screen, click the ship’s steering wheel icon. More it to the right to zoom in, or drag it to the left to reverse the effect. The same effect can be obtained by clicking on large/small mountains on both sides of the line.
To see zoom in Photoshop, use the navigator panel. On the right side of the screen, click the ship’s steering wheel icon. More it to the right to zoom in, or drag it to the left to reverse the effect. The same effect can be obtained by clicking on large/small mountains on both sides of the line.
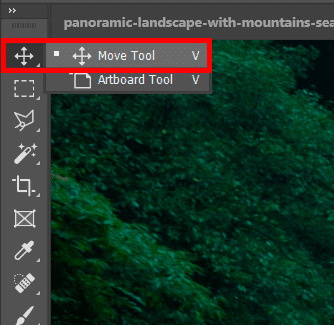
This approach is great for quick work. Select the “Move Tool” from the toolbar on the left or activate it by pressing V.
STEP 5. Animated Zoom
To zoom in or out, click the magnifying glass icon several times or use the continuous zoom function by checking the “Animated Zoom” box in the settings.
Select “Edit” from the top menu bar.
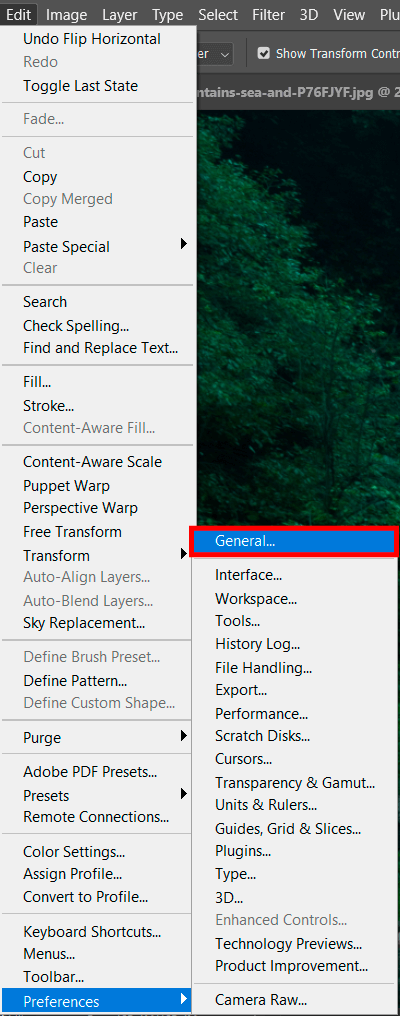
Hover over “Preferences” and select “General”. Click “Tools” on the left of the window that opens and make sure the “Animated Zoom” checkbox is checked.
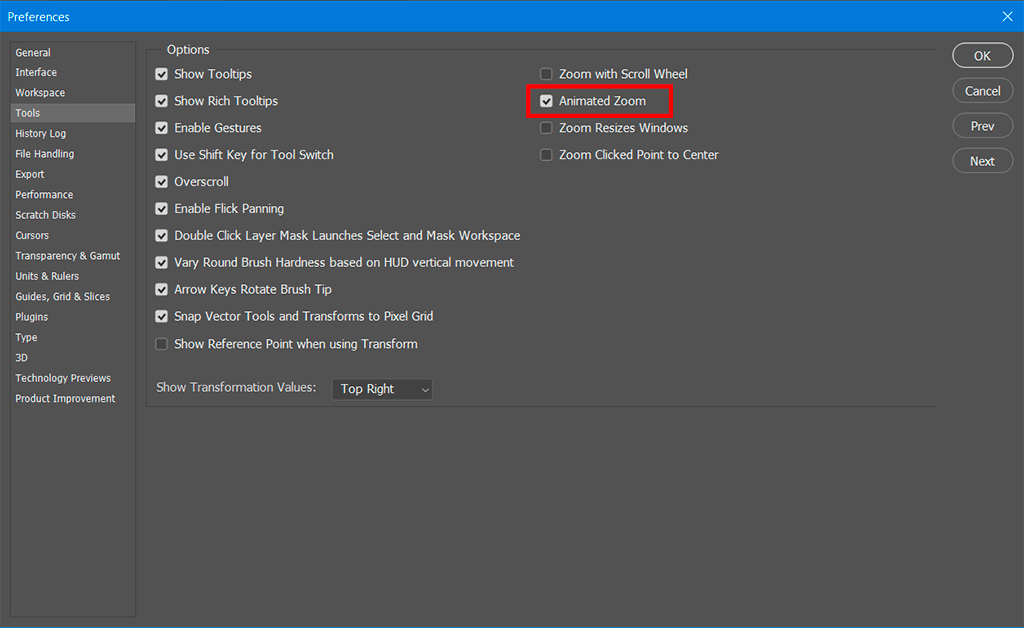
With this feature active, you can click and hold, and the screen will slowly zoom in until you release it.
STEP 6. Use Scrubby Zoom

You can also use Scrubby Zoom in the options bar to zoom in Photoshop.
STEP 7. Enlarge a Part of an Image
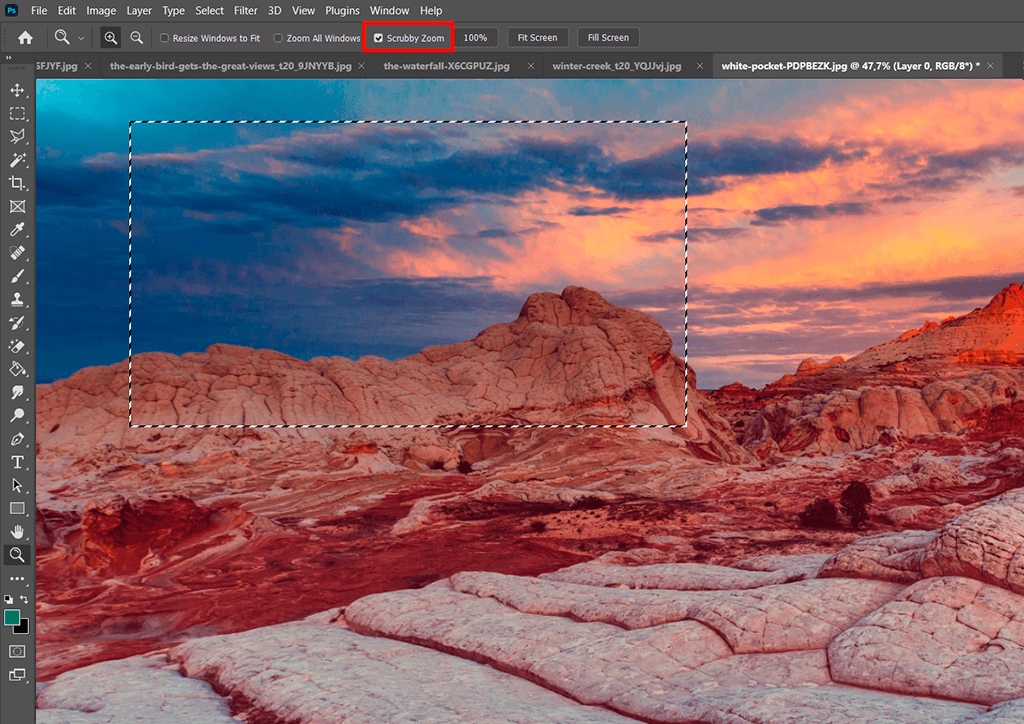
You can also broaden your options. Make sure the “Zoom” tool is selected, and uncheck the “Scrubby Zoom” checkbox in the top options bar. Create a frame around the area you want to enlarge next.
METHOD 4. Use Mouse Scroll Wheel
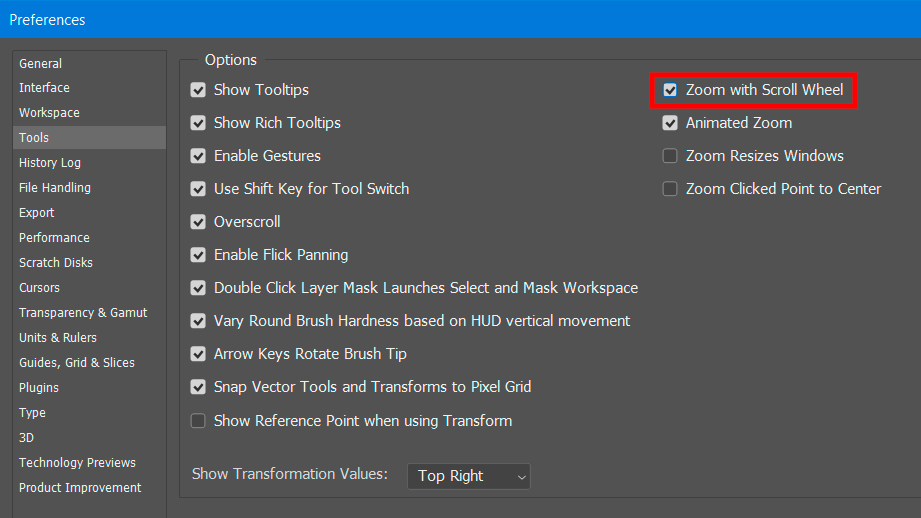
Another method that is sure to pique the interest of newcomers. Make sure the “Zoom with Scroll Wheel” checkbox in the general settings is selected for this option to work. This can be verified in a few steps.
Go to the menu bar, select “Edit,” and scroll to the bottom to hover the cursor over “Preferences.” There will be a menu that appear; select “General” from there.

In the window that opens, click Tools on the left. Then tick the “Zoom with Scroll Wheel” checkbox.
Then you can easily zoom in/out an image using a mouse scroll wheel. If you need to switch off this function, untick the corresponding checkbox.
Note: If you want to make some adjustments to the photo just let me know. I can do it for you at a very low cost. You can hire me to edit your photo.
LATEST POST
- What is Midjourney
 Discover the capabilities of Midjourney AI, learn how to effectively utilize the platform, and explore the advantages and disadvantages of the Midjourney AI image generator across its different pricing options.
 - Brand identity elements
 In the vast marketing universe, imagery is pivotal in establishing and nurturing a brand’s identity. A brand’s visual choices are not merely aesthetic decisions but strategic moves that can significantly influence perception and performance. This Picfixs article explores the intricacies of selecting imagery that complements and enhances a brand’s essence, ensuring it resonates with the… Read more: Brand identity elements
 - 100 Best Mountain Captions and Mountain Quotes for Instagram
 Ready to scale new social media heights? Look no further than this treasure trove of 100 exhilarating captions and quotes, handpicked for your Instagram mountain posts!
 - Symmetry in Photography: A Creative Approach with Examples
 Delve into the enchanting realm of symmetry in photography as we showcase mesmerizing examples on our website. Experience the allure of perfectly mirrored images!
 - 11 Quarantine Photoshoot Ideas to Try at Home for Amazing Photos
 Looking for unique photoshoot ideas during quarantine? Explore the 11 creative suggestions that will help you capture unforgettable moments at home.