
With warmer weather on the way (at least for those of us in the Northern Hemisphere), now is an excellent time to consider how to photograph the ocean. The ocean is my personal favorite landscape subject, but anyone who has been to the beach with a camera knows that capturing the sea can be more difficult than it appears. Today, we’ll look at 15 tips for photographing the ocean so you can come home from your next beach trip with amazing photos.
Protecting Your Gear at the Ocean
Before you even begin taking seascape photographs, you must consider how you will protect your camera. Sand, salt water, and wind are lethal combinations that can easily damage your expensive equipment. A little forethought can go a long way toward protecting your camera. When possible, use weather-sealed gear or a rain cover to protect against mist and water. Make sure your camera bag is waterproof and that it is closed when you are not actively retrieving items from it.
1. Keep your camera dry
The ocean is unpredictably unpredictable. Even if you believe you are far enough away from the water to avoid getting wet, a rogue wave can come along and drench you and your camera, so plan ahead. I was photographing along the coast of Big Sur one morning when, after about 45 minutes of photographing the sunrise in the same (dry!) spot, a random wave came out of nowhere and drenched both me and my camera from head to toe! Fortunately, everything was weather-sealed, so the only damage was that I had to wear wet clothes to breakfast that morning, but it could have been much worse.
2. Protect your camera from sand

If photographing near the ocean isn’t dangerous enough, it’s often accompanied by sand. Sand has the potential to cause as much or more damage than water. Even a single grain of sand can harm your camera’s sensor or shutter mechanism. Plan ahead of time and think about using a zoom lens (preferably internal zoom) to cover your desired focal lengths without changing lenses. If you need to change lenses, make sure to dust all of the sand off the outside of your gear before removing the lens, and only change lenses in a sheltered location.
3. Clean everything at the end of the day
After a day of beach photography, it is critical to clean all of your equipment. Before removing a camera’s lens, use a clean rag and a rocket blower to remove sand. Check your camera bag for sand, and if your tripod has been sitting in sand and saltwater, take it apart, rinse it with fresh water, and let it dry.
Lighting Tips for Ocean Photography
The sun rises over the Atlantic and sets over the Pacific for the majority of the Americas. There are some exceptions, such as the Gulf Coast of Florida and islands that allow you to photograph from various angles. While most people think of ocean photography in terms of east and west, there are some locations, mostly on islands, that provide a great view of the water while facing north or south. There are good images to be had no matter which direction you are facing, as long as you know how to manage the light in front of your lens. The following pointers should be useful.
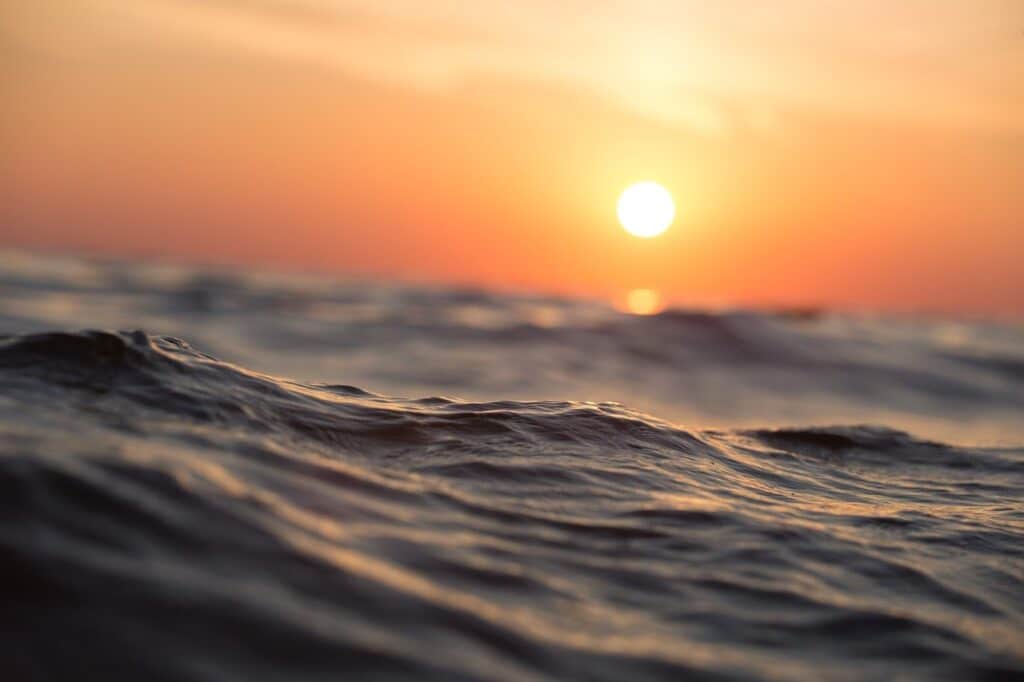
4. Photograph early and late
Whatever ocean you’re photographing or which direction you’re facing, one thing they all have in common is harsh midday light. In most places, sandy beaches or rocky coasts aren’t known for providing any sort of protection from the hot sun. When the sun is directly overhead, it reflects off the water, creating specular highlights, hard shadows, and conditions that are simply unsuitable for photography. With a few exceptions, ocean photography is best done during the hour or two surrounding sunrises in the morning and the hour or two surrounding sunsets in the evening.

While sunrise and sunset over west-facing water provide the classic sun fading over the horizon image, don’t forget to photograph with the sun at your back as well. And the good news for those of us trying to capture some ocean photographs while on vacation is that you can easily slip out for photographs twice a day and spend the best lounging hours on the beach without worrying about missing images!
Note: If you want to make some adjustments to the photo just let me know. I can do it for you at a very low cost. You can hire me to edit your photo.
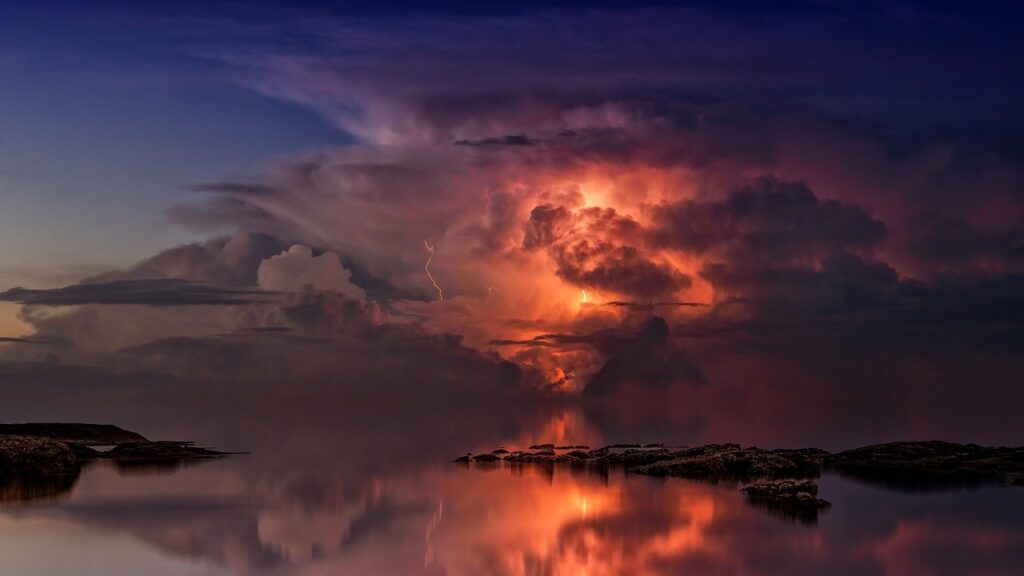
5. Wait for bad weather
While most people go to the beach hoping for bright, sunny, cloudless skies, the occasional rain shower or storm can provide excellent lighting for photography. Rather than packing your camera gear at the first sign of bad weather, have it ready because the light immediately following a storm can be some of the best. This is also one of the few times when photographing the ocean in the middle of the day works. The clouds from the storm soften the light, and sun rays and even rainbows are common as the light begins to emerge from the clouds after a storm.You can also photograph the growing clouds as a storm begins to roll in across the ocean, but for safety reasons, you should stay off the beach during the storm.
6. Be careful not to underexpose
Most of us rely on our camera’s meter to get properly exposed images, but the camera meter isn’t as smart as we think it is. Even in advanced metering modes like matrix or evaluative, the meter inside your camera has no idea what exposure you want and will usually aim for a “medium” exposure. However, most ocean scenes, particularly those with white sand and bright blue water, are much brighter than that middle grey, so your camera will most likely underexpose your scene. When photographing snow, we face the same issue.
In general, you’ll want to expose your scene about a stop brighter than the camera meter thinks it should be, but make sure to double-check your exposure with your histogram as well. Despite the risk of underexposure, all of those specular highlights can make it easy to capture an overexposure, blowing out the white tips of the waves in your images (i.e., making them so bright that there is no detail). Take care not to overextend yourself in either direction.
7. Consider excluding the sun from your frame
In general, you’ll want to expose your scene about a stop brighter than the camera meter thinks it should be, but make sure to double-check your exposure with your histogram as well. Despite the risk of underexposure, all of those specular highlights can make it easy to capture an overexposure, blowing out the white tips of the waves in your images (i.e., making them so bright that there is no detail). Take care not to overextend yourself in either direction.
The sun is so bright that including it in your frame will almost certainly result in dynamic range issues. Photographing with your back to the sun can result in softer light and easier exposures. However, if you want to capture the classic orange-pink sunset or sunrise sky, try shifting your frame to exclude the sun. Sometimes shifting a little to the left or right and excluding the actual sun is enough to solve the problem while still retaining all of the wonderful colors in the sky. The same is true for shooting just before or after sunrise or sunset.
8. Photograph in RAW
With the strong light and wide dynamic range associated with ocean photography, it is especially important to shoot in RAW format. RAW files contain far more information than JPEG files and allow you to recover shadow and highlight detail that would otherwise be lost in a JPEG image. While it’s important to get your exposure as accurate as possible in camera to reduce the amount of recovery you’ll need later, shooting in RAW can provide you with the extra dynamic range you need to get a properly exposed final image.
9. Create silhouettes
Another way to deal with the high dynamic range of sunset/sunrise images is to expose the sky and water while leaving the foreground and other elements dark, resulting in silhouettes. This works best with simple scenes and easily recognizable shapes, such as sailboats, palm trees, and even people. Make sure your sky is properly exposed if you want to create silhouettes. To meter for the sky, use your camera’s spot metering mode, or simply meter for the entire scene and underexpose by a stop or two until the sky is properly exposed and the shadowed elements are a nice, deep black.
Choosing a Shutter Speed for Seascapes
When it comes to photographing the ocean, few camera settings have a greater impact on the image than shutter speed. Long shutter speeds allow you to capture some incredible motion on the water, such as turning receding water into streaks or rendering waves as a hazy mist on the ocean’s surface. However, don’t dismiss the possibility of using shorter exposures. The splash effect created by using fast shutter speeds can lead to really interesting images, especially when photographing waves or water crashing along the shoreline.
10. Use a slow shutter speed…
When photographed at slow shutter speeds, creating a blurred effect in the water, the ocean can be very interesting. The precise appearance of your image is determined not only by your shutter speed but also by the amount of water moving along the shore. Small waves along an inlet, for example, are very different from the massive waves of Maui’s north coast or the water crashing along the shore at Big Sur. You can achieve anything from a gentle blurring effect to completely smoothing the water into a misty fog with the right settings. You will also get very different effects if you make your long exposure when the water is approaching you versus when it is receding, so experiment with both your shutter length and timing.
A good, solid tripod is essential for long exposure photography, as it is for any other type of long exposure photography. Furthermore, as a result of the sun reflecting off the water and sand, the ocean is very brightly lit throughout the day. Even at sunrise and sunset, you’ll probably need a Neutral Density filter if you want to use shutter speeds of several seconds or minutes. A Neutral Density (ND) filter is essentially a darkening filter; it reduces the amount of light entering your camera, allowing you to use a longer shutter speed while still achieving proper exposure.
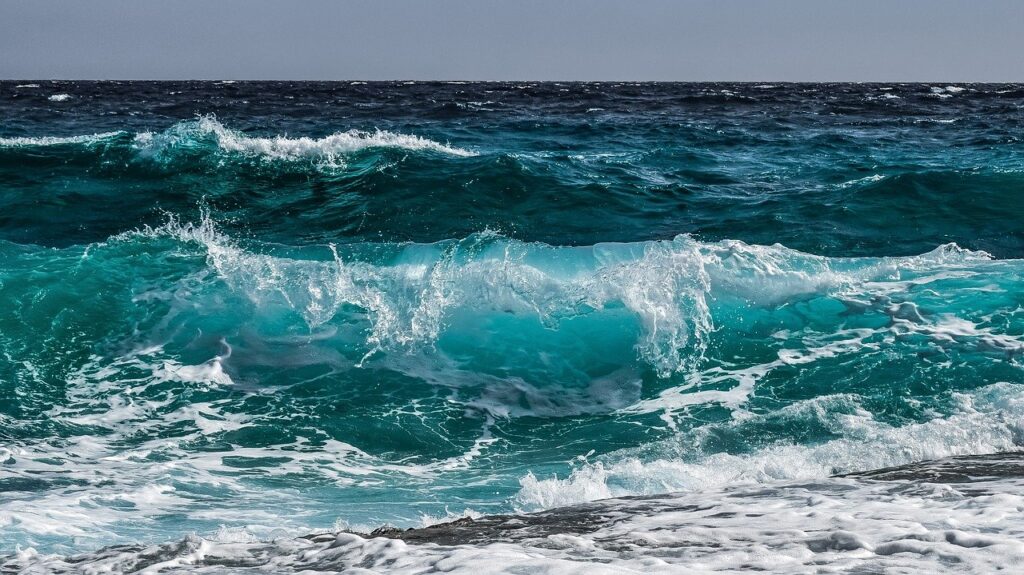
11. Or try a fast shutter speed
While water is frequently photographed at slow shutter speeds for seascape photography, it is also worthwhile to experiment with faster shutter speeds. A fast shutter speed can be used to photograph waves crashing along a rocky shore in order to “freeze” the action and capture the splash. Don’t pass up the opportunity to photograph water sports. A fast shutter speed will freeze the athlete’s action as well as the power of the waves, resulting in some very dynamic images.
Consider photographing the waves from the side and using a faster shutter speed to capture the curl of the water as it crests. At first glance, it may appear that photographing waves from the side necessitates being in the water, but this is not always the case. If you look around, you’ll often find rocky outcroppings, jetties, or even the angle of the land itself that can help you capture the side of a wave, especially if you have a longer lens.
Composing ocean images
While metering and capturing the right light can be challenging, it’s often the composition of ocean images that photographers struggle with the most. For starters, there’s almost always the horizon to contend with, and it’s frequently a straight line across the frame. Then, depending on the shoreline, you may not have much to work with as a foreground, leaving you with the task of fitting a powerful, dynamic scene that literally stretches as far as the eye can see into a single frame. The following pointers should help make things a little easier.
12. Pay close attention to the horizon
The first decision you have to make when composing an ocean scene is usually where to place the horizon. Newer photographers frequently place their horizon in the centre, whereas those familiar with the rule of thirds are frequently torn between placing it in the lower or upper third. But these aren’t your only options; you can also take good seascape photos with the horizon near the very top or bottom of the frame – or somewhere between the centre and thirds marks – if it works best for the image at hand.
The simplest way to decide where to place the horizon is to consider the subject of your image. Is it the ocean or the sky that you’re photographing? Either is a valid option, but the subject of your photograph should take up the majority of the image. Most of the time, if the horizon is directly across the centre, your sky and water will compete for the viewer’s attention, resulting in a photo with less focus.
13. Include foreground elements

A strong foreground, as with other types of landscape photography, can do wonders for your seascape images, drawing the viewer into the scene and adding interest to your image. When you consider walking up to the ocean and photographing it from a standard eye height, you can probably see how the resulting image would be lacking in depth and direction. Instead, get low and let sand patterns, shells, or rocks dominate the foreground. Foliage, sand dunes, and palm trees are also options. You can get low and close to the waves, allowing them to serve as a foreground to the larger ocean and sky beyond. Try to think about your image in terms of foreground, middle ground, and background. If you do this, you will frequently end up with much stronger compositions.
14. Photograph up the coastline
One of the simplest ways to add depth to your composition is to position yourself along the coastline rather than straight toward the ocean. Turning your camera 90 degrees adds instant depth to your image and opens up a plethora of new compositional options. Although photographing along the coast can introduce a lot of “people clutter” into your image in busy beach areas, it still works well very early in the morning, before most beachgoers are out. It’s even easier in non-commercial beach areas, rocky coasts, or more secluded areas.
15. Capture the details
Because the ocean is so vast, most people gravitate toward photographing it with a wide-angle lens. However, focusing on the details can result in some interesting images. Because you will never be able to capture the entire ocean in a single frame, instead of attempting to capture as much as possible, consider how much you can crop and still tell your story. A close-up of a wave, the water lapping against the sand, or a macro shot of shells and rocks can sometimes tell the viewer more about what you’re feeling than a larger scene ever could.
Conclusion
Standing at the beach is a sensory experience in the best possible way. The fresh sea air, hot sun, rough sand, loud waves, and warm breeze all combine to create an experience that is difficult to convey in a two-dimensional image. However, photographing the ocean is immensely satisfying, and once you know how to handle the extreme conditions (both physical and lighting conditions), and start thinking about how to build a stronger composition, you will be sure to come home with some great ocean images. Please leave a comment with your best ocean photography tips and favorite seascape photography locations!
Note: If you want to make some adjustments to the photo just let me know. I can do it for you at a very low cost. You can hire me to edit your photo.
LATEST POST
- What is Midjourney
 Discover the capabilities of Midjourney AI, learn how to effectively utilize the platform, and explore the advantages and disadvantages of the Midjourney AI image generator across its different pricing options.
 - Brand identity elements
 In the vast marketing universe, imagery is pivotal in establishing and nurturing a brand’s identity. A brand’s visual choices are not merely aesthetic decisions but strategic moves that can significantly influence perception and performance. This Picfixs article explores the intricacies of selecting imagery that complements and enhances a brand’s essence, ensuring it resonates with the… Read more: Brand identity elements
 - 100 Best Mountain Captions and Mountain Quotes for Instagram
 Ready to scale new social media heights? Look no further than this treasure trove of 100 exhilarating captions and quotes, handpicked for your Instagram mountain posts!
 - Symmetry in Photography: A Creative Approach with Examples
 Delve into the enchanting realm of symmetry in photography as we showcase mesmerizing examples on our website. Experience the allure of perfectly mirrored images!
 - 11 Quarantine Photoshoot Ideas to Try at Home for Amazing Photos
 Looking for unique photoshoot ideas during quarantine? Explore the 11 creative suggestions that will help you capture unforgettable moments at home.