Estimated reading time: 7 minutes
Table of contents
Whether you are a beginner or a seasoned photographer, here are some of our favorite photography tips to help you improve your photography!
Use the Rule of Thirds
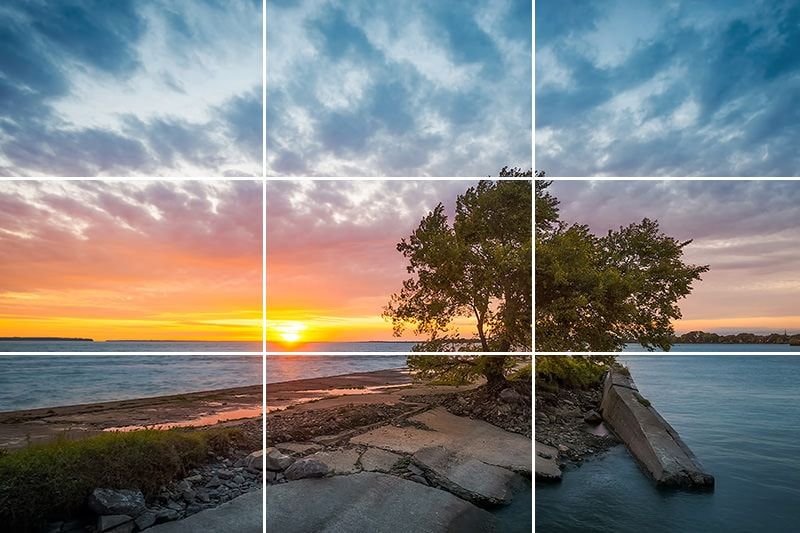
This rule assists you in taking eye-catching photographs by utilizing one of the most effective composition rules.
If you want to take photos with a “wow” factor, the Rule of Thirds is the composition trick you should use!
To apply the rule of thirds, imagine four lines, two horizontal and two vertical, forming nine even squares. Some images look best with the focal point in the center square, but placing the subject off-center at one of the imaginary lines’ intersecting points often results in a more aesthetically composed photograph.
When the rule of thirds is used to compose a photograph, the viewer’s eyes will wander around the frame. A picture composed according to the rule of thirds is usually more visually appealing.
Avoid Camera Shake
Camera shake or blur can be a problem for any photographer, so here are some tips to help you avoid it.
To begin, you must learn how to properly hold your camera; use both hands, one around the body and one around the lens, and keep the camera close to your body for support.
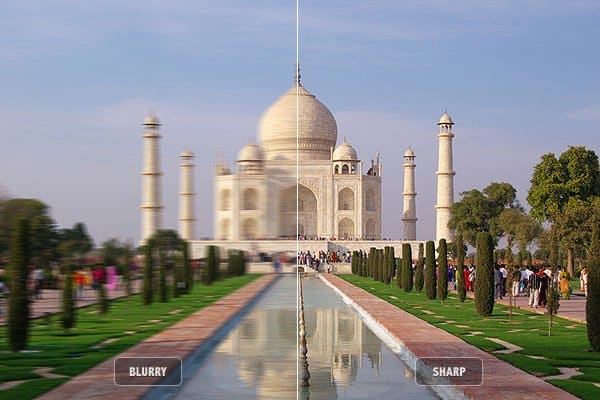
Also, when shooting handheld, make sure you’re using a shutter speed that corresponds to the focal length of your lens. If your shutter speed is too slow, any unintentional movement of the camera will result in a blurry image.
The rule of thumb is not to shoot at a shutter speed that is slower than your focal length to minimize this problem:
1 / Focal Length (in mm) = Minimum Shutter Speed (in seconds)
So, as an example, if you’re using a 100mm lens, then your shutter speed should be no lower than 1/100th of a second.
Use a tripod or monopod whenever possible.
Learn to use the Exposure Triangle

To make your photos look their best, you must first master the three fundamentals: Aperture, Shutter Speed, and ISO.
You must also understand the connections between these three controls. When you change one of them, you usually have to change at least one of the others to achieve the desired results.
Using Auto Mode takes care of these controls but at the cost of not getting your photos to look the way you want them to, which is often disappointing.
It’s a better idea to start with Aperture-priority or Shutter-priority modes and work your way up to Manual mode.
Use a Polarizing Filter
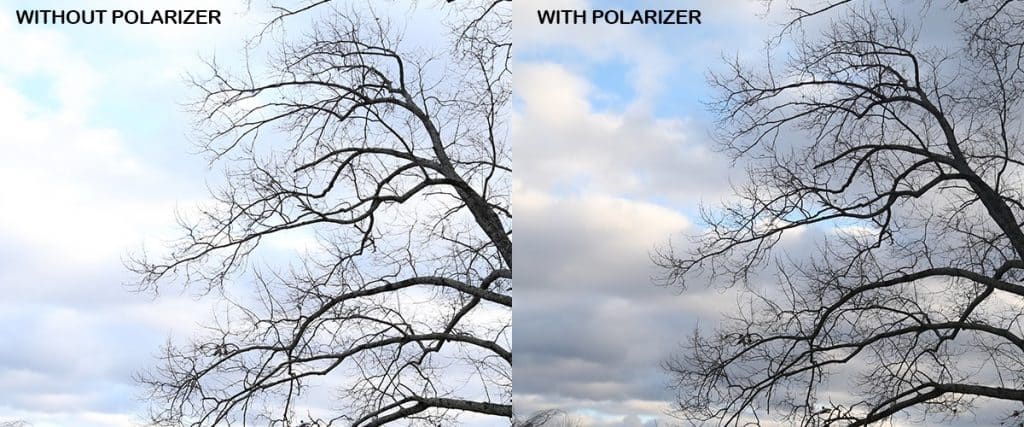
If you can only afford one lens filter, make it a polarizer.
Circular polarizers are recommended because they allow your camera to use TTL (through the lens) metering, such as auto exposure.
This filter reduces reflections from water, metal, and glass; it improves the colors of the sky and foliage, and it adds the WOW factor to your photos. All of this while protecting your lens. There’s no reason you shouldn’t use it for all of your photography.
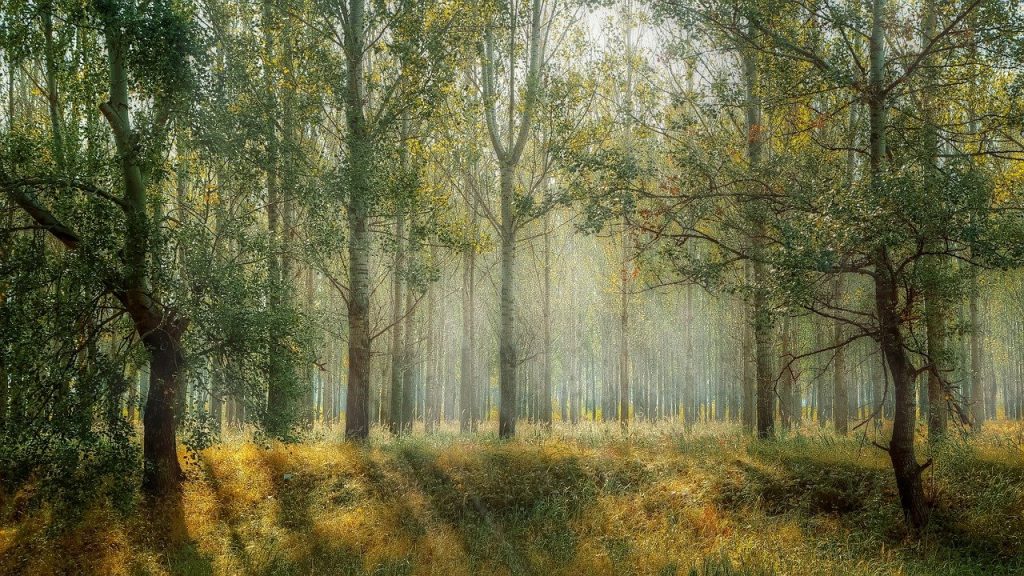
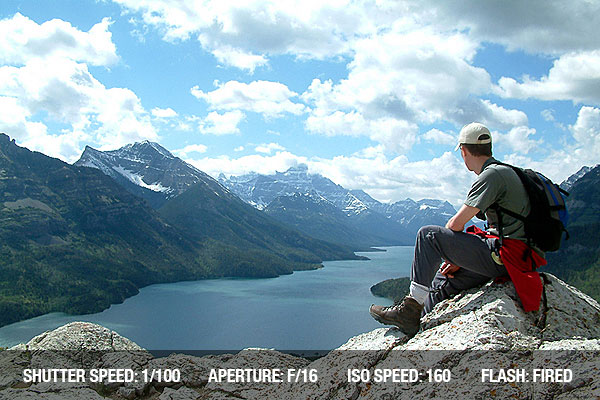
Create a Sense of Depth
When photographing landscapes, it is important to create a sense of depth or to make the viewer feel as if they are there.
For a panoramic view, use a wide-angle lens with a small aperture of f/16 or smaller to keep the foreground and background sharp. Placing an object or person in the foreground adds scale and emphasizes how far away the object is.
If possible, use a tripod, as a small aperture necessitates a slower shutter speed.
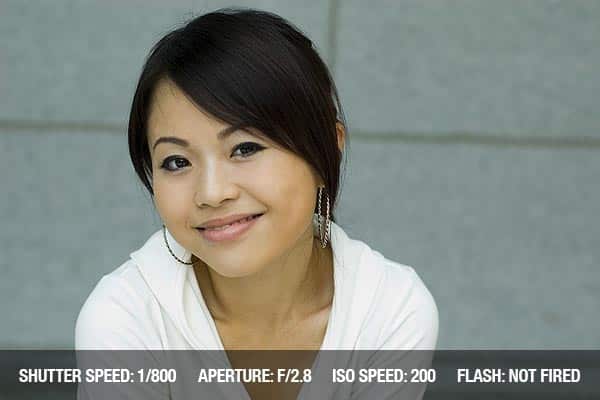
Use Simple Backgrounds
In digital photography, the simple approach is usually the best, and you must decide what needs to be in the shot while excluding anything that is a distraction.
If at all possible, use a plain background – that is, neutral colors and simple patterns. You want the viewer’s attention to be drawn to the image’s focal point rather than a splotch of color or an unusual building in the background. This is especially important in shots where the model is off-center.
Don’t Use Flash Indoors
Flash can appear harsh and unnatural, especially when used for indoor portraits. As a result, there are a variety of ways to capture an image indoors without using flash.
First, increase the ISO – typically, ISO 800 to 1600 will make a significant difference in the shutter speed you can use. Use the widest aperture possible; this will allow more light to reach the sensor and create a nice blurred background. Using a tripod or an I.S. (Image Stabilization) lens to avoid blur is also a good idea.
If you absolutely must use flash, then use a flash with a head you can rotate, and point the light to the ceiling at an angle.
Choose the Right ISO
The ISO setting determines how sensitive your camera is to light as well as the fineness of your image’s grain.
The ISO we use depends on the situation – when it’s dark, we need to increase the ISO to a higher number, say 400 – 3200, to make the camera more sensitive to light and avoid blurring.
On bright days, we can use ISO 100 or the Auto setting because there is more light to work with.
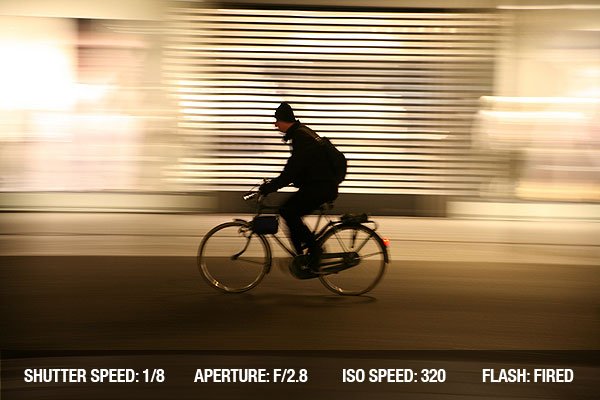
Pan to Create Motion
If you want to capture a moving subject, use the panning technique. To accomplish this, select a shutter speed that is two steps lower than necessary – for example, instead of 1/250, select 1/60. Keep your camera on the subject and your finger halfway down on the shutter to lock the focus, then take the photo, remembering to follow them as they move.
If possible, use a tripod or monopod to avoid camera shake and get clear movement lines.
Experiment with Shutter Speed
When photographing at night, use a tripod and set the shutter speed to 4 seconds. The movement of the object, as well as some light trails, are captured.
If you use a faster shutter speed, such as 1/250th of a second, the trails will be shorter and less bright; instead, the action will be frozen.
Other compositions with moving objects or backgrounds, such as waves on a beach, crowds of people walking, or cars commuting, can be shot with different shutter speeds to capture either blurred movement or snapshots that freeze everything sharply in time.
When using slow shutter speeds to blur movement, it is critical to stabilizing the camera to eliminate camera shake. The AmazonBasics 60-inch Portable Tripod is an excellent entry-level option for photographing with slow shutter speeds.
Note: If you want to make some adjustments to the photo just let me know. I can do it for you at a very low cost. You can hire me to edit your photo.
LATEST POST
- What is Midjourney
 Discover the capabilities of Midjourney AI, learn how to effectively utilize the platform, and explore the advantages and disadvantages of the Midjourney AI image generator across its different pricing options.
 - Brand identity elements
 In the vast marketing universe, imagery is pivotal in establishing and nurturing a brand’s identity. A brand’s visual choices are not merely aesthetic decisions but strategic moves that can significantly influence perception and performance. This Picfixs article explores the intricacies of selecting imagery that complements and enhances a brand’s essence, ensuring it resonates with the… Read more: Brand identity elements
 - 100 Best Mountain Captions and Mountain Quotes for Instagram
 Ready to scale new social media heights? Look no further than this treasure trove of 100 exhilarating captions and quotes, handpicked for your Instagram mountain posts!
 - Symmetry in Photography: A Creative Approach with Examples
 Delve into the enchanting realm of symmetry in photography as we showcase mesmerizing examples on our website. Experience the allure of perfectly mirrored images!
 - 11 Quarantine Photoshoot Ideas to Try at Home for Amazing Photos
 Looking for unique photoshoot ideas during quarantine? Explore the 11 creative suggestions that will help you capture unforgettable moments at home.