
Estimated reading time: 10 minutes
Table of contents
- Keep Details in the Highlights by Exposing
- Keep a Close Eye on Your UV Filter
- Use a Narrow Aperture to Create a “Sunstar” Effect
- Use Apps to Pre-Visualize
- Return to the Original Spot
- Arrive early
- Wait a Bit Late
- Be Prepared for a Break in the Clouds
- Choose between sunrise and sunset (or Both)
- LATEST POST
- RELATED LINK
Sunset photography is extremely popular for good reason. The special quality of light at the end of the day can give landscape photos an emotional impact that is difficult to capture in other ways. I’ll go over my favorite sunset photography tips for both beginners and advanced photographers down below.
Keep Details in the Highlights by Exposing
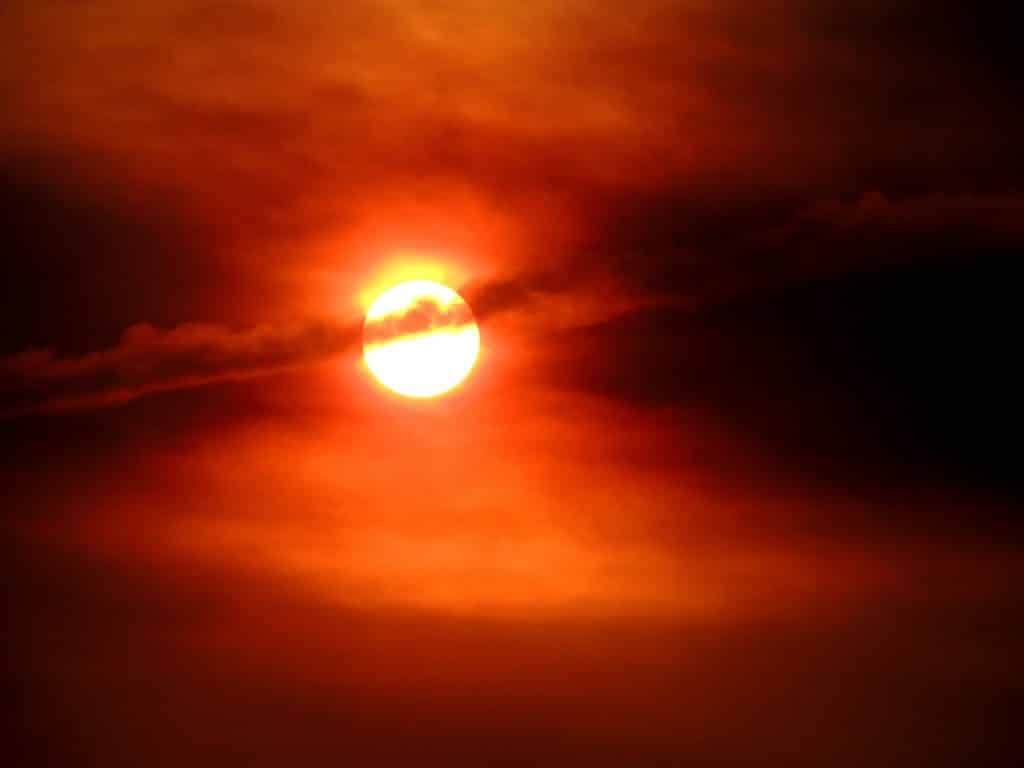
The first point I’d like to emphasize is the importance of preserving highlight detail when photographing sunsets. At sunset, there is often a wide range of tones between highlights and shadows, especially if the sun is in your frame. It can be difficult to know how to expose your photograph, and the camera’s meter may be of no assistance. (In tricky light like this, they sometimes recommend wildly dark or bright exposures.)
My advice is to keep an eye on the brightest highlights in your photo and make sure they don’t turn completely white. The only exception is if the sun is in your frame, in which case it’s fine if the central area of the sun blows out – just try to keep the area around it from blowing out. The only exception is if the sun is in your frame, in which case it’s fine if the central area of the sun blows out – just try to keep the area around it from blowing out.
This is because blown-out highlights are nearly impossible to recover when shooting with a digital system, whereas seemingly pitch-black shadows almost always have some usable dynamic range left.
This may necessitate some negative exposure compensation, as well as reviewing your photos in the field and inspecting them for overexposure using blinkies or histograms. If the meter behaves erratically in aperture-priority mode, it may also be necessary to switch to manual mode.
Keep a Close Eye on Your UV Filter
If you’re using a UV filter on your lens (also known as a clear filter, haze filter, or protective filter), you’ll want to be careful not to get too much flare in your sunset photos. When the sun is in or near your frame, UV filters frequently add reflections that end up in your photo. This can range from a visible “blob” of flare to a more subtle reduction in contrast throughout the image.
While this is unlikely to happen with higher-end UV filters, the reality is that many photographers, even if they are unaware of it, are shooting with lower-end UV filters. For my own photography, I’m not a fan of this type of filter, but if you like UVs, I won’t tell you to get rid of them. However, remember to remove them before sunset or you risk getting more flare in your shots.
Use a Narrow Aperture to Create a “Sunstar” Effect
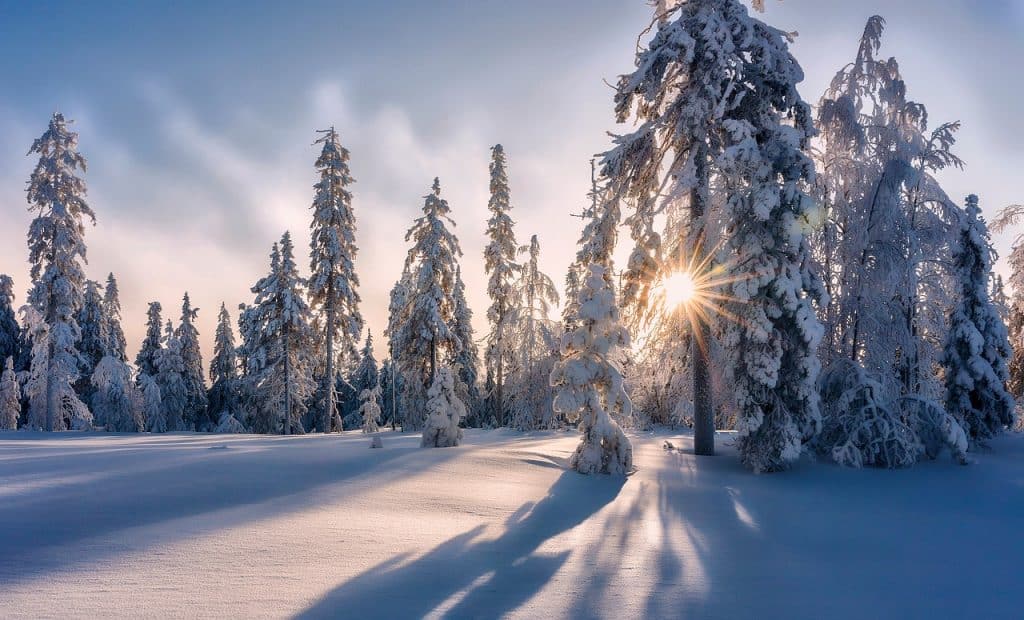
One of my favorite landscape photography effects is when the sun appears as a sharp, multi-pointed star that draws attention and simply looks cool. I’m talking about something like this:
While it may appear to be a Photoshop effect, it is not. That effect (known as a “Sunstar,” “starburst,” or “sunburst”) is caused by how a bright point of light interacts with the aperture blades in your lens. Not all lenses have such a dramatic Sunstar effect, but most lenses can produce some effect.
The key is to make your light source as small and bright as possible. In the case of sunset photography, this means waiting until the sun dips partially below the horizon or is partially obscured by an object in your composition. Then, use a lens with a narrow aperture: at least f/11, ideally f/16 or even f/22. Yes, these apertures have less sharpness due to diffraction, but they also have a more defined Sunstar, so you must weigh the benefits and drawbacks. When I need a Sunstar like that, I usually use f/16.
Use Apps to Pre-Visualize
We photographers have it so easy these days! Rather than consulting topo maps and compass directions to determine where the sun will be, we can use dedicated apps to pre-visualize any sunset.
Some of these are augmented reality (AR) apps that use your phone’s camera to trace the path of the sun through the landscape in front of you. Others are desktop apps that you can use in advance to see a rendered view of a landscape with topological data and the path of the sun at any time of year.
Both types are excellent tools for determining a good sunset location or even planning out your composition ahead of time if you’re that type of photographer. It may not matter much if it’s a familiar location (see the next tip below), but if you’re short on time or traveling, apps like this make things a lot easier.
The Photographer’s Ephemeris and Photopills are two apps that I use for my personal photography. There are numerous similar tools available, and I encourage you to experiment with them to find one that works well for you. The majority of them have the following characteristics:
Return to the Original Spot

As convenient as it is to scout locations ahead of time with modern technology, nothing beats seeing a landscape in person. Because sunsets are cyclical in nature, you can return to the same location – even with a similar composition – multiple times and wait for an evening when the sunset is at its best.
That’s what I did on a recent trip to the Faroe Islands. It rained almost the entire trip, and many of my planned sunset photoshoots turned into impromptu “blue hour” photoshoots due to the gloomy weather.
I like the composition above and don’t mind the moody blue lighting, but I thought a golden sunset would look better and kept this shot in mind throughout the trip. The sky appeared to have some sunset potential the day before I returned home, so I had to decide where to go. I decided to return to this location and try to recreate the image I had in mind the first time I saw it. I believe the resulting shot is an improvement:
The more you visit a particular sunset location, the better the conditions you’ll see and, hopefully, the better photos you’ll take. Even if you’re not trying to replicate your old compositions, familiarity with a location can help you get a sense of how the light interacts with the land.
Arrive early
It’s easy to fall into the trap of believing that “golden hour” only lasts about an hour. The truth is that you can get sunset-like lighting even a few hours before sunset, depending on your location and shooting conditions.
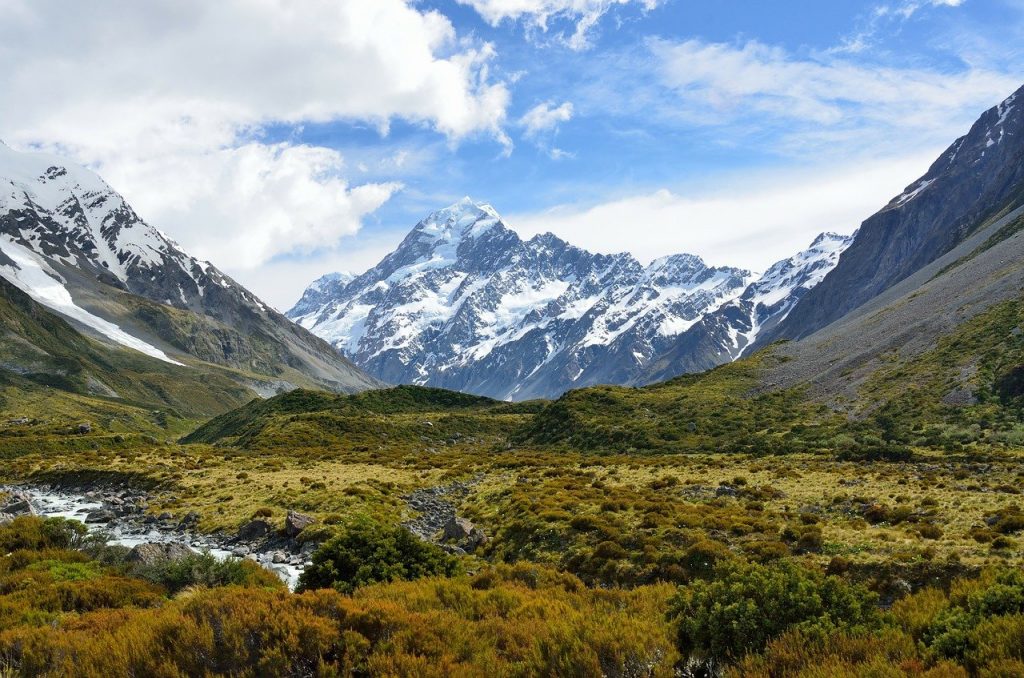
I did some photography recently at a mountain lake in Colorado, and I arrived a couple of hours before sunset just to soak in the atmosphere. The light was already amazing when I arrived, with beautiful colors in the sky and landscape.
Soon after, a cloud obscured the mountain in front of me, and another obscured the sun behind me. The photo above captures the best “sunset” light I saw that evening, and I was grateful to have arrived in time to witness it.
That’s why, if possible, arrive early at any potential location. Even if the best light occurs right at sunset, you’ll have more time to set up, test some compositions, and enjoy watching the light change.
Wait a Bit Late
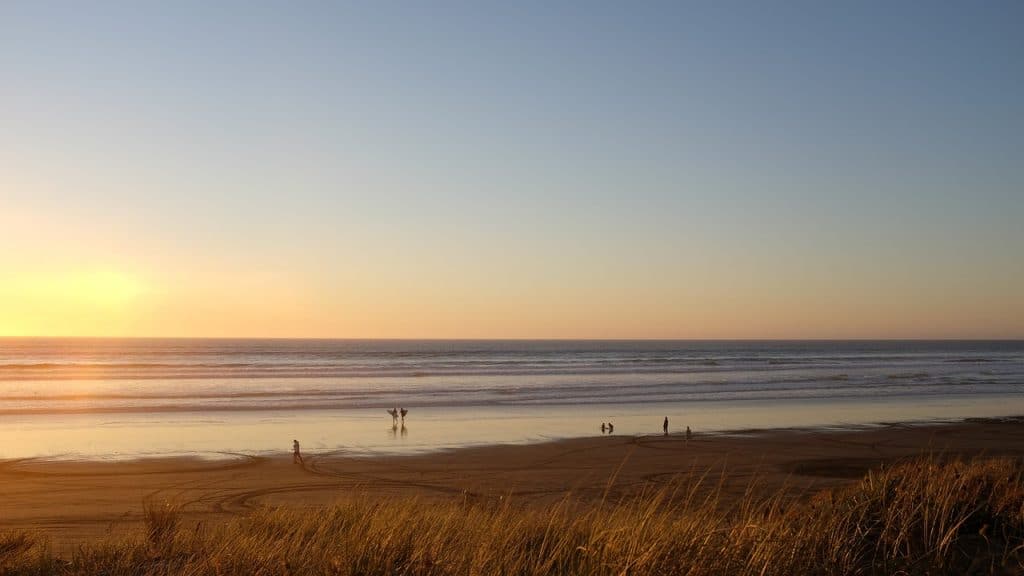
In all seriousness, I recommend not only arriving early but also staying late. We’ve written about the second sunset before on Photography Life, and how many photographers leave far too soon after the sun dips below the horizon.
Often, there will be colors in the sky and landscape that our eyes cannot see but that the camera can capture beautifully. Other times, a dull sunset can transform into something spectacular ten, fifteen, or even thirty minutes after you thought the curtain had closed.
It can be difficult to tell which evenings will have a beautiful “second sunset” and which will not, which is why I recommend staying out a bit longer than conventional wisdom would suggest.
Be Prepared for a Break in the Clouds
There is always a chance for the sun to shine through a break in the clouds until it is actually below the horizon. I’ve witnessed even the dullest sunsets transform into a brilliant light show in an instant, and then vanish just as quickly.
That’s why I recommend setting up your camera and keeping it ready to take a photo at a moment’s notice, even if the forecast predicts a colorless sunset. It’s impossible to say for certain.
Indeed, many of the best sunsets I’ve ever seen have occurred under seemingly overcast grey skies. In such cases, a small break in the clouds can cause the entire sky to light up with color, or a brilliant beam of light can be used to highlight your subject. So, never underestimate the power of a sunset.
Choose between sunrise and sunset (or Both)
The fact that sunset and sunrise both involve golden light does not imply that they are interchangeable in terms of photography. Sunset and sunrise are almost always noticeably different in a given landscape.
The most obvious reason is a shift in the direction of light. Consider the well-known Half Dome in Yosemite National Park. At sunrise, the sun is almost directly behind Half Dome from the most famous vantage points, such as Tunnel View and Glacier Point. It shines in the opposite direction at sunset, illuminating the rock face just before it sinks below the horizon.
Neither of these lighting situations is superior to photography, but they convey very different moods.
Almost every landscape has similar factors to consider. When the sun is in the same direction as the ocean and is filtering through the salty and humid sea air, you’re more likely to get a hazy, pastel photo if you’re near a coastline. If you live in a polluted or smoggy area, sunset will be more vivid than sunrise because it follows the day’s activity.
Sunrise and sunset can sometimes work equally well for the subject you’re photographing. If you want to do abstract, close-up landscapes of sand dunes with side lighting, you can probably find something good at any time of day.
However, in many cases, there is a significant difference between the two. Factors such as fog, dust, and pollution may be more prevalent in one location than in another. Even ignoring those considerations, a simple shift in light direction can drastically alter the mood of many subjects.
So, even though I wrote this article about sunset rather than sunrise, consider whether a sunset is truly appropriate for your subject in the first place. Almost all of these suggestions are applicable regardless of which “golden hour” you are in.
That is why it is critical to conduct preliminary research and practice, preferably by visiting the location in person to get a sense of its characteristics. In fact, this is one of the best ways to improve your photography skills for any subject, not just sunrises.
Note: If you want to make some adjustments to the photo just let me know. I can do it for you at a very low cost. You can hire me to edit your photo.
LATEST POST
- What is Midjourney
 Discover the capabilities of Midjourney AI, learn how to effectively utilize the platform, and explore the advantages and disadvantages of the Midjourney AI image generator across its different pricing options.
 - Brand identity elements
 In the vast marketing universe, imagery is pivotal in establishing and nurturing a brand’s identity. A brand’s visual choices are not merely aesthetic decisions but strategic moves that can significantly influence perception and performance. This Picfixs article explores the intricacies of selecting imagery that complements and enhances a brand’s essence, ensuring it resonates with the… Read more: Brand identity elements
 - 100 Best Mountain Captions and Mountain Quotes for Instagram
 Ready to scale new social media heights? Look no further than this treasure trove of 100 exhilarating captions and quotes, handpicked for your Instagram mountain posts!
 - Symmetry in Photography: A Creative Approach with Examples
 Delve into the enchanting realm of symmetry in photography as we showcase mesmerizing examples on our website. Experience the allure of perfectly mirrored images!
 - 11 Quarantine Photoshoot Ideas to Try at Home for Amazing Photos
 Looking for unique photoshoot ideas during quarantine? Explore the 11 creative suggestions that will help you capture unforgettable moments at home.