
Many photographers nowadays want to learn how to add text in Lightroom for a variety of reasons. Before publishing an image on the web, some photographers must add metadata to it.
Others want to add text or titles to the images to help them be identified. Furthermore, many photographers use watermarks and identity plates to protect their images and prevent them from being used illegally on the Internet.
Method 1. Through Photo Info
The good news is that Lightroom can be used to add text to images. The procedure is very similar to a Photoshop procedure. You can directly enter text in the Print module. To accomplish this, you must first layout an image as if it were on a sheet of paper, and then save it using Print to File.
STEP 1. Work with the Page Setup
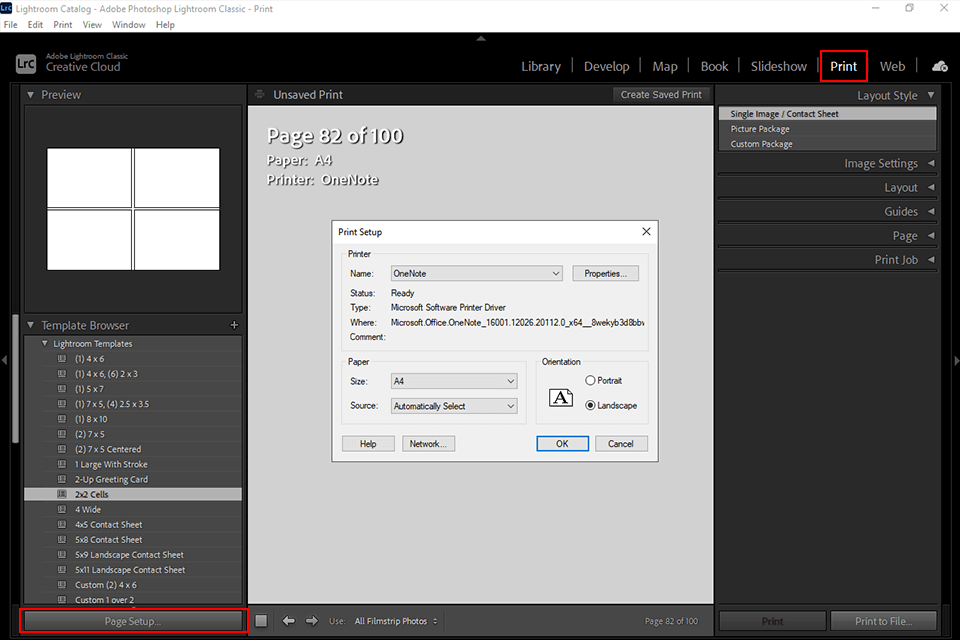
To add text to a photo in Lightroom, navigate to the Page Setup menu in the window’s bottom left corner. Then, go to the Paper Size tab and press the Ok button. Prior to this, you can fine-tune various configurations to your liking.
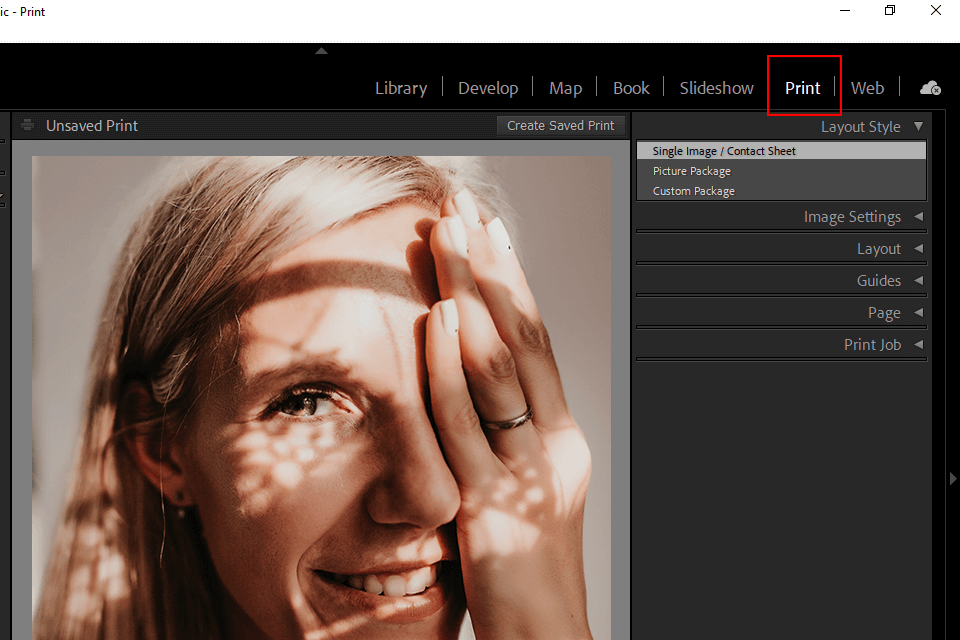
STEP 2. Open the Custom Package in the Layout Style

If you’ve never worked with images in the Print module before, you’ll need to learn more about using templates. First, look for a template that includes the word “custom” in its name. It should be part of the Custom Package. Images from the photo bin at the bottom of the window can be dragged to the black-outlined picture slots in your print layout.
STEP 3. Add the Photo Info by Using Custom Text

Then, navigate to the Page menu and configure the text display settings. The Photo Info box must be checked. Then, from the drop-down menu, select the type of text.
STEP 4. Type and Customize Inscriptions
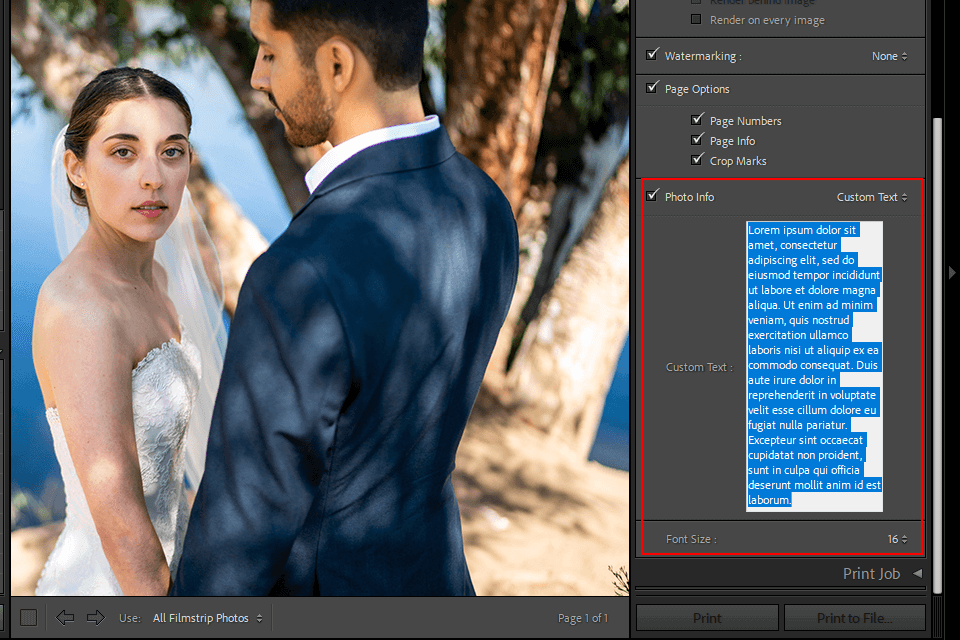
You can enter any text in the Custom Text checkbox. If you want to change the text, we recommend going with the Identity Plate option.
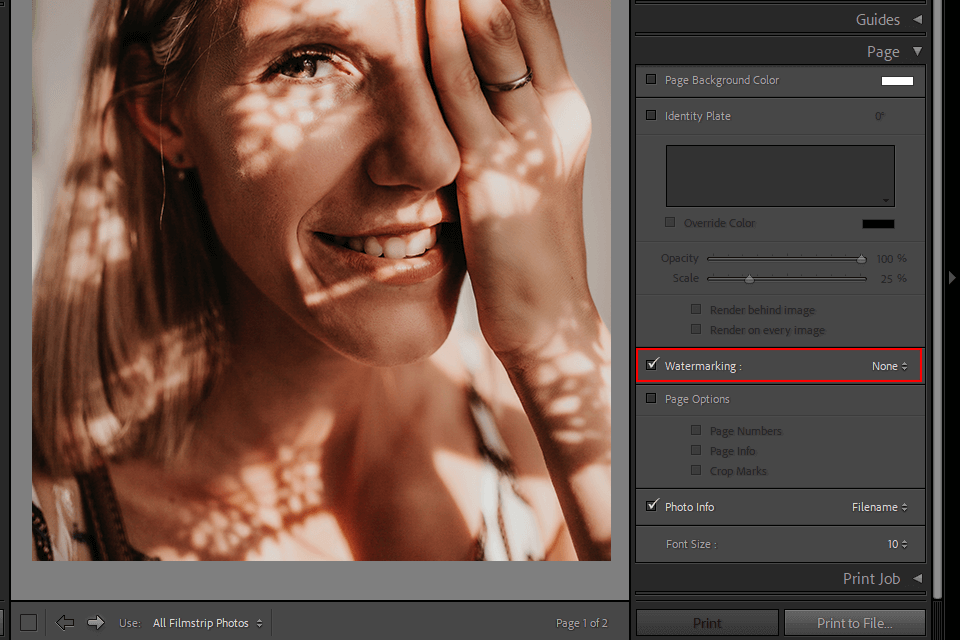
To begin, check the Identity Plate box in the Page section of the Print module’s right panel. The next step is to enable the Identity Plate preview by checking the box and then selecting the “Edit” tab from the pop-up window.
This process may be too difficult for beginners, but they can hire professionals who understand how to add text in Lightroom and can complete the task quickly and affordably.
Method 2. Through Watermark Editor
You can enter any text in the Custom Text checkbox. If you want to change the text, we recommend going with the Identity Plate option.
You must use the Print module once more. In this case, however, you will use Lightroom as a watermark software. Select an image to which you want to add metadata. Then select File > Export. A dialogue box for exporting images will appear.
STEP 2. Open the Editor
Watermarking should be checked here. Then you can choose from the available options. The “no watermark” option is the default. You’ll see a pull-down menu after clicking the button next to Watermarking. You must choose the Edit Watermark option.
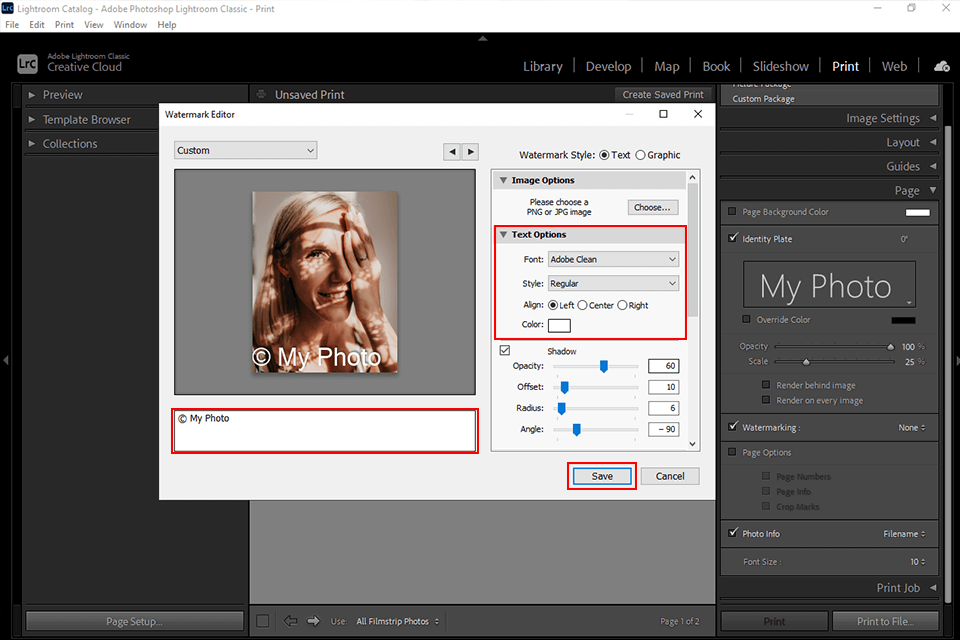
STEP 3. Type and Adjust the Text Options
The Watermark Editor box, located on the left side, can be used to preview a selected image. Enter the text you want to add in the text box. Users frequently enter the name of their blog, URL, image title, and so on here.
On the right side, you’ll see a number of options for personalizing your inscription. You can change the fonts, the alignment, the color, the opacity, the drop shadow, and so on.
STEP 4. Save Settings for Batch-Processing
You can also use the batch-processing feature. This is extremely useful when you need to add a watermark to a number of photos. Use the fit or fill button above the Inset sliders to complete this task. The fit slider allows you to resize text to fit the width of an image, whereas the fill option allows you to resize text to fit both the height and width of the image.
To save the watermark for future use, click the Save button. Enter the watermark’s name and download the file.

Note: If you want to make some adjustments to the photo just let me know. I can do it for you at a very low cost. You can hire me to edit your photo.
latest post
- What is Midjourney
 Discover the capabilities of Midjourney AI, learn how to effectively utilize the platform, and explore the advantages and disadvantages of the Midjourney AI image generator across its different pricing options.
 - Brand identity elements
 In the vast marketing universe, imagery is pivotal in establishing and nurturing a brand’s identity. A brand’s visual choices are not merely aesthetic decisions but strategic moves that can significantly influence perception and performance. This Picfixs article explores the intricacies of selecting imagery that complements and enhances a brand’s essence, ensuring it resonates with the… Read more: Brand identity elements
 - 100 Best Mountain Captions and Mountain Quotes for Instagram
 Ready to scale new social media heights? Look no further than this treasure trove of 100 exhilarating captions and quotes, handpicked for your Instagram mountain posts!
 - Symmetry in Photography: A Creative Approach with Examples
 Delve into the enchanting realm of symmetry in photography as we showcase mesmerizing examples on our website. Experience the allure of perfectly mirrored images!
 - 11 Quarantine Photoshoot Ideas to Try at Home for Amazing Photos
 Looking for unique photoshoot ideas during quarantine? Explore the 11 creative suggestions that will help you capture unforgettable moments at home.