
Find Still Water
The first requirement in photographing reflections is obviously still water. Most of us think we need large lakes to get those lovely reflections. But in reality, even a small puddle is good enough. What is more important is that it should be stagnant.
In fact, smaller and shallower water bodies give better reflections most of the time. The larger the water body, the longer it will carry the flow of air. Most of the time, the speed of air increases as it cruises through an uninterrupted surface. The lesser the wind/breeze, the better the reflections.
Generally, the air is almost idle during the early hours of the day. The first step is to have a guess on when the air is static. A scout trip becomes mandatory here and it is unlikely we would go to a spot and bag a good reflection shot in a few hours. Once you have picked your spot, have a few days planned for that spot alone. When the air is stagnant, the light might not be good or vice versa.
In my experience, 2-3 days in a spot could certainly guarantee a few hours of still water. In practice, it is pretty difficult to get absolutely still surface. Mild ripples often seem to be present. But don’t let that limit your photographic opportunities. When the reflection is not still, get creative to see what best you can bring out of a picture.
Equipment Considerations
When it comes to photographing reflections, a good tripod takes top preference. A tripod that allows you to get low would be most preferable. While photographing reflections, most of the time we might want to take multiple shots and bracket them for exposure and/or focus stack them in post. For both of the above-mentioned criteria, a tripod becomes mandatory.
Next comes lens choice. This is subjective. A wide or ultra-wide-angle lens is desirable in most cases. What works best for me is a focal range between 15mm to 30mm (on full-frame). There are exceptions as always. An ultra-wide-angle lens works only if you have a subject that fills the mid-ground significantly.
If the subject whose reflection you seek to get is too far away, then the subject, as well as its reflection, gets pretty insignificant due to perspective distortion that is more exaggerated in ultra-wide-angle lenses.
If your subject is far off, you might want to think about a mid-range lens around 35mm. Each option has its own pros and cons. If you have an ultra-wide angle lens (wider than 24mm), the mild turbulence in the surface (which is present almost always) gets insignificant. Whereas with increasing focal lengths, the turbulence gets more pronounced.
But on the positive side, with a mid-range lens, you get a majestic subject and a big enough reflection as your foreground. So ultimately, it is the scene that dictates what focal length you should be using. In my experience, anything over 50mm rarely works for photographing reflections.
Zoom lenses are preferable to primes for photographing reflections. It is true that zooms cannot often come close to primes in terms of sharpness, sun stars, levels of chromatic aberration, ghosting, and flare, as well as color rendition.
But on a practical note, sometimes it is impossible to zoom with your feet, which becomes mandatory when using primes. For example, if you have a rock in the middle of the water that you want to have as a foreground, then getting near gets practically impossible.
Zooms also let us control the size of our subjects to a certain level where zooming with feet is not always possible. If you have a zoom like the Nikkor 14-24mm f/2.8 or the Tamron 15-30mm f/2.8 and a prime like the Nikkor 20mm f/1.8G, then you are all set – all of these are excellent choices! When I bring along a Zoom and a Prime with me, I start with the Prime. If the prime does not give the desired composition, then I switch to a zoom. For Nikon crop bodies, the Tokina 11-16mm f/2.8 is a great choice.
As with the camera choice, the one you already have should work great. If your camera has a wide dynamic range, even better, but it is not necessary, since you can be exposed to the right without blowing any highlights out, or if the conditions are extreme, use the bracketing technique.
Most landscape photographers use polarizing filters extensively and I am no exception. But when photographing reflections, a polarizer becomes a big no. It is for the obvious reason that one of the basic characteristics of a polarizer is to cut reflections. It might help by reducing glare on wet or metallic surfaces, but it destroys the reflections and as a result, it lets the light from what is beneath the surface into the frame. You should not be using one unless you want to get creative and bring out a blend of what is under the surface and just a reflection of the hues.
Camera Settings
Below are a few recommended settings for most reflection shots:
- As with most landscape photographs, sticking to your base ISO or somewhere close to it is the way to go. Most of us already know that the widest dynamic range, as well as the lowest amount of noise in images, is achieved at base ISO. Since you are going to be using a tripod, adequate lighting is never a problem. Low-light conditions are not an issue either, since you can do long exposure shots.
- Generally, a smaller aperture works well. As a standard practice, I try to use the aperture in which the lens yields maximum sharpness. For most fast lenses, the best aperture is between f/4 to f/5.6 and for slower zoom lenses it is generally at the f/8 mark. When I am talking about maximum sharpness, I mean maximum overall sharpness and not just center sharpness. So my general aperture recommendation would be f/8 or smaller (depending on subject distance). Another reason for smaller apertures is to achieve the maximum depth of field.
- There are two possible shutter speeds that can be used depending upon preference. A shutter speed of at least 1/250 is desirable if you want the reflections to be sharp. As I have already mentioned above, there is most certainly some disturbance on the surface even with the least possible breeze. A slow shutter speed will smooth out the reflection. On the other extreme, a smoothed-out reflection will call for an extremely slow shutter speed which gives a sharp subject and soft, blurred-out water around the subject, making it stand out. Both options will convey different messages. An image with a sharp reflection will make a geometrically symmetrical mirror image. On the other hand, a reflection with ripples will generally convey the message of a subject and a water body around it.
- To be able to have full control of the exposure, shooting in manual mode is recommended. I put the metering mode to Spot and hovered the focus point around the brighter spots of the frame to read the values of the recommended shutter speeds. Then after turning into manual mode with ISO and Aperture fully set, I adjust the shutter speed to the value where the brightest spot in the frame falls just inside overexposure or a third of a stop below the values where blinkies just start showing up. Another way of doing it is by using the highlights protection metering mode if your camera has one. This mode calculates and meters for the highlights (brightest spots) in the frame. If you shoot in any other mode, you can adjust the exposure compensation to get the brightest spot in the frame just inside the right edge of your histogram. This is how you properly expose yourself to the right!
On-Location Tips and Considerations
- Get close and get to as low of an angle as possible. Sometimes you might end up with your feet and your tripod legs in the water to get to an angle where the bottom tip of your lens is barely a few inches above the surface. As you walk closer to the surface of the water body, you will notice that you will cover more of your mid-ground in the reflection and it gets more pronounced as you angle almost parallel to the surface.
- The reflected image is approximately a stop darker than the actual subject. So make sure you get the darker tones well within your histogram unless you deliberately want to leave them dark.
- Sometimes the number of stops of light available in the scene exceeds the dynamic range of your camera. In such cases, bracket. I take three shots one stop apart. I make it a general practice so that I can merge them in post if I end up with blown-out highlights or blacks that have lost all the details in any one of the images. If the stops between the bracketed images are too high, it would be difficult to seamlessly merge them in post.
- There are big debates about the ratio between the subject and the reflection. A lot of people argue that a 2:3 is the best and others go for 1:1. In my opinion, the scene dictates the ratio to be used. I prefer 1:1. If I have to include any patterns, details under shallow water (foreground), I push the actual subject a bit up in composition.
- In addition to bracketing exposure, more often than not, you might need to focus on stack images. I generally shoot at least three images for the purpose of focus stacking. One for the immediate foreground, one for the actual subject, and one in between them. I then blend them all together in a post later. This step will certainly become mandatory if you have any foreground objects very close to your lens.
- If you have to bracket for exposure and focus stack, you have to click a total of bracketed shots multiplied by the focus stacked shots. For example, if you need 3 shots for focus stacking and 3 for exposure, you need to take a total of 9 shots (3 exposures for each focus-stacked image). This is another reason why manual exposure is recommended. When you place your camera in aperture priority or any other auto mode, it might add or subtract a few thirds of stops in either direction. It will get very tricky to get a seamless final image while working on it in post.
- Mind the leading lines. They are pretty important in any landscape photograph. They are even more important when you are photographing reflections, as one of the primary objectives is to attain a sense of symmetry. A small tilt in the horizon might make the final image practically useless. You might rotate it a bit in post, but it is best to get it right in the camera. That is because when you tilt the picture you might end up compromising on your composition.NIKON D5100 @ 18mm, ISO 160, 1/800, f/14.0
- Have some negative space around your subject and its reflection. A very tight composition might have all the technical ingredients of a picture, but most of the time it lacks emotion.
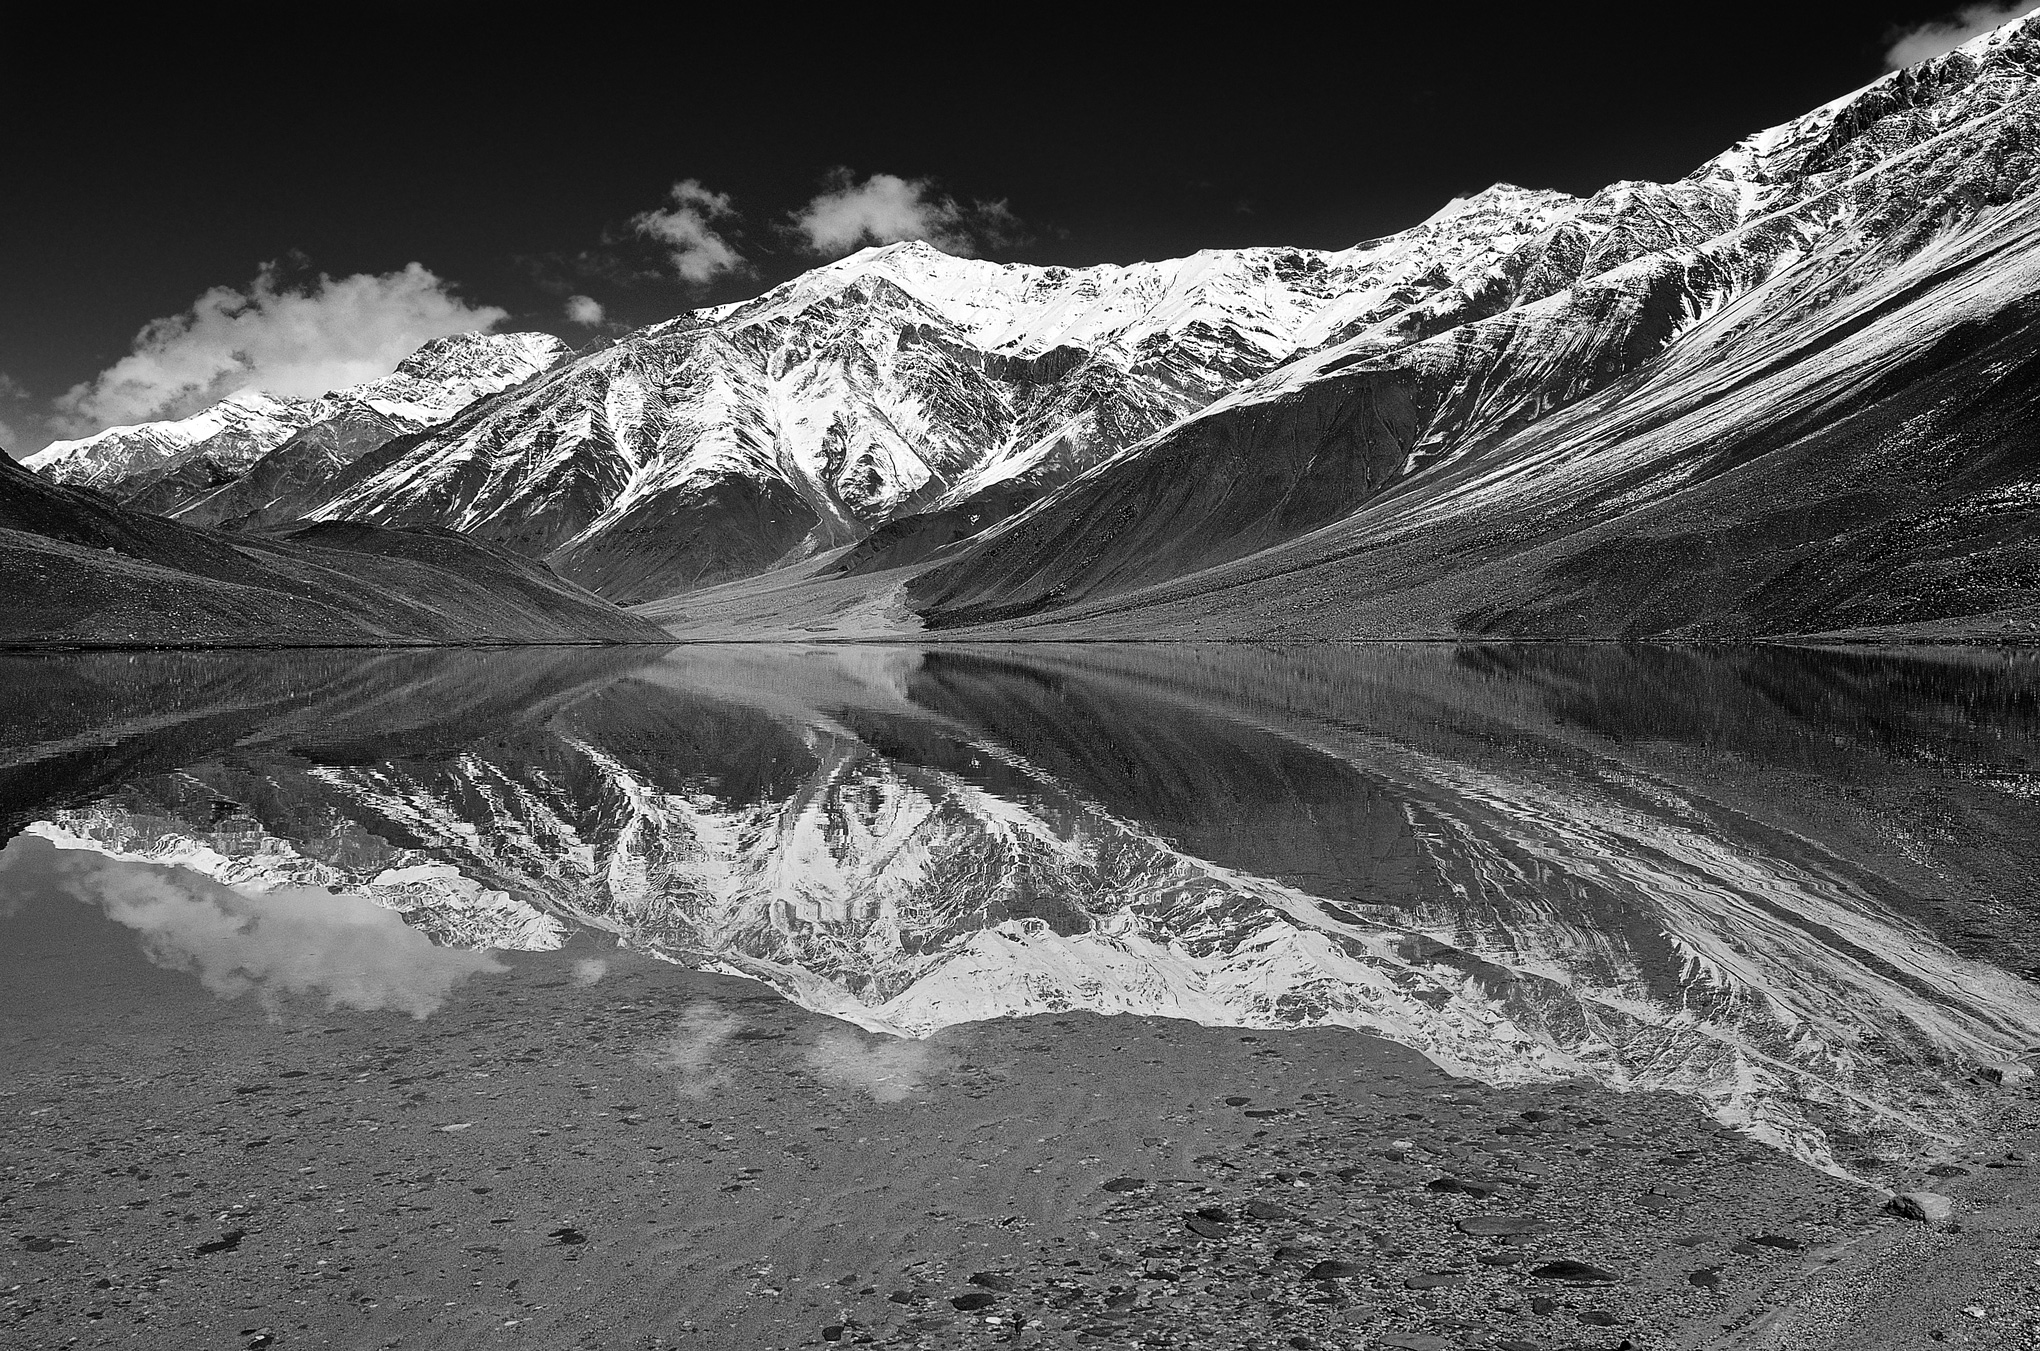
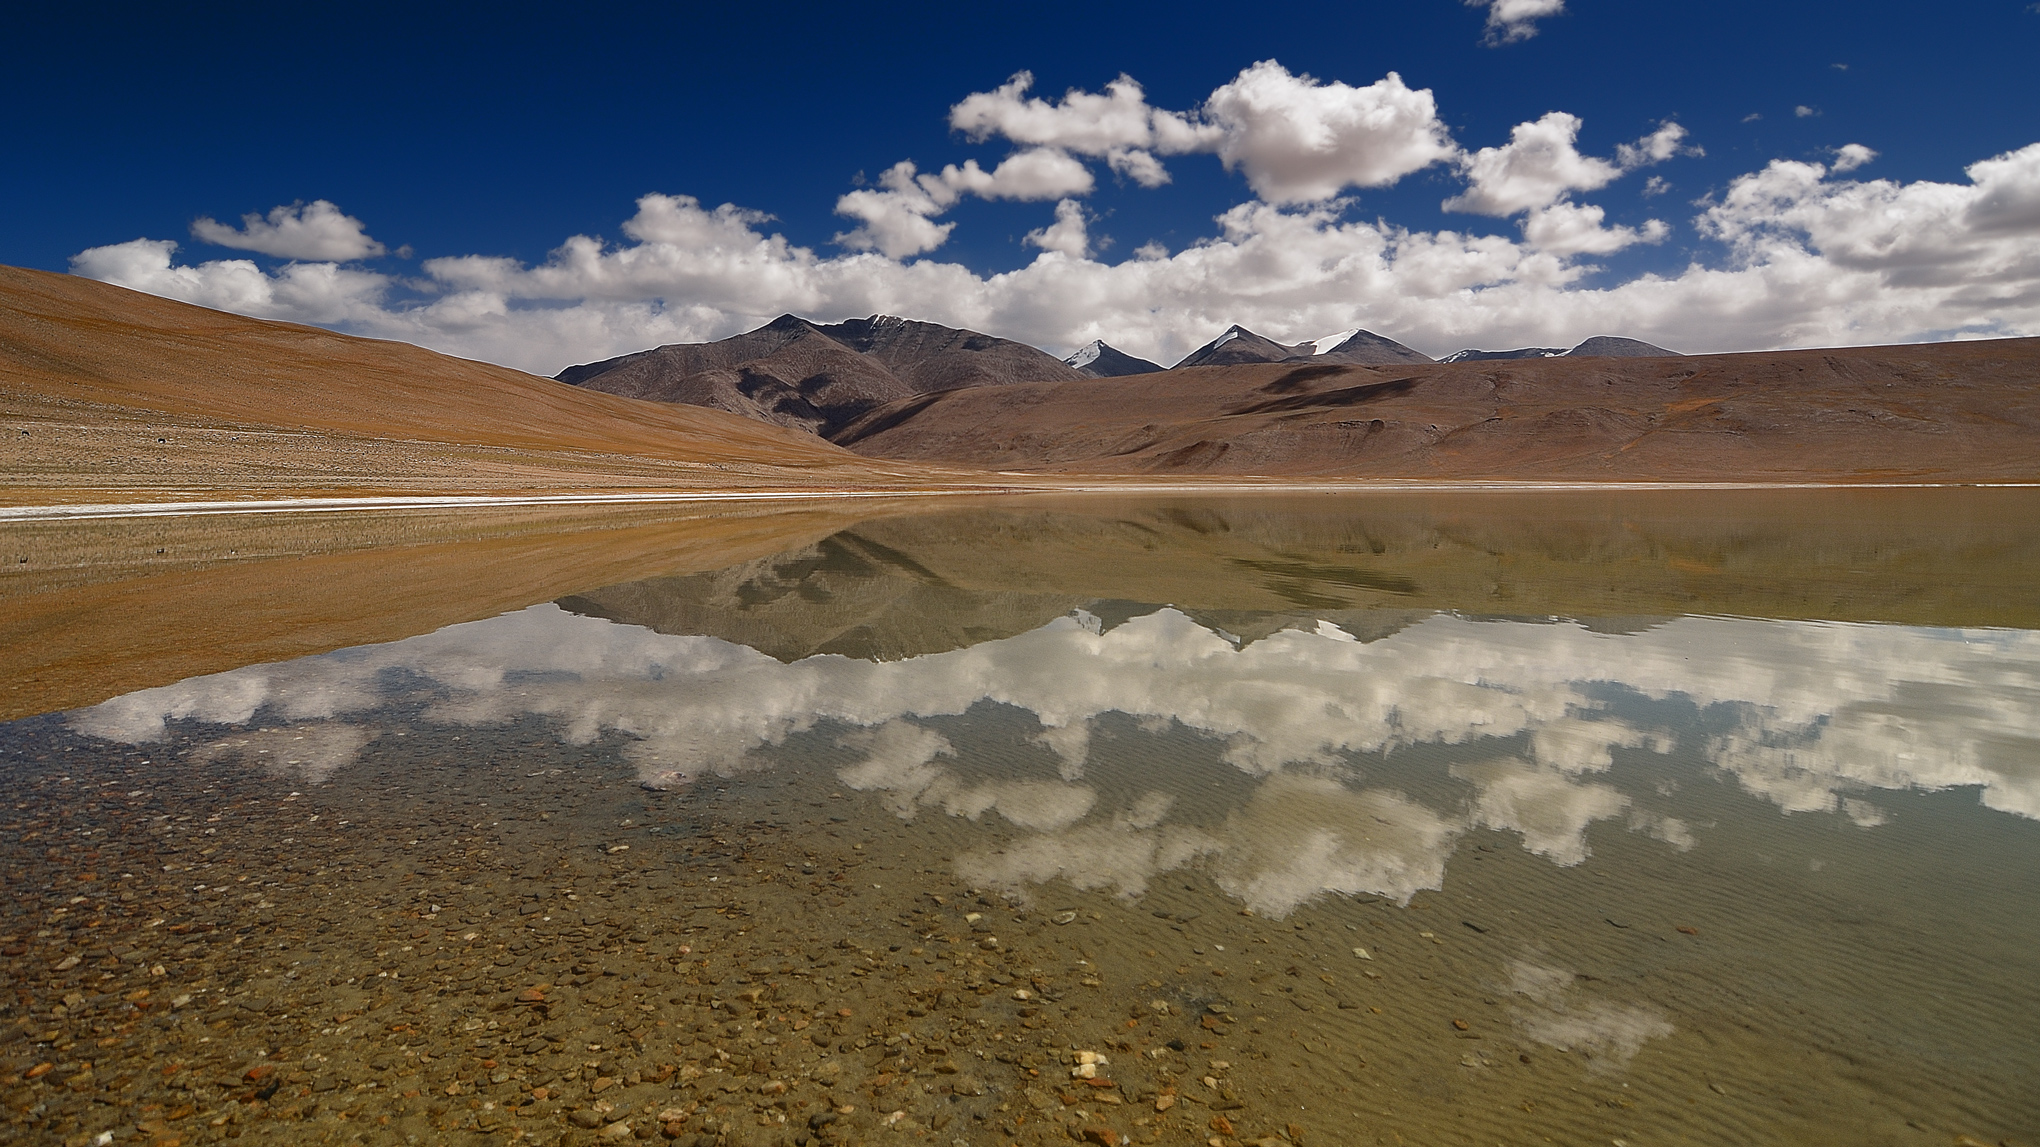
- Include clouds in your frame. With the subject and its reflection, the mid-ground and the foreground is taken care of. But a blank cloudless sky looks boring unless you deliberately seek to make the image abstract.NIKON D7000 @ 16mm, ISO 100, 1/320, f/8.0
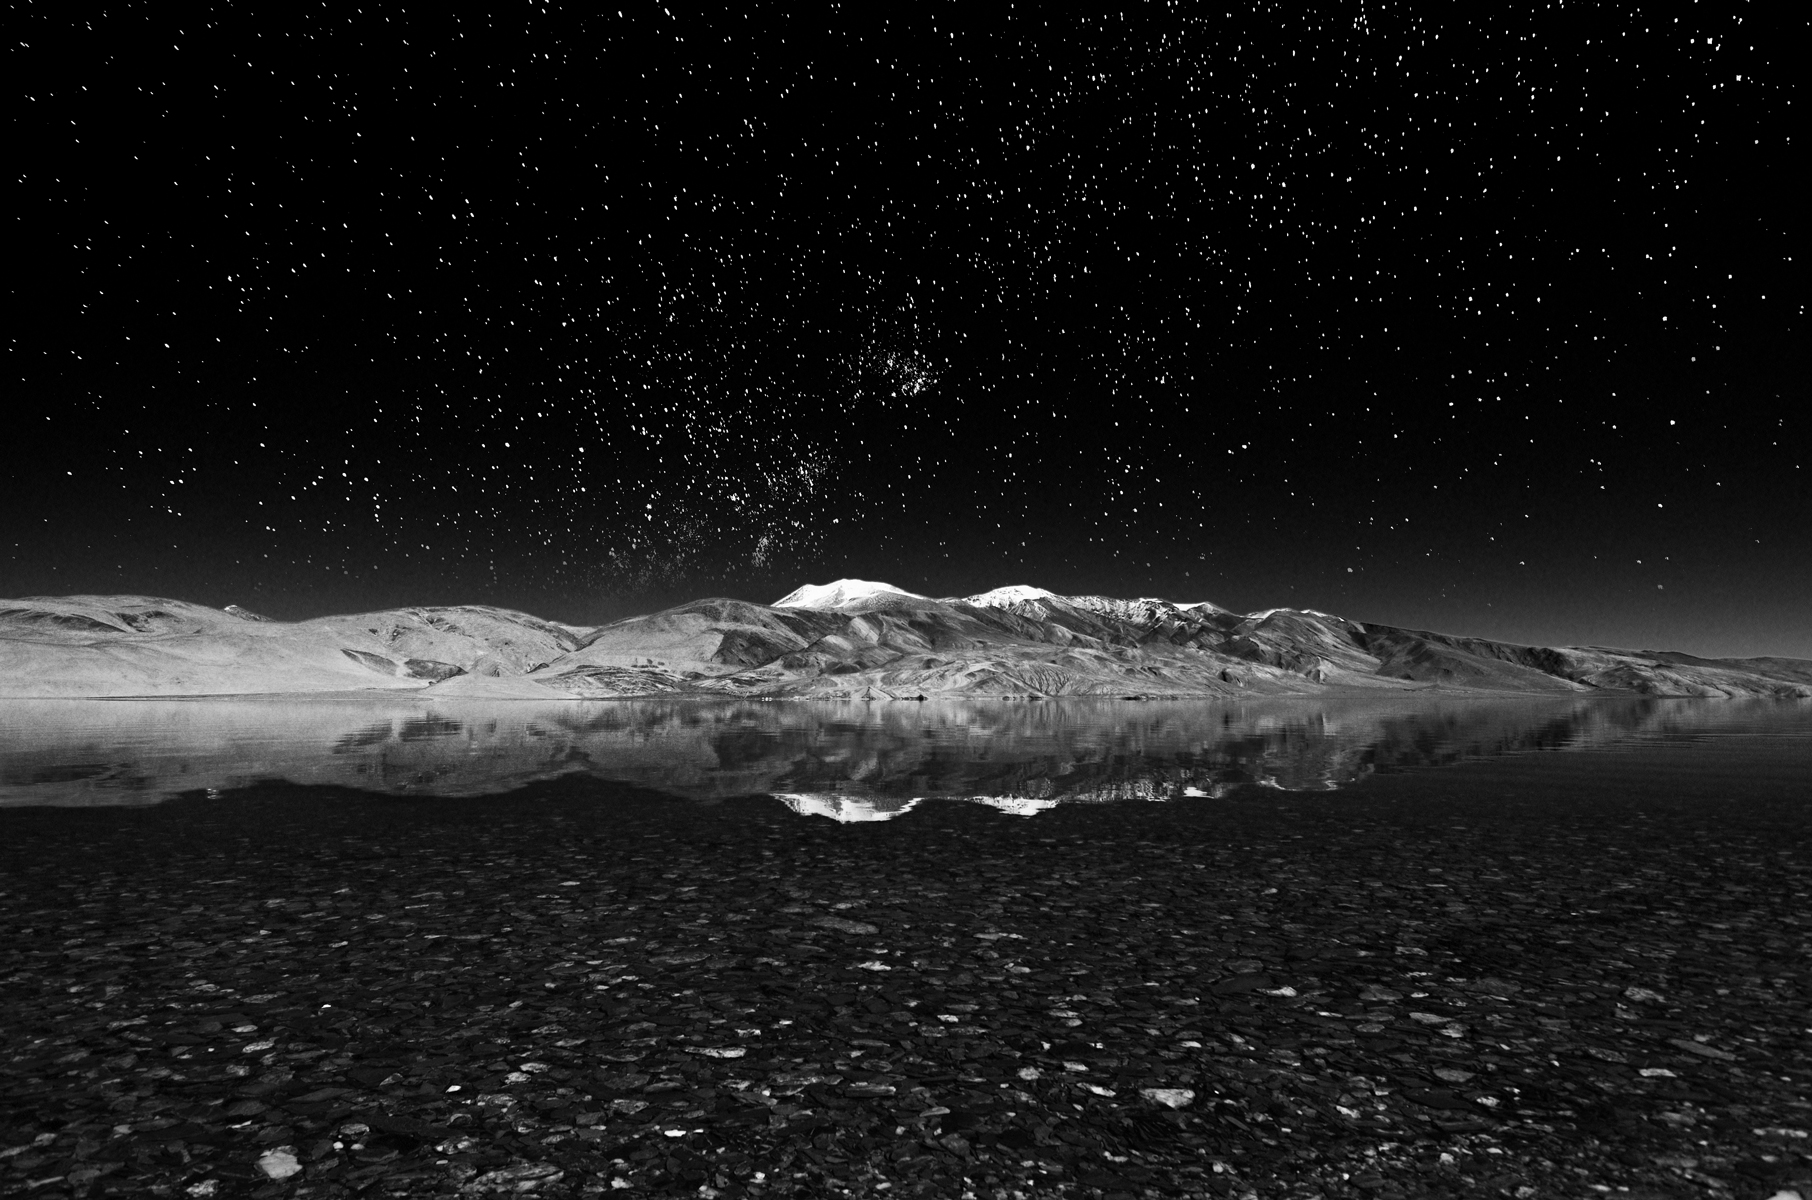
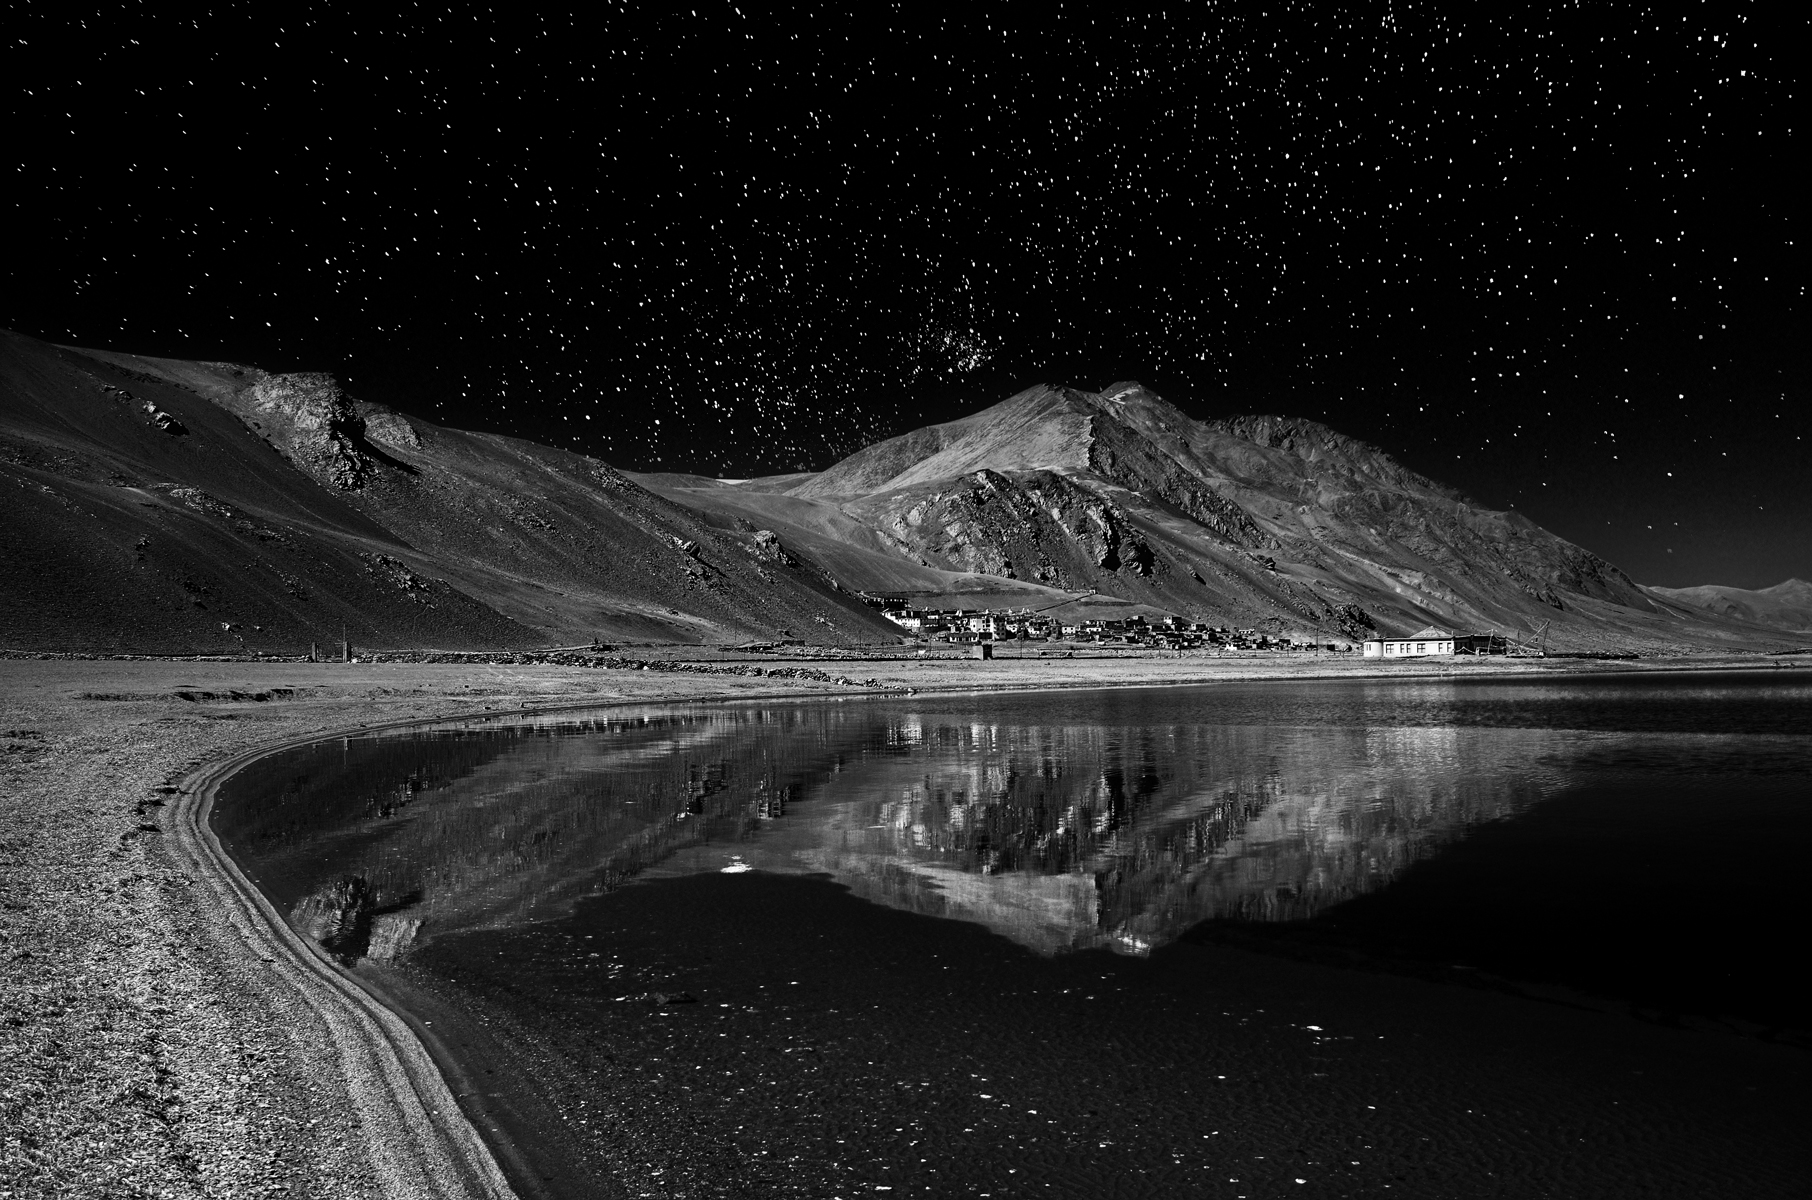
- If you are shooting during the night, then stars can be great backgrounds. When you are trying to photograph a reflection during the night, do so on a full moon day or at least when it is within or over a week of it. The reason being, you do need bright light to illuminate your subject and as I have mentioned earlier, to illuminate the darker reflection as well. Depending upon the lens used, you will also need to watch your shutter speed, as long shutter speeds will create star trails. And on top of all this, pushing the ISO too high will add noise. Yes, the moon will flush out some of the stars, but the brightest stars will still shine on your background.
- Most of the time we seek to get geometrical mirror images. But do not limit yourself to just that. Get creative – sometimes even distorted reflections of a subject might turn up interesting.
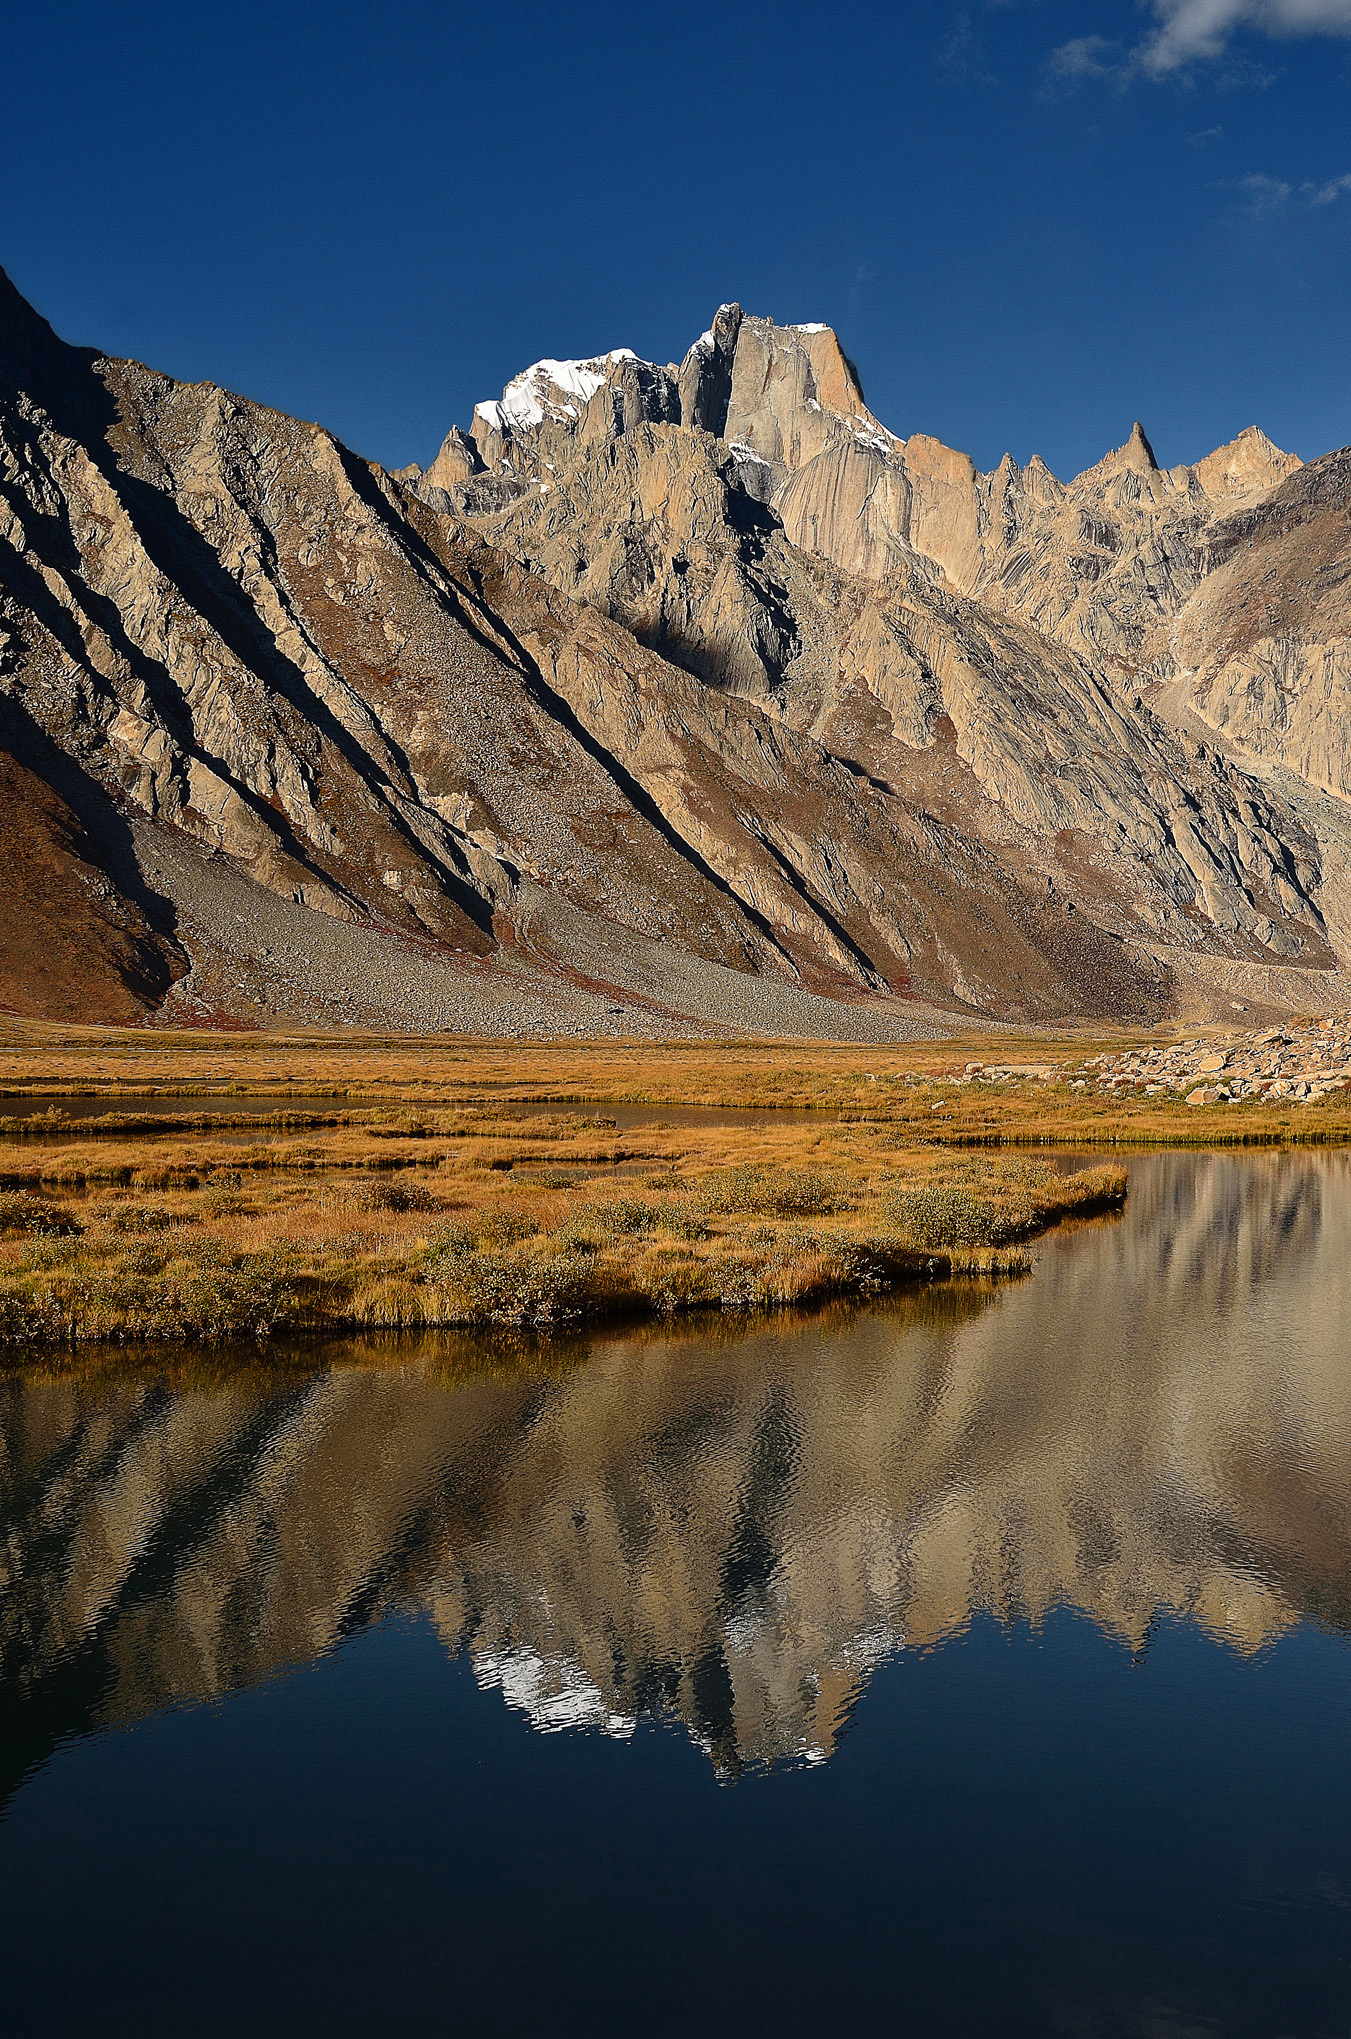
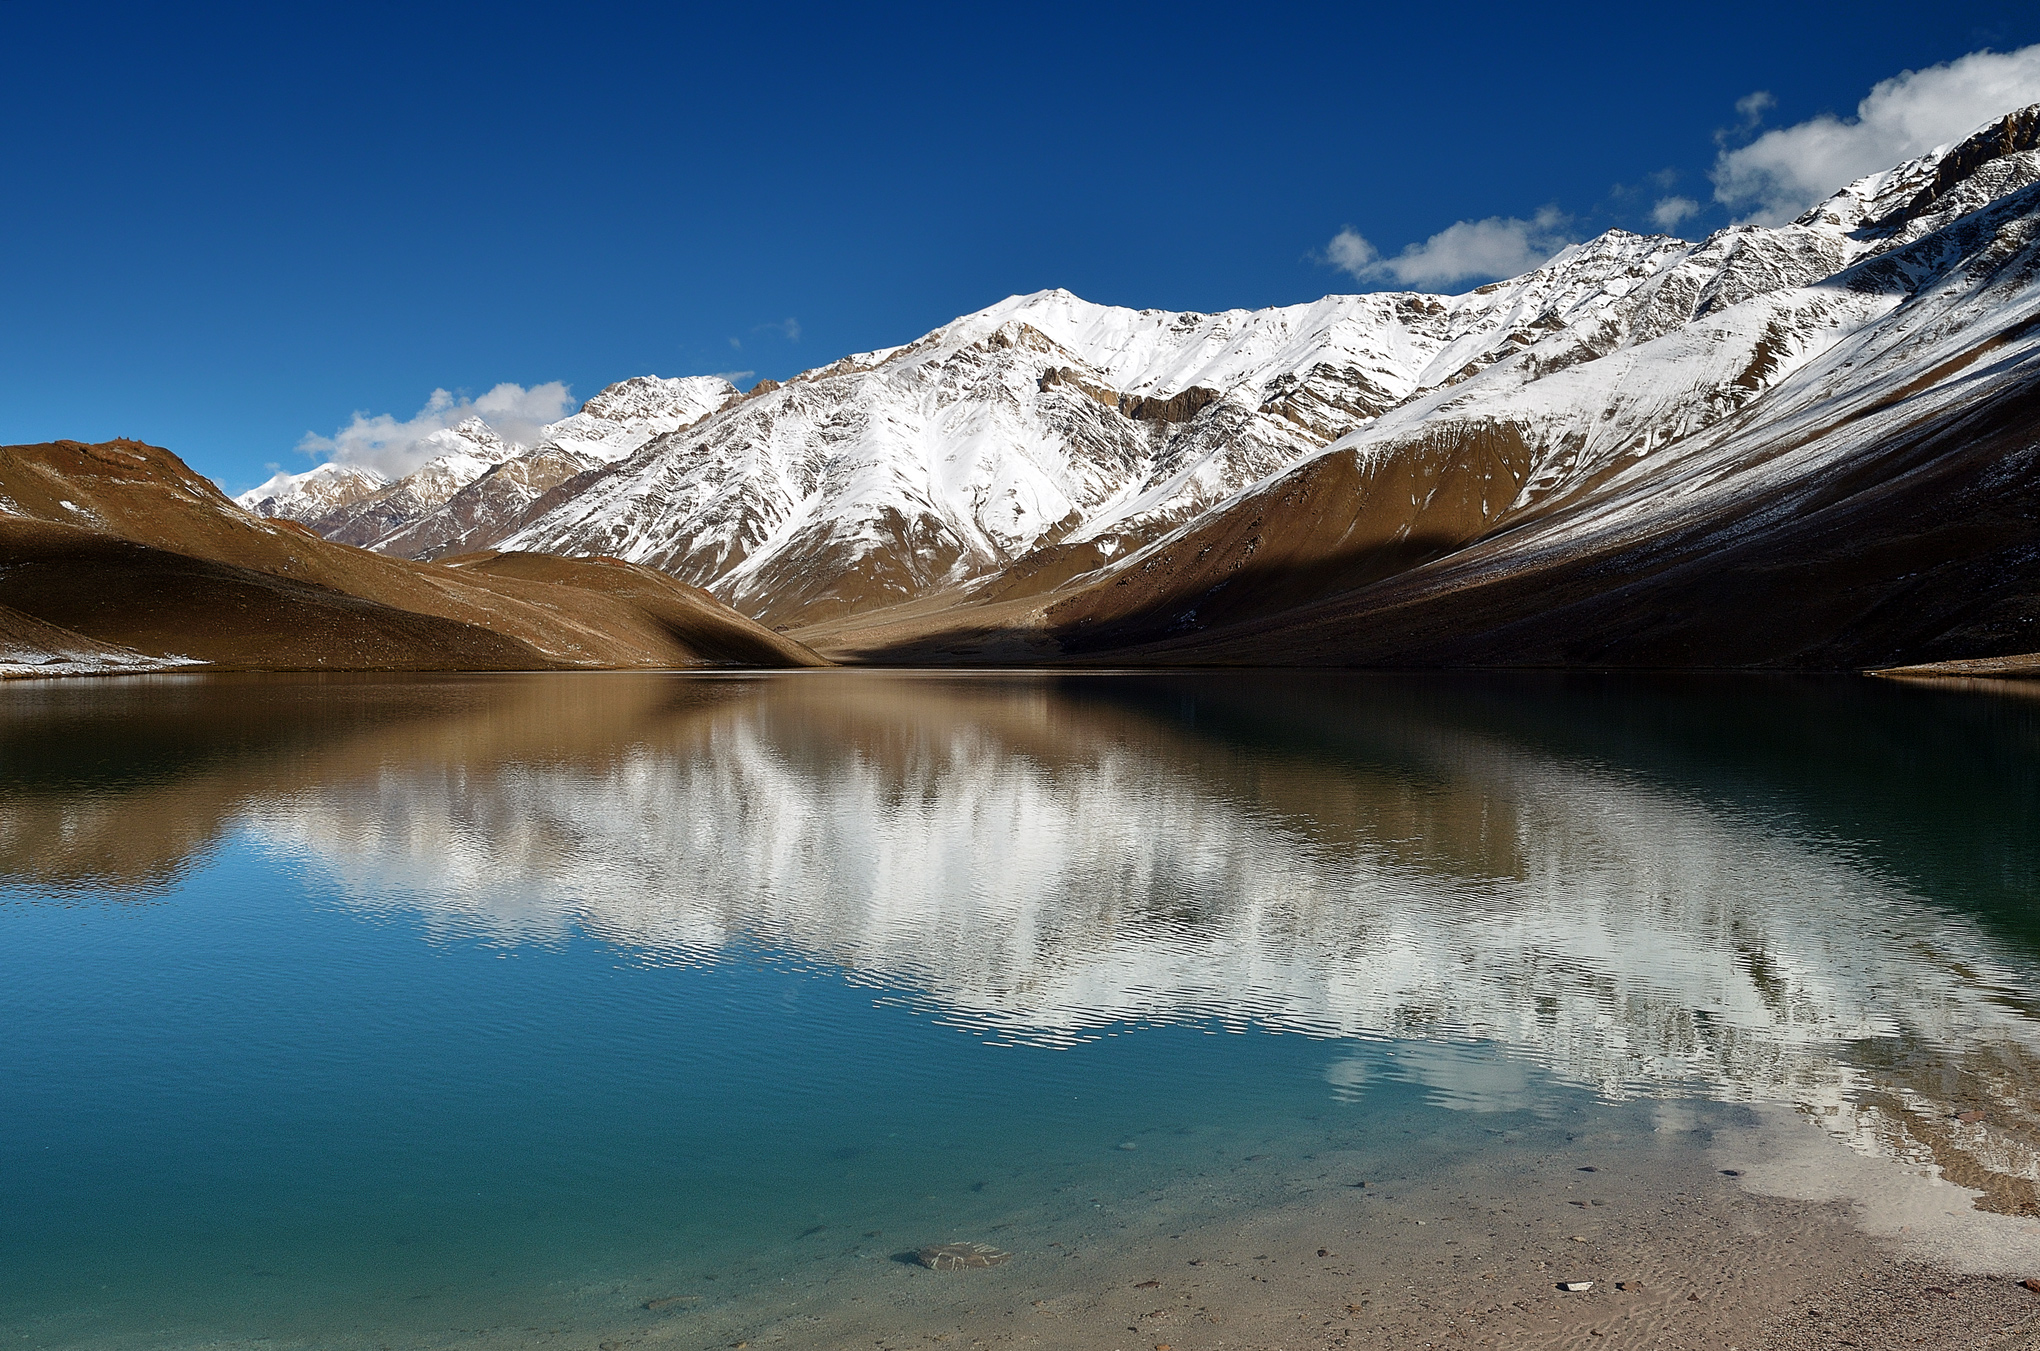
- Try to photograph when the sun is behind you. If you decide to shoot against the sun, make sure the sun is around the horizon and not too high up in the sky. Sometimes to get the blue/cyan tones reflected in the water, you might want to shoot when the sun is much higher. The blue wavelengths will be feeble or absent during early and late hours with the exception of the blue hour. In such a case, get to an angle that avoids the reflection of the sun in your frame.NIKON D7000 @ 24mm, ISO 100, 1/320, f/8.0
Post-Processing Tips
- The first step of post-processing should be merging all images in case you bracketed or focus-stacked them.
- If you decide to adjust the daylight settings or color-correct using curves, make sure to make the same adjustments on all layers you are going to merge.
- Try merging images manually by using layer masks and avoid HDR algorithms. Most of the time they either render a flat image or an image that looks artificial. One major issue I have found with most HDR algorithms is, most of them seem to introduce halos around the edges.NIKON D7000 @ 11mm, ISO 100, 1/1600, f/4.0
- Since you will be dealing with too many stops of light in your frame, the saturation also might vary to a great deal. In such cases be careful while using the saturation slider. Use vibrance or adjust local areas individually. Please take a look at my article on Saturation for more information.NIKON D5100 @ 18mm, ISO 160, 1/250, f/14.0
- You can solve the reflected area being a stop or more underexposed by adding a gradient layer mask for the Exposure layer. On top of your current layer, add an Exposure layer and increase the exposure slider to about 1 stop (marked blue). Then click on the Gradient tool (marked with red) and use a gradient on the layer mask (marked with green): Remember as always with layer masks, white shows, and black hides. So it will apply the increased exposure only to the foreground and graduate it smoothly.
That’s all there is to it. I have shared most of the practices I do in the field and in post-processing, specific to photographing reflections. If you have any questions or concerns, please leave a comment below.
Lates Post
- What is Midjourney
 Discover the capabilities of Midjourney AI, learn how to effectively utilize the platform, and explore the advantages and disadvantages of the Midjourney AI image generator across its different pricing options.
 - Brand identity elements
 In the vast marketing universe, imagery is pivotal in establishing and nurturing a brand’s identity. A brand’s visual choices are not merely aesthetic decisions but strategic moves that can significantly influence perception and performance. This Picfixs article explores the intricacies of selecting imagery that complements and enhances a brand’s essence, ensuring it resonates with the… Read more: Brand identity elements
 - 100 Best Mountain Captions and Mountain Quotes for Instagram
 Ready to scale new social media heights? Look no further than this treasure trove of 100 exhilarating captions and quotes, handpicked for your Instagram mountain posts!
 - Symmetry in Photography: A Creative Approach with Examples
 Delve into the enchanting realm of symmetry in photography as we showcase mesmerizing examples on our website. Experience the allure of perfectly mirrored images!
 - 11 Quarantine Photoshoot Ideas to Try at Home for Amazing Photos
 Looking for unique photoshoot ideas during quarantine? Explore the 11 creative suggestions that will help you capture unforgettable moments at home.