
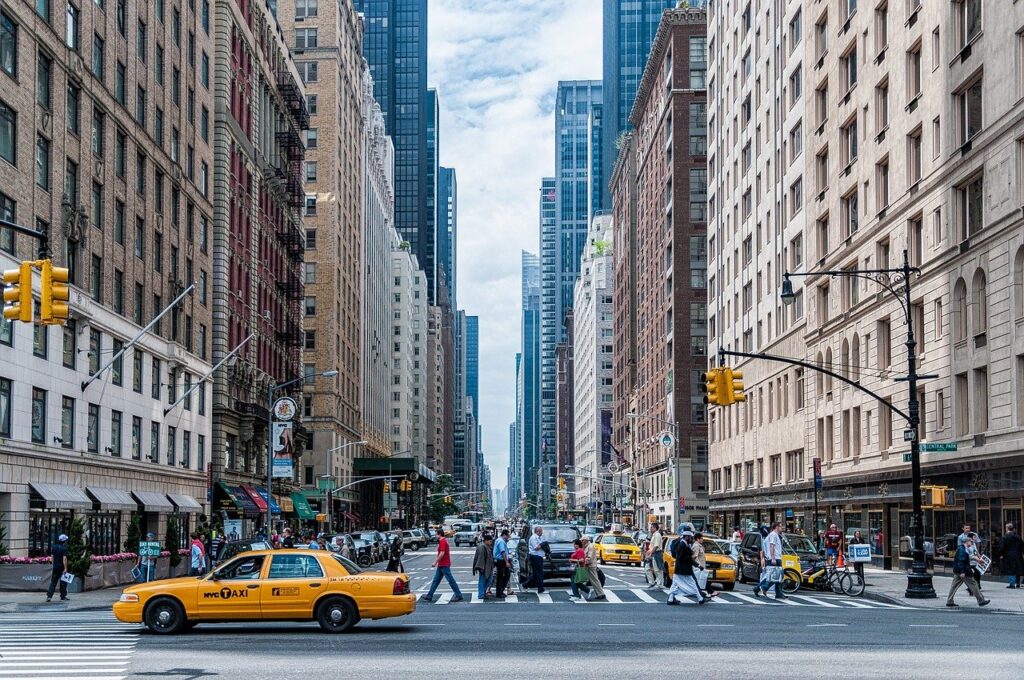
Every city on this planet has a unique look and feel that can be captured through photography. The city skyline can show the face of the city in the most fascinating and exciting way. Big cities like Seattle, Toronto, and Paris often have the best views and great skyline photos. This article presents 6 tips for shooting the city skyline.
Choose the best lens for your situation
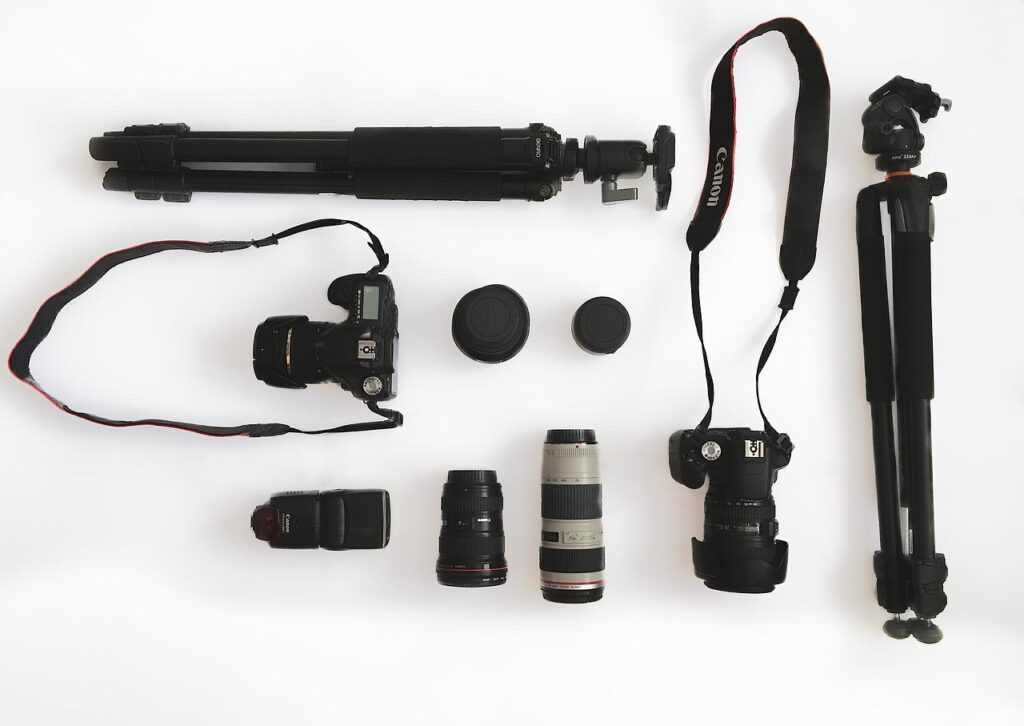
Shooting urban landscapes isn’t as difficult as it sounds. As long as you have the right camera settings and the right camera equipment, you are already taking a step in the right direction. When shooting a cityscape, it is important to choose a lens that suits your situation. Wide-angle and fisheye lenses are great for creating dramatic sensations, but these types of lenses have an intermediate focal length of about 28mm to 100mm, especially when focusing on one important landmark in the city skyline. Can be quite distorted. Focus city. This focal range is also great for capturing vast skylines without making the skyline look far away.
Note: If you want to make some adjustments to the photo just let me know. I can do it for you at a very low cost. You can hire me to edit your photo
Use a Tripod
Bringing a tripod around the town can be a hassle, but it’s a good idea to have one, especially if you want to get crisp images. You can use a tripod to reduce camera shake. It is also possible to shoot at a slow shutter speed. This is useful when you’re out in the dark, practicing night photography, or wanting a little more creative exposure.
Focus Manually
Despite the benefits of autofocus, there are a few reasons why you should focus manually when shooting cityscapes, even if you feel that your vision is not quite 20/20. Manual focus nearly always produces sharper images than autofocus, especially when the lighting is poor. Focusing manually can also be much more accurate when you’re shooting buildings from a distance, where the autofocus may have difficulty deciding how far away the structures actually are. In addition, when it’s dark, the autofocus function of your camera may fail to work, meaning that you’ll have no other choice but to manually focus the lens. An easy way to do this is by switching to Live View, which will allow you to magnify the scene so that you can ensure that the area you want to have in focus is actually sharp. If you’re having trouble deciding on where to set your focal point, simply place it on the center of interest within the frame. For example, if you are shooting St Paul’s Cathedral in London, then make that your point of focus. If you’ll be shooting the Burj Khalifa in Dubai, then that should be the building that you focus on. To get the most out of using a tripod, set your shutter release on a 2-second delay. This will reduce the movement between the gear settling down and pressing the button until the shutter is released. Unfortunately, you may want to shoot in places where tripods are not allowed, such as hotels and shops. You can have a wonderful view of the city. If you can’t bring a tripod, try improvising by balancing the camera on a railing or in a safe and stable location in the building instead.
Set Your Shooting Mode to Aperture Priority
It’s best to shoot in manual mode whenever possible, but shooting the city skyline is one of the useful situations when setting the mode to aperture priority. This is because aperture priority mode gives you control over all camera settings. Except for the shutter speed. What does that really mean? Now you can set the ISO low to reduce noise and maintain the optimum aperture for the lens to ensure sharpness and proper depth of field. In the meantime, the camera will automatically calculate the shutter speed, so all you have to do is compensate for the exposure in dark or very bright scenes. Taking a picture of the cityscape is never easier.
Use a narrow aperture to improve the depth of field
Having said that you need to have enough depth of field, you may be wondering what the best aperture is for shooting the city skyline. This depends on what you’re really trying to achieve, but often the goal is to capture all the details by keeping everything sharp and focused. To achieve this, use a narrow aperture around f / 11. This improves the sharpness of the front and back. For nighttime cityscapes, you may need to open the aperture to about f / 3.5 to get a brighter exposure.
Low ISO
As with any genre of photography, when shooting a city, it’s best to use the lowest possible ISO, depending on the situation. This reduces the risk of image noise, graininess, camera shake, and motion blur. When shooting the cityscape during the day with a tripod, you can escape with ISO100. When shooting with a handheld, you may need to use an ISO of 100-400. For night views, you can use ISO 800-1600 for your tripod. Handheld shots may require a higher ISO. Experiment until you get a crisp, well-exposed image.
Note: If you want to make some adjustments to the photo just let me know. I can do it for you at a very low cost. You can hire me to edit your photo
Straight Horizon Line
Whether the horizon is straight or not, especially in urban photography, it is possible to make or break a photo … Many photographers decide to make sure the horizon is horizontal at the time of the shooting. You will be surprised that you are not paying enough attention. The result can be a badly distorted image that is not aesthetically correct. Therefore, once you’ve decided on your composition, it’s a good idea to make sure the horizon is level before you press the shutter button. The horizon may be completely hidden by skyscrapers and other buildings. In this case, look in the center of the frame and make sure the vertical lines are not bent. If the line is not straight, you may need to move the camera up or down or tilt it slightly until the horizon is level.
Get a Different Perspective
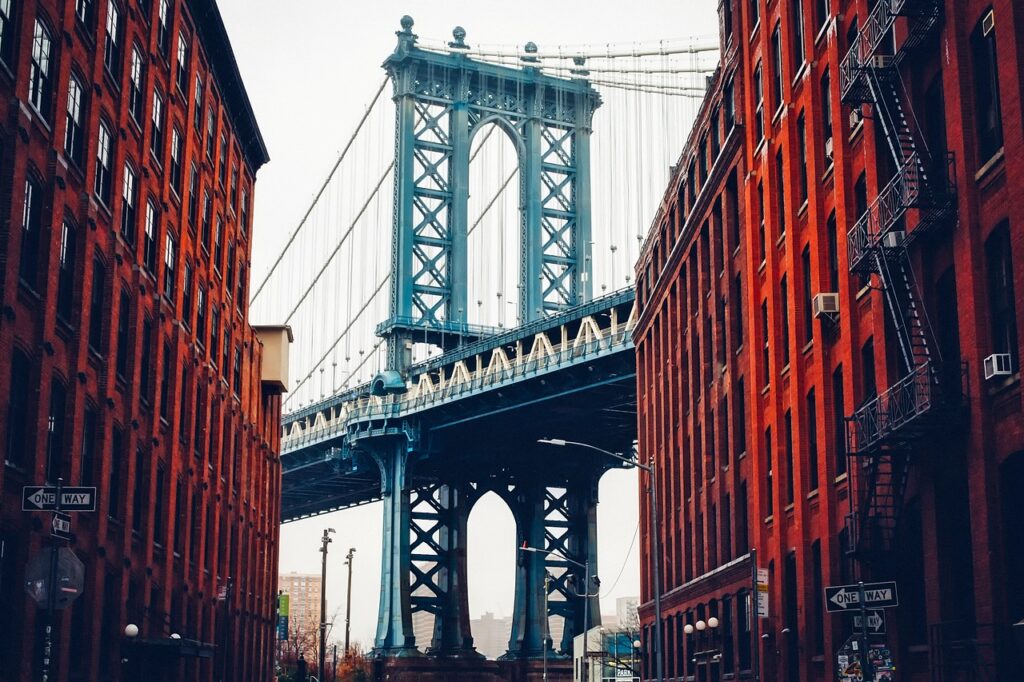
This has the advantage of being able to shoot from multiple perspectives. When standing on the ground, you may not be able to arrange the city skyline the way you want, especially if you are near the building and the distortion effect makes the building appear to tilt. Instead of capturing everything from the ground, find other interesting vantage points. For example, a photo of the amazing views of Lower Manhattan from the Brooklyn Bridge has an observatory where you can fly high to see the city from above. Consider the Empire State Building in New York City or the Shanghai Tower in China.
Best Time for Photographing City Skylines
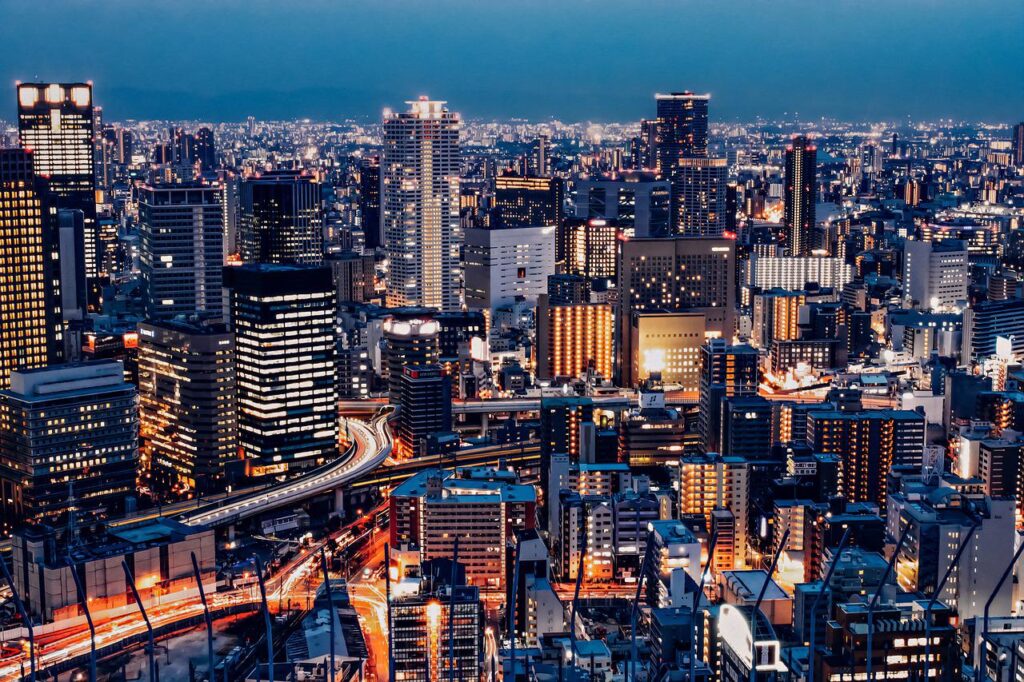
Timing is as essential in skyline photography as it is in landscape photography. My favorite time to go out is just after sunset or just before sunrise. It is called “blue hour” because of its magical color. Even better than the famous, sometimes a golden hour. No other time zone offers such a wide range of colors and shades. This also opens up many opportunities for post-processing to bring out the lights of these beautiful cities. The histogram is the richest in such images.
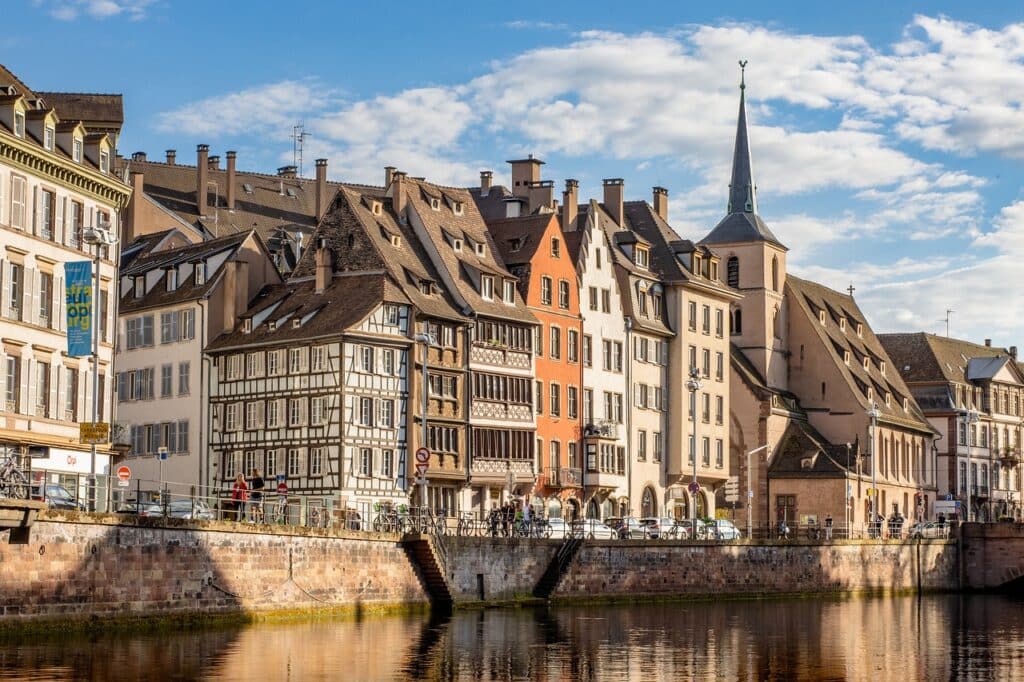
Use Water to Capture Reflections of City Skylines
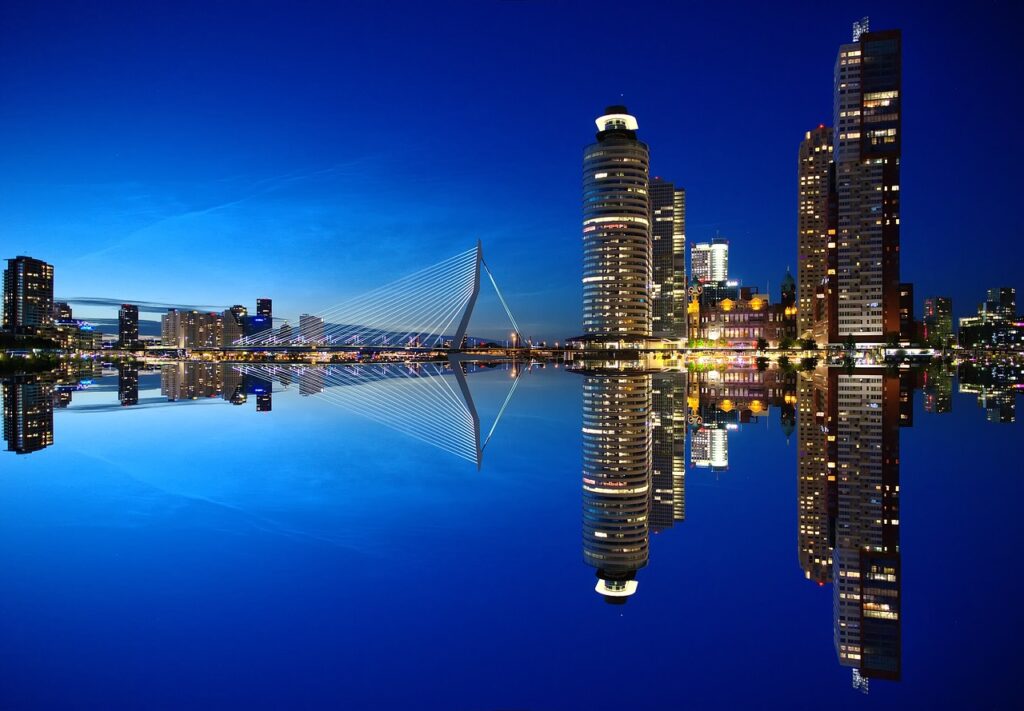
I love water It can produce great photographic effects. Water is a magic mirror that reflects the light of a photo to create stunning creative images. All cities are lit up at dusk, and these lights are more likely to change and become evenly colorful. Large bodies of water such as rivers, lakes, and canals are natural reflectors. Add more charm to your skyline photos. Head to the riverbanks and bays and find a place with a good view.
Use Live View Mode to Set Focus
When shooting the city skyline, it can be difficult to focus. Especially when it gets dark after sunset. With a small LED screen, you may miss subtle differences in sharpness. After taking a picture, be sure to zoom in to see it. It is highly recommended to use it in the camera display mode. Set the focus manually and check in live view.
Leave Aperture Narrow for Better Depth of Field
The smaller the aperture, the less light can pass through the lens and the deeper the depth of field. Skyline photos aren’t looking for flashy bokeh. Or it’s up to you whether the background is blurry. The subject is quite far from you. Consider shooting multiple buildings, or just one. Differences in the depth of field between subjects far from the photographer’s lens are negligible. I usually set the aperture to f / 11 or f / f a / 16 for sharp skyline results. Photo.
Use Long Exposure to Capture Movement
It’s okay to shoot the city skyline in normal mode. But if you decide to follow the water and reflection tips, long exposures will be your best friend. Keep the shutter open for a long time to get more light. This creates a cool, star-like look for artificial light sources. I usually expose for 10-15 seconds and bracket 3 frames. This gives you the maximum dynamic range possible in post-production. For long exposures, don’t forget the tripod and remote shutter release (recommended).
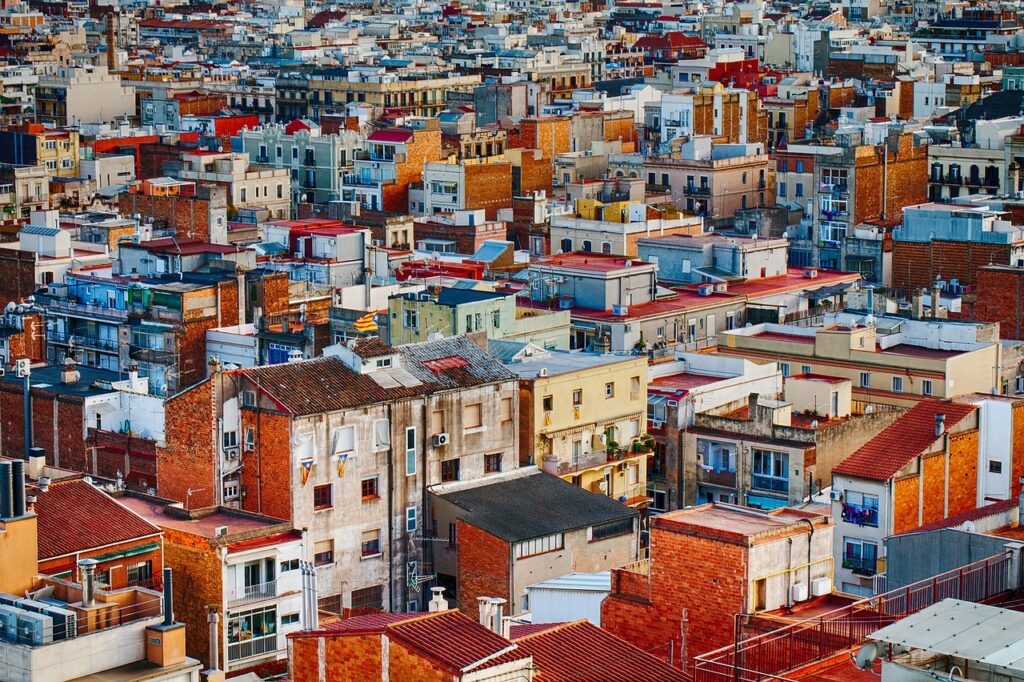
Find Elevated Places for a Better City Skyline View
In some cities, such as Mexico City, there may not be enough water to take great skyline shots. Others like Hong Kong may not be overwhelmed by it too much. Enjoy the view from the top of the mountains and hills. Take a picture of the city skyline from above for a powerful visual effect. If reflections are not available, try this.
Conclusion
There are many pictures of cities on the internet, many of them from cities in the United States. Everything was filmed from Los Angeles to Austin and Detroit. A photo of the Chrysler Building in New York, or a photo of the Golden Gate Bridge in San Francisco. That doesn’t mean you can’t pick up a wide-angle lens and find its good vantage point. I shot your next trip to New York. The city skyline is popular for good reason. Be beautiful, whether it’s printed, archived photos, or social media. Don’t be afraid of competition. Get out there and snap the cityscape!
Note: If you want to make some adjustments to the photo just let me know. I can do it for you at a very low cost. You can hire me to edit your photo
latest post
- What is Midjourney
 Discover the capabilities of Midjourney AI, learn how to effectively utilize the platform, and explore the advantages and disadvantages of the Midjourney AI image generator across its different pricing options.
 - Brand identity elements
 In the vast marketing universe, imagery is pivotal in establishing and nurturing a brand’s identity. A brand’s visual choices are not merely aesthetic decisions but strategic moves that can significantly influence perception and performance. This Picfixs article explores the intricacies of selecting imagery that complements and enhances a brand’s essence, ensuring it resonates with the… Read more: Brand identity elements
 - 100 Best Mountain Captions and Mountain Quotes for Instagram
 Ready to scale new social media heights? Look no further than this treasure trove of 100 exhilarating captions and quotes, handpicked for your Instagram mountain posts!
 - Symmetry in Photography: A Creative Approach with Examples
 Delve into the enchanting realm of symmetry in photography as we showcase mesmerizing examples on our website. Experience the allure of perfectly mirrored images!
 - 11 Quarantine Photoshoot Ideas to Try at Home for Amazing Photos
 Looking for unique photoshoot ideas during quarantine? Explore the 11 creative suggestions that will help you capture unforgettable moments at home.