
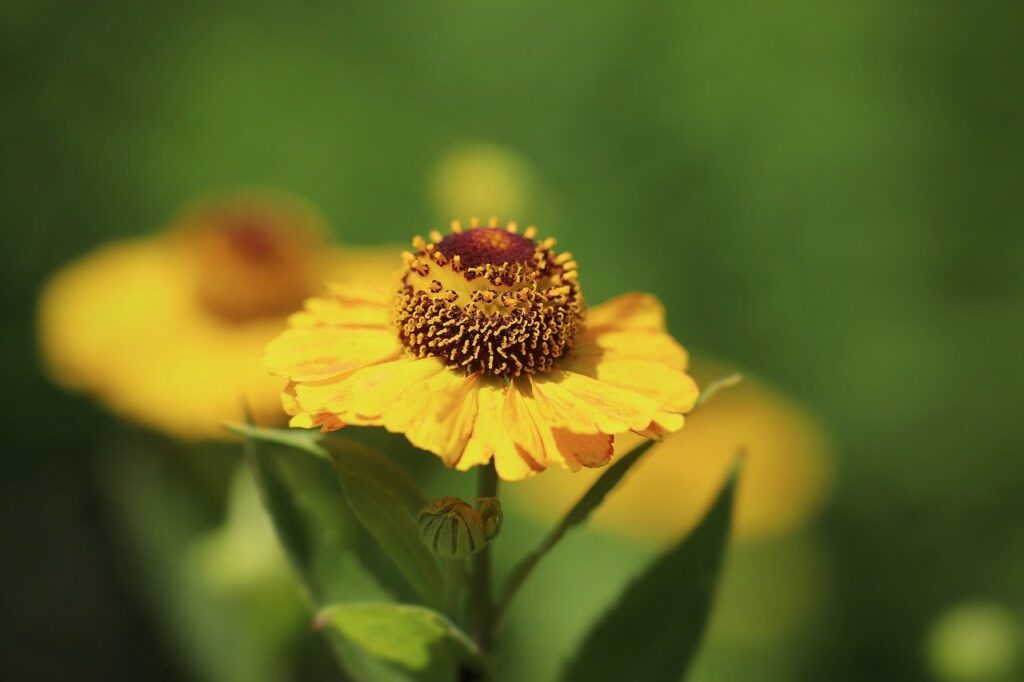
Blurring the background is one of many ways to isolate or emphasize your subject. Do you need a special lens to do this? Absolutely not! In this article, we look at several ways to get creamy backgrounds using almost any camera and lens.
Use a Wider Aperture

A lens aperture is an aperture that can be adjusted to control the amount of light entering the lens. It is defined by an f-number, such as f/2.8, which is the ratio of the focal length of the lens to the visible size of the adjustable aperture. All things being equal, a wider aperture results in a blurred background. Consider four shots at different apertures to see this effect: as you can see, wider apertures such as f/1.8 and f/2.8 are better for creating smoother, blurred backgrounds. but more.
This means that “fast” lenses like the f/1.4 and the f/2.8 zoom have an edge if that’s your goal. These lenses may be more expensive than others, but you should be able to find inexpensive f/1.8 or f/2 lenses for almost any camera. However, opening the aperture wider is not always desirable, even if you are looking for a blurred background. Why is that? First, the depth of field may be too shallow at wider apertures to cover your subject, even if you prefer the look of a blurred background otherwise.
Also, as shown repeatedly on Photography Life, a lens closer to its maximum aperture usually has less sharpness and more aberration. Loss of sharpness at large apertures is common with very fast portrait lenses, although recent models are much better in this regard. For example, I’m usually hesitant to shoot the Nikon 50mm f/1.8G at f/1.8, while I wouldn’t hesitate with the Nikon 50mm f/1.8 S for the Nikon Z. The same goes for the 50mm f/ 1.8 from Canon, Sony and others.
Note: If you want to make some adjustments to the photo just let me know. I can do it for you at a very low cost. You can hire me to edit your photo
Get Closer

Renowned war photographer Robert Capa once said, “If your pictures aren’t good enough, you’re not close enough. As it happens, in addition to regularly improving the photo, getting closer to your subject also increases the background blur. This is a good technique to use when you don’t have a quick target. Let’s see what happens if we get closer, keeping the other parameters the same: of course, getting closer also brings its own limitations. It magnifies issues like camera shake and missed focus, making it harder to take sharper photos.
Plus, getting closer completely changes the composition and perspective. Portrait photographers should be particularly sensitive to perspective, as getting too close to a person’s face accentuates closer features like the nose. Or, if you’re a wildlife photographer and you’re about to photograph a King Cobra, you may not want to get close at all.
Keep the Background Far Away
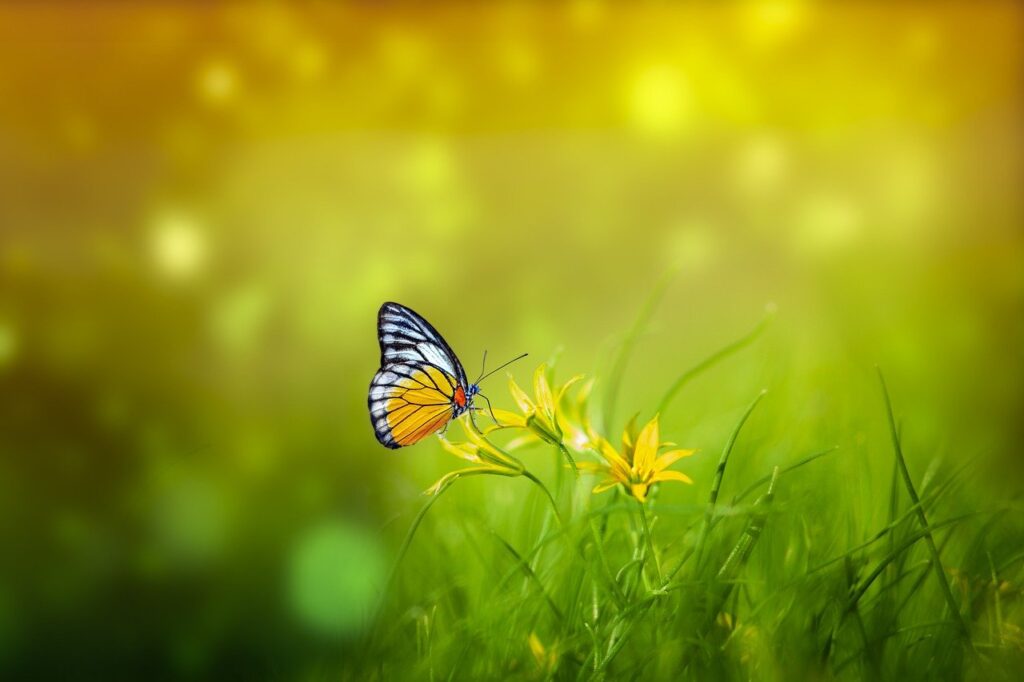
Keeping the background as far away as possible is one of the best ways to blur the background. In the following photo, the sparrow house is pretty close to me, while the background is a forest behind a river in the distance: If you want a blurred background with an animal photo, you have to pay attention to the background. and take pictures from different angles to avoid close background elements.
In the following example, the only change to the second photo is to move the background half a distance from the subject: it is important to pay attention to the type of background behind your subject. Thin grass can melt fairly quickly, while tall structures like thick trees are still recognizable even when they are further away.
Use a Bigger Sensor
Can choosing a larger sensor help you blur the background? In some cases, yes. With the same focal length and aperture, and with a larger sensor, you can get the same frame closer to your subject than with a smaller sensor. So it’s a variation of getting closer. However, you don’t need a large sensor camera to create beautifully blurred backgrounds. Using faster apertures, bringing the background closer and farther works with all cameras.
Note: If you want to make some adjustments to the photo just let me know. I can do it for you at a very low cost. You can hire me to edit your photo
Use a Longer Focal Length

Can a longer focal length get you a blurred background? Sure. As you zoom in, the background opacity increases. Despite what you may have heard, this holds true even if you step back a bit so your subject is the same size. Due to the increased magnification provided by the longer focal length, there will be less background in the image with the longer focal length than in the image with the shorter focal length.
This creates the appearance of more blurred background. Here’s an example of zooming in and then zooming out to keep the frame constant: The background has the same amount of detail in both photos, which is why it’s fair to say that you I haven’t really changed my depth of field. But from an artistic point of view, it is larger than in the 150 mm photo. The appearance of a smoother, more translucent background. This is the result of using a longer lens, even when I step back to keep the frame constant.
If I hadn’t stepped back when I took the second picture, you’d have seen the orange view be more magnified and the difference in background blur even more pronounced (similar to the example in the “back” section). near the”). Changing the focal length but keeping the subject’s frame the same will change the angle of view, so there is only a certain amount of freedom in choosing the focal length. For human portraits, for example, many appreciate the ability to perspective and frame shots in the full-frame equivalent range of 85mm to 200mm.
Motion Blur and Long Exposure

You can use motion blur to create a smoother background by blurring it with a long shutter speed. In the following example, I used a five-second long exposure in both shots but physically shook the background in the second exposure: in wildlife photography, you can achieve this effect by panning with moving objects. Normally, a shutter speed of about 1/2500 is used to freeze birds in flight, but you can also rotate the bird to a scale of 1/40 for an interesting blur effect. If you pan the bird very closely, you can still get a good amount of detail around its eyes, while the background will be heavily blurred due to the movement.
I encourage you to read Dvir Barkay’s Guide to Motion Blur and Rotation for more details. Even if you’re not looking for the full picture, the principle applies. If having a range of shutter speeds will give you a perfectly sharp bird – say between 1/500 and 1/8000 sec – deviation on the 1/500 sec side will make the background softer if you follow the bird in flight.
Blurring in Software?
I’m hesitant to talk about software, but software methods these days are getting pretty complicated and can now produce a more realistic blur than ever before. In one test, I found a photo of a chick in a black scarf, with a slightly busy background: I then used a smartphone app that uses AI to create a depth map. and try to reproduce the blur effect produced by the real lens. : The results weren’t perfect, and I had to manually adjust the depth map on the gorilla’s beak, but that’s not bad for something that’s almost fully automatic.
Even more sophisticated is that the phone generates a depth map when taking a photo, which is used by algorithms to provide a more realistic background blur from the rather small sensors. In post-processing, you can also use something like Photoshop’s Lens Blur tool. It is a little dangerous to use such tools.
For example, the image of the chick that I illustrated above has artifacts. Also, parts of the image in the same focal plane as the bird are blurred as if they were far away. Personally, aside from minor tweaks like noise reduction, tone curves, and color correction, I never use such post-processing as it goes beyond what I feel like a natural photo. . However, such tools can produce interesting results when used wisely, and ultimately one has to make a personal artistic decision about them. Whatever your own decision, I recommend you do your best to get what you want behind closed doors.
To Blur or Not to Blur?
We found that we could control the amount of background blur. However, the amount of blur should be a conscious choice. In other words, you should choose a blur level that will compliment your subject, rather than always aiming for a background blur at. More blur emphasizes interesting textures and details in your subject. , but less blur provides more environmental context and contrasts with a smooth background. topics. And of course, some photos don’t need to be blurred at all.
Admittedly, if you’re shooting subjects like landscapes or architecture, it’s common for photos not to have background blur, and photographers sometimes go to great lengths to avoid it. Make the decision to intentionally blur your background to capture your subject in the best light.
Conclusion
In this article, we looked at different ways to achieve blurred backgrounds with camera settings, composition, and even software. With these techniques, you can choose the right level of blur for your photos and have fun too. If you have any background blur ideas, I’d love to read them in the comments!
Note: If you want to make some adjustments to the photo just let me know. I can do it for you at a very low cost. You can hire me to edit your photo
latest post
- What is Midjourney
 Discover the capabilities of Midjourney AI, learn how to effectively utilize the platform, and explore the advantages and disadvantages of the Midjourney AI image generator across its different pricing options.
 - Brand identity elements
 In the vast marketing universe, imagery is pivotal in establishing and nurturing a brand’s identity. A brand’s visual choices are not merely aesthetic decisions but strategic moves that can significantly influence perception and performance. This Picfixs article explores the intricacies of selecting imagery that complements and enhances a brand’s essence, ensuring it resonates with the… Read more: Brand identity elements
 - 100 Best Mountain Captions and Mountain Quotes for Instagram
 Ready to scale new social media heights? Look no further than this treasure trove of 100 exhilarating captions and quotes, handpicked for your Instagram mountain posts!
 - Symmetry in Photography: A Creative Approach with Examples
 Delve into the enchanting realm of symmetry in photography as we showcase mesmerizing examples on our website. Experience the allure of perfectly mirrored images!
 - 11 Quarantine Photoshoot Ideas to Try at Home for Amazing Photos
 Looking for unique photoshoot ideas during quarantine? Explore the 11 creative suggestions that will help you capture unforgettable moments at home.