Estimated reading time: 8 minutes
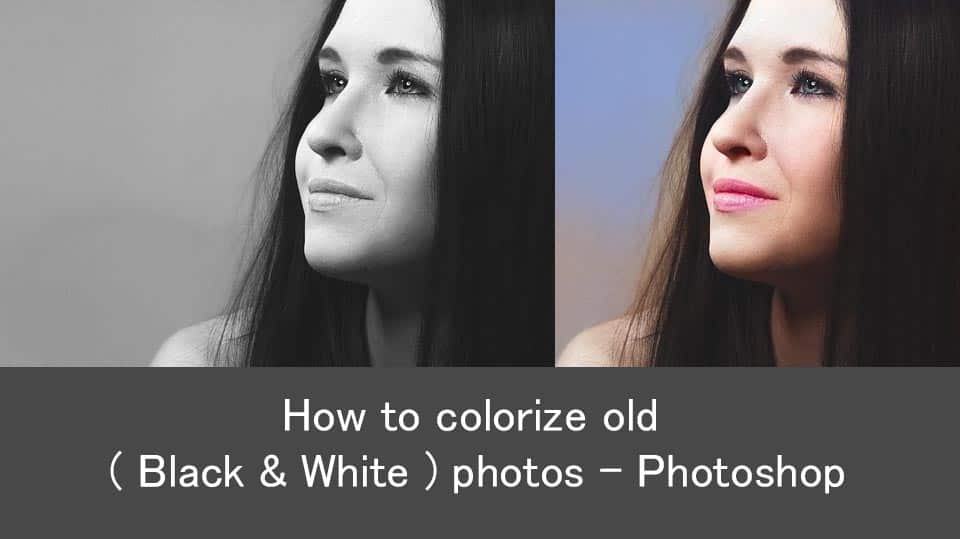
All you need is a basic understanding of Photoshop to properly color correct black and white photos. You can use this method to understand better colors and give old photos new life. This blog will explain “How to Colorize Old (Black & White) Photos – Photoshop Tutorial.” Let’s wait and see.
What You’ll Want
⦁ Photoshop or a similar software, such as GIMP, in any version. Even if some of the tools are new, you must be ready to follow through this guide.
⦁ A picture in black and white.
⦁ Begin with a simple picture which is not submit detailed. It will allow you to improve while also fun.
⦁ A knowledge of the period of time shown in your image If the photograph is old, you’ll need
⦁ to know what colours were like in the earlier. It will verify that your results are completely correct.
Start with cleaning the photos
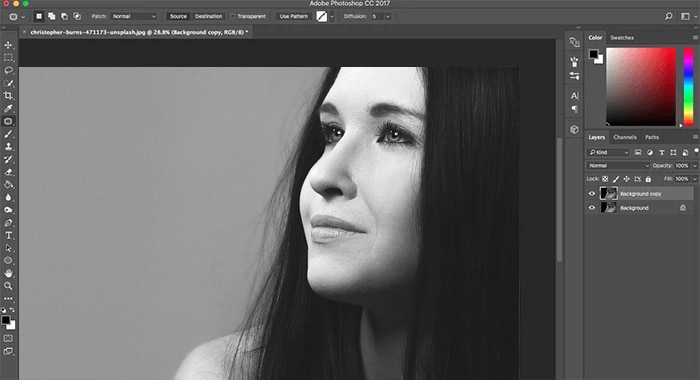
⦁ In Photoshop, open the picture. If it’s an old photograph, there’s a good chance it’s covered with dust and blemishes. If the picture is new, it may still have faults that affect the colouring process.
Note: If you want to make some adjustments to the photo just let me know. I can do it for you at a very low cost. You can hire me to edit your photo
⦁ By using Patch tool, you can easily delete all. It’s easy to do separate by making a new background layer, but it is not required.
⦁ Keep in mind that the original is selected at the centre of the display before selecting the Patch tool. Drag the problem to a clear spot by circling it and moving it there. The blemish will be repaired by the area you dragged.
Increase image contrast
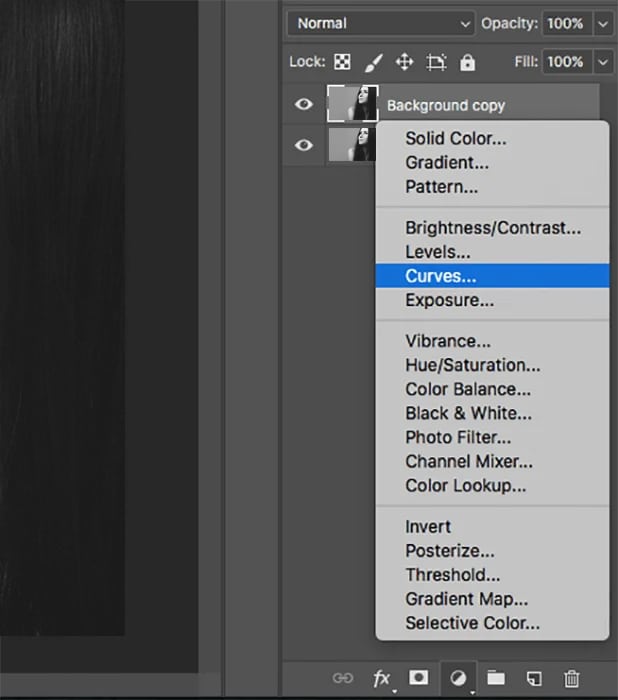
⦁ It is a very simple process which needs just a few tools of one’s choice. Easily increase the contrast and create some changes to make one’s picture more vibrant.
⦁ Press on the adjustment layer of the bottom of Layers box to use it. Users can use a number of tools, but I suggest that you can use curves or levels.
⦁ Reduce the brightness of the adjustment layer if the outcomes are just too harsh.
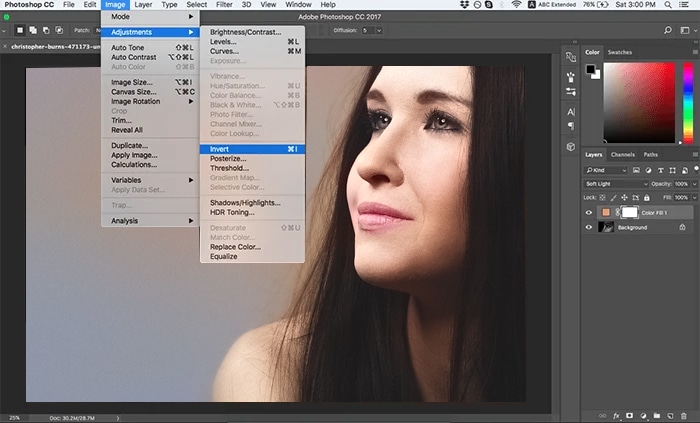
Change to CMYK for vibrant colors

⦁ To use CMYK mode it will make the whole of one’s colours extra colourful and make it easier to fill any black and white spaces.
⦁ Go to Image > Mode > Colour CMYK.
⦁ A window will open. Select between Flatten or Merge.
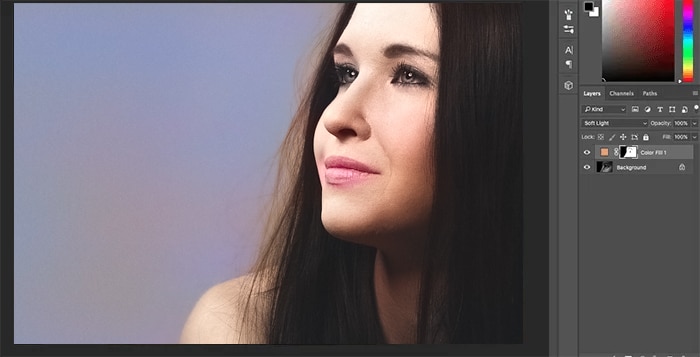
Colour each part of the image
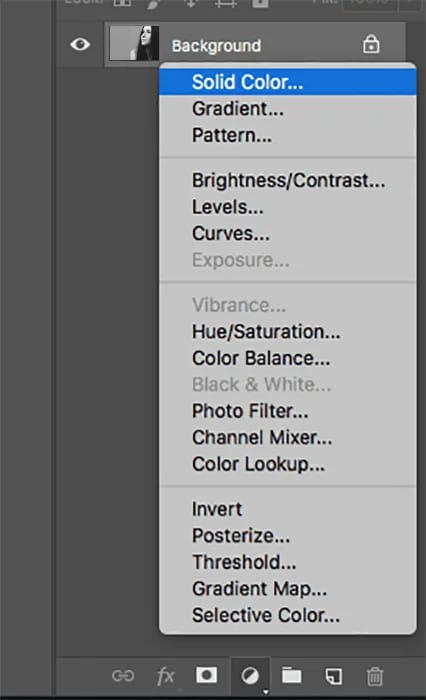
⦁ It’s time to colour your picture. Select Solid Colour by clicking on the adjustment layer symbol twice. Choose a colour to work with first.
⦁ Don’t be too worried about finding the right colors. Users can change it at any time by double-clicking the colour inside the layer as well as changing the hue.
⦁ Layer mode must be fixed to Soft Light. To rearrange the layer mask (the white box next to the new layer), click Command + I or Ctrl + I.
⦁ Users can also use the following steps to replace the layer mask.
Use the Brush Tool to paint over the image
⦁ Change the softness and size of the brush tool. There are also no hard and fast rules for this stage.
⦁ To cover almost all of the image, use a soft brush with 100% shading.
⦁ Users can begin with a rough ‘foundation’ to avoid putting out black and white areas.
⦁ Choose the layer mask and set the foreground colour to white. Press the X key on your keyboard to turn between black and white.
⦁ When you’re finished with one part of the image, start creating another adjustment layer, and choose a different colour, and repeat in step 4.
⦁ To remove errors, click X to make black the foreground colour as well as paint over the areas you want to remove them.
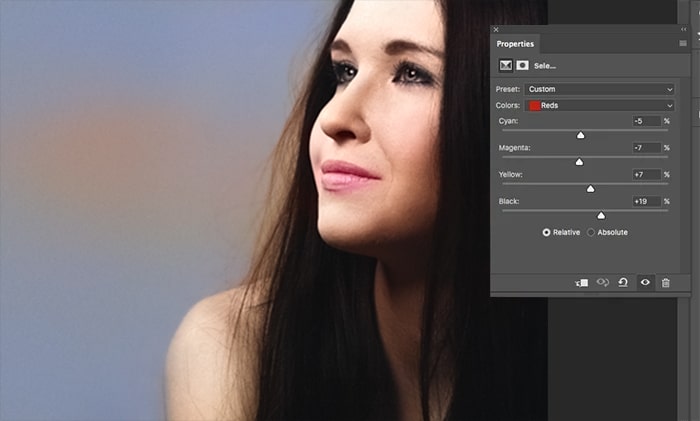
⦁ When something doesn’t look perfect, users can always change the colour hue or the saturation of the layer.
Try new colours to get realistic results
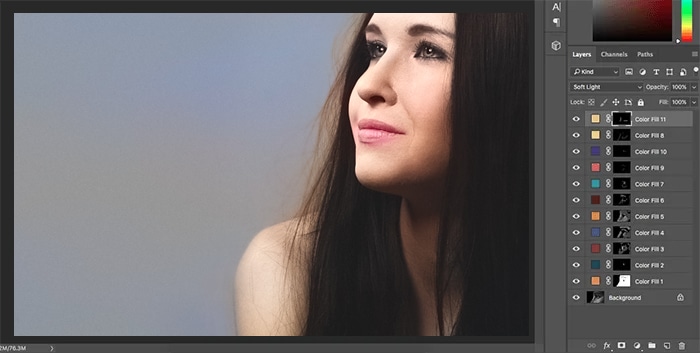
⦁ Sure, users didn’t paint three different images and hope it would look real. Try different tones, such as unique colours. Start by creating many more solid colour adjustment layers just as you wish.
⦁ For skin colours, for example, users must use purples, blues, and yellows so that skin does not appear dull.
⦁ If using odd colours, make sure to reduce the shading of the layer so that the image does not appear unreal. Sometimes subtle colours can make a major difference.
⦁ As users update, look over a few different coloured pictures to see how different colours function together. It is an excellent way to improve one’s understanding of colours as well as their ability to capture them in photography.
Use others tools to Improve better colour
The End Result
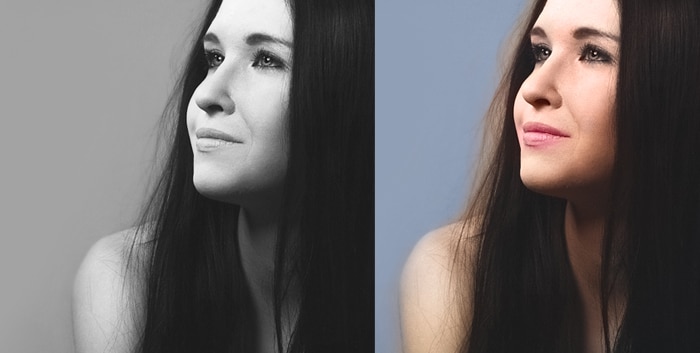
Now, you’re finally complete! Start colouring images to boost your colouring strategy. Save the image as a Photoshop (PSD) file if users would like to go back and focus on it again. All of the layers will be stored here as a result. Such a method is suitable if you are a high achiever or simply need a break from painting one image.
PHOTOSHOP COLOURING EASY METHOD
Conclusion
You don’t really need a degree and years of work experience to bring black and white images to existence. You can use this method to restore old family photos, experiment with unique colours, or even change your view of colour combinations forever. I hope the above method is beneficial for you in the upcoming years.
Note: If you want to make some adjustments to the photo just let me know. I can do it for you at a very low cost. You can hire me to edit your photo
latest post
- What is Midjourney
 Discover the capabilities of Midjourney AI, learn how to effectively utilize the platform, and explore the advantages and disadvantages of the Midjourney AI image generator across its different pricing options.
 - Brand identity elements
 In the vast marketing universe, imagery is pivotal in establishing and nurturing a brand’s identity. A brand’s visual choices are not merely aesthetic decisions but strategic moves that can significantly influence perception and performance. This Picfixs article explores the intricacies of selecting imagery that complements and enhances a brand’s essence, ensuring it resonates with the… Read more: Brand identity elements
 - 100 Best Mountain Captions and Mountain Quotes for Instagram
 Ready to scale new social media heights? Look no further than this treasure trove of 100 exhilarating captions and quotes, handpicked for your Instagram mountain posts!
 - Symmetry in Photography: A Creative Approach with Examples
 Delve into the enchanting realm of symmetry in photography as we showcase mesmerizing examples on our website. Experience the allure of perfectly mirrored images!
 - 11 Quarantine Photoshoot Ideas to Try at Home for Amazing Photos
 Looking for unique photoshoot ideas during quarantine? Explore the 11 creative suggestions that will help you capture unforgettable moments at home.
related link
