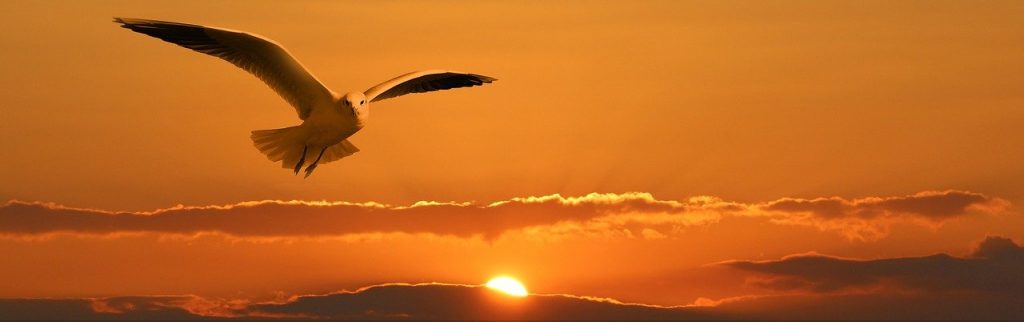
Wildlife photography is a popular and rewarding genre, but it can also be difficult. One of the most common difficulties in determining the most effective camera settings, especially in low-light situations. Animals do not always enjoy being out in the open in bright natural light. They are frequently seen in the shadows of trees, and they may be most active at night.
As a result, the photographer must be familiar with the best camera settings for wildlife photography in low light conditions. As a result, we’ve compiled a list of 11 essential camera settings for capturing stunning wildlife images.
1. Make a Plan

One of the most important factors in your success is proper planning and scheduling. It’s especially important as you consider how to make the best use of the light you’ll have. The best light for photographing wildlife occurs in the early morning or late afternoon when many animals are also active.
If you can anticipate the type of light you’ll be dealing with as well as its position in the sky, you can plan how to position yourself to make the most of what light you do have.
2. Switch to Manual Mode

In low-light situations, your camera’s automatic mode will struggle with exposure, so you’ll need to switch to manual mode. You can adjust the settings in manual mode until your camera’s histogram confirms a good exposure. This will be necessary for obtaining sharply focused images.
3. Use a Tripod
Using a tripod is critical for obtaining sharp images. To avoid shaky or blurry images when using the aperture, shutter speed, and ISO settings required in low light conditions, you’ll need to use a tripod. For less than $100, you can get some excellent tripods that are extremely stable.
4. Wide Open Aperture Settings
This is one of the most important camera settings for low-light wildlife photography. To let in more light, you should open up the aperture (use a smaller f-number). However, this frequently necessitates slowing down the shutter speed.
As a result, you should think about the lens you’re using as well. Fast aperture lenses have a larger maximum aperture but achieve the same exposure by using a faster shutter speed. That’s useful when your subjects are likely to be moving around a lot. Here are a few examples of lenses with fast apertures:
Canon EF 70-200mm f/2.8L USM
Sigma 120-300mm F2.8 Sports DG APO OS HSM Lens
Canon EF 300mm f/2.8L IS USM II Super Telephoto Lens
You’ll notice that these lenses aren’t cheap, but they’re well worth the investment, especially if you’re getting into wildlife photography professionally.
5. Shutter Speed Settings
The rule that most photographers learn is that your shutter speed should be one over your lens’s focal length. To effectively eliminate camera shake, use a shutter speed of 1/300th of a second if you’re using a 300mm zoom lens.
This, however, is insufficient for photographing wildlife in low-light conditions. You’ll simply have to break the rule. Using a shutter speed of 1/100th of a second is usually sufficient, especially if your lens has vibration reduction, but shooting in burst mode and using a tripod will help ensure that you get at least one image in sharp focus.
6. ISO Camera Settings
In low light, you should increase your ISO. The ISO setting represents how sensitive your camera is to light, and most photographers avoid going above 400. However, for low-light settings, you’ll need more, possibly as much as 3000 or even a little more.
Higher ISO settings introduce more noise–that is, a more pixelated appearance–to the image, but noise can be removed in post-production. Furthermore, most modern cameras have good ISO performance, which means they can produce a high-quality image even at ISO settings as high as 3,200.
7. Shoot in Burst Mode
Another important camera setting for wildlife photography is to set the camera to burst mode. When you shoot in burst mode, the camera takes a rapid succession of images.
This setting is usually found on the dial of most cameras. It could be labeled C for continuous shooting and S for a single image. Some cameras have the option of CL, which stands for continuous low, or CH, which stands for continuous high. The high mode takes more photos faster, but it may limit autofocus capabilities or other features, so make sure you understand what those limitations may mean for your image.
Shooting in burst mode increases the likelihood of capturing at least one sharply focused image. This is important not only because of the low light conditions, but also because your subject may move, and this will allow you to capture one sharply focused image even if your subject moves quickly.
8. Avoid Underexposure
It’s tempting to believe that you can simply fix underexposure in post-production. However, the reality is that you will introduce a lot more noise that way. It is preferable to avoid underexposure in the first place by adjusting the other critical settings.
9. Shoot in RAW
Shooting RAW in low light conditions means your camera will retain more shadow detail than the compressed jpg format. This gives you more control over image manipulation in post-production, and it often results in more dramatic images.
10. Lock the Focus

This is a useful camera setting, especially if you use the back button focus setting. Because you’ll be shooting in low light with your aperture wide open, your depth of field will be very shallow. As a result, you must ensure that you maintain your focus.
Normally, you do this by pressing halfway down on the shutter button, allowing the image to focus, and then taking the picture. But there is another option. It’s known as a back button focus. This was a Canon feature introduced in 1989 that never really caught on, but it is still included in almost all brands of DSLR or mirrorless cameras today.
To enable back button focus, go into the settings menu, but once you do, there will be a separate button on the back of the camera (hence the name) that will allow you to focus the camera separately from using the shutter button. That leaves only one thing for the shutter button to do: take the picture.
11. White Balance Settings
You must adjust your white balance to match your surroundings. Indoor shooting modes include Tungsten for regular light bulbs and Fluorescent for fluorescent bulbs. There are also outdoor photography settings. Cloudy is for low light on overcast days, and Shade is for low light created by shadowy areas, such as under trees or deep in the forest.
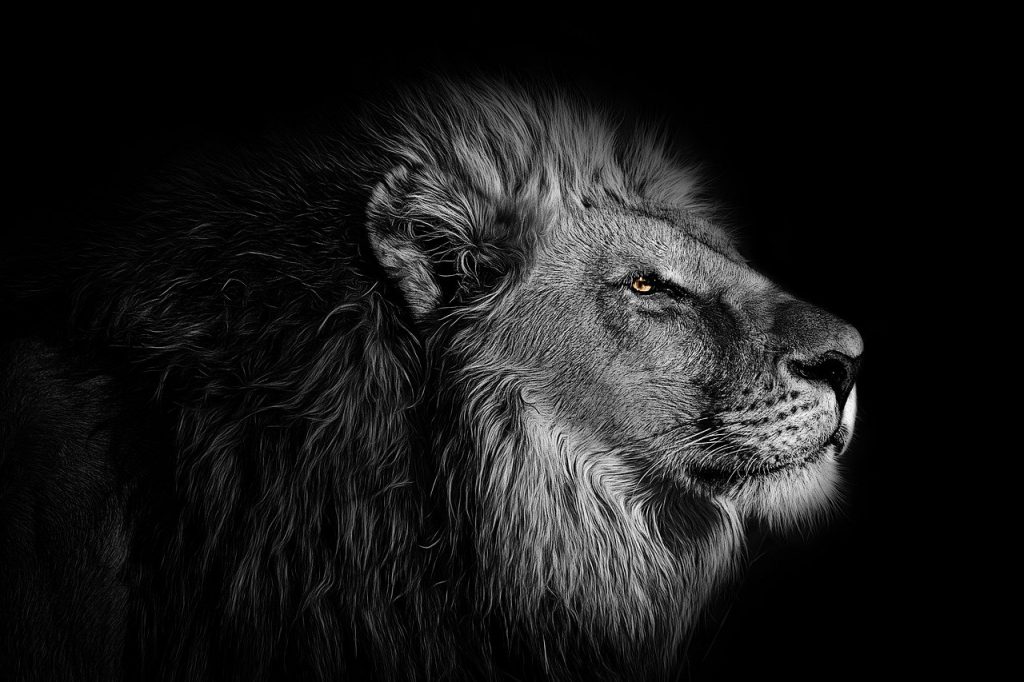
Determine your white balance and adjust it based on the lighting: For wildlife photography, white balance is an important camera setting. It ensures that what appears white to the naked eye, such as the white on this tiger, appears white in the image.
You can remove unrealistic color casts by using the proper white balance settings so that objects that appear white to your eyes will also appear white in the image. If you shoot in RAW, you can remove the casts in post-production, but if you shoot in compressed jpg, it will be difficult to do, so if you shoot in jpg, you must get your white balance correct.
You must also be familiar with your camera’s settings. You should open up your aperture to let more light in and use the fastest shutter speed possible to avoid camera shake, but the slowest shutter speed possible to compensate for a wider aperture. That could imply investing in a fast aperture lens, which will be worthwhile if you want to be a professional.
To increase your chances of getting at least one good image, you should also use higher ISO settings and shoot in burst mode. You can avoid underexposed images, which are difficult to correct in post-production, by doing so. Shooting in RAW, locking your focus, and using the proper white balance settings can result in great images that can be post-processed.
Wildlife photography is an exciting and rewarding genre, but you must know how to use the right camera settings to get the images you want. If you do, you will be rewarded with stunning photographs of your enthralling subjects.
Note: If you want to make some adjustments to the photo just let me know. I can do it for you at a very low cost. You can hire me to edit your photo.
LATEST POST
- What is Midjourney
 Discover the capabilities of Midjourney AI, learn how to effectively utilize the platform, and explore the advantages and disadvantages of the Midjourney AI image generator across its different pricing options.
 - Brand identity elements
 In the vast marketing universe, imagery is pivotal in establishing and nurturing a brand’s identity. A brand’s visual choices are not merely aesthetic decisions but strategic moves that can significantly influence perception and performance. This Picfixs article explores the intricacies of selecting imagery that complements and enhances a brand’s essence, ensuring it resonates with the… Read more: Brand identity elements
 - 100 Best Mountain Captions and Mountain Quotes for Instagram
 Ready to scale new social media heights? Look no further than this treasure trove of 100 exhilarating captions and quotes, handpicked for your Instagram mountain posts!
 - Symmetry in Photography: A Creative Approach with Examples
 Delve into the enchanting realm of symmetry in photography as we showcase mesmerizing examples on our website. Experience the allure of perfectly mirrored images!
 - 11 Quarantine Photoshoot Ideas to Try at Home for Amazing Photos
 Looking for unique photoshoot ideas during quarantine? Explore the 11 creative suggestions that will help you capture unforgettable moments at home.