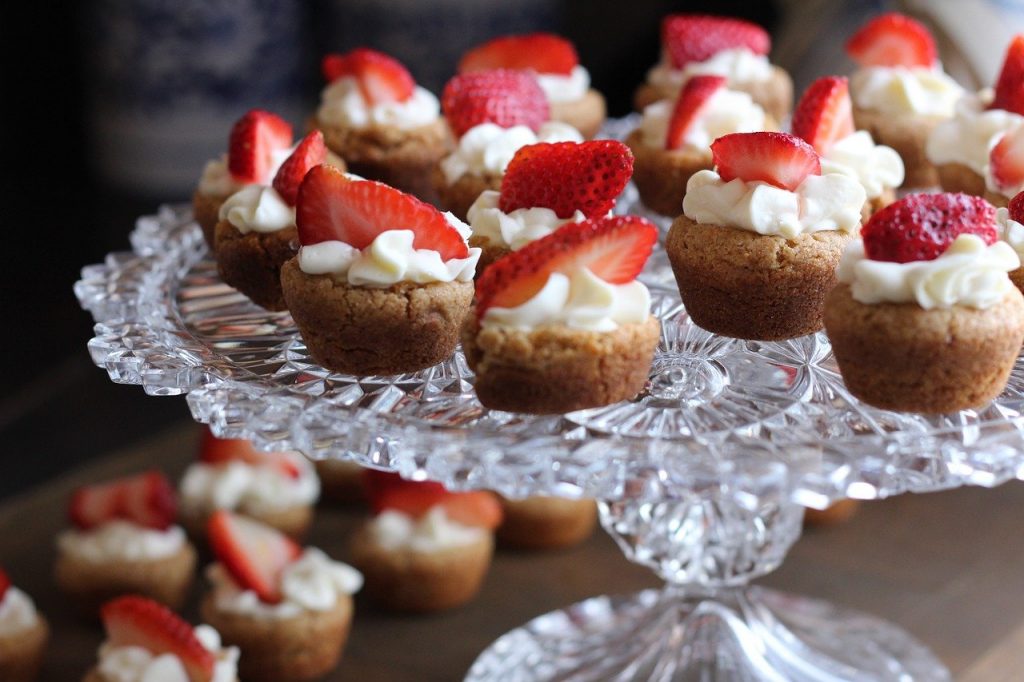
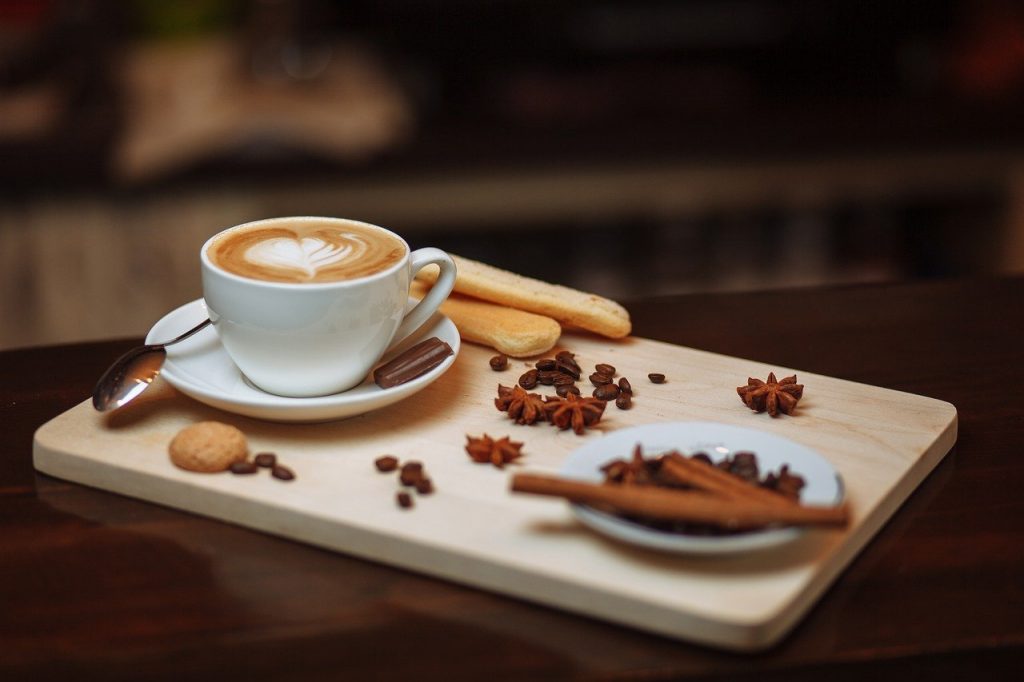
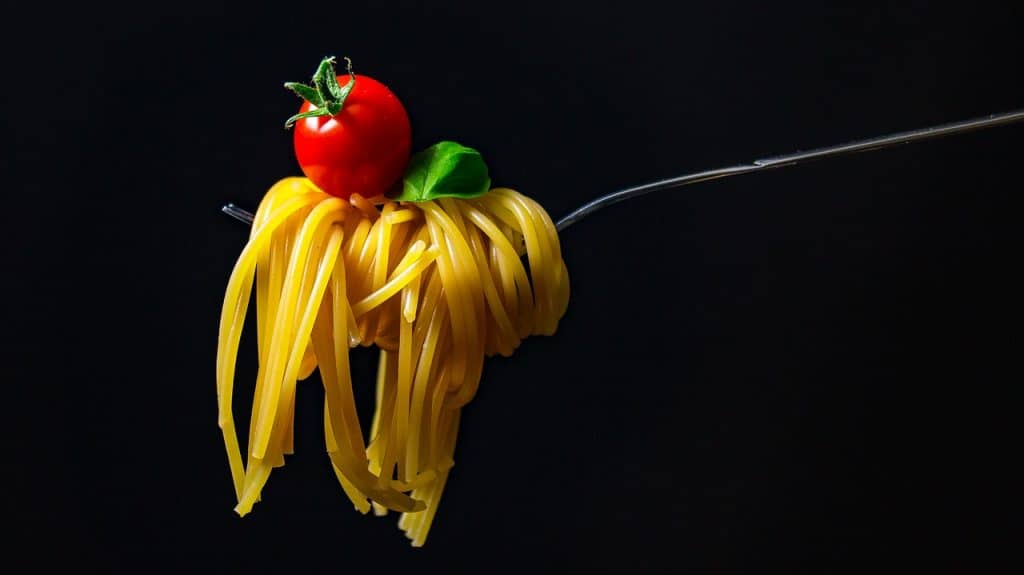
If you want to take beautiful food photographs, you must use proper lighting. Your goal is to create an appealing, even mouth-watering image of food.
Natural light is usually the preferred source of light for achieving that image, but it doesn’t always cooperate with your schedule or the location. There are also techniques for shaping the light in order to capture those enticing shots.
So, how do you get the right light? So, here is the most important food photography lighting setup tips to help you create food images that will make you salivate!
Light Sources for Food Photography
The main point to consider here is whether to use natural or artificial light sources. However, one thing to keep in mind with your lighting setup, whether natural or artificial, is that bright light has a tendency to wash out the image, reducing the color saturation of your subject.
Keep in mind that you may need to compensate for this by increasing the vibrancy and clarity of the colors in post-production processing. With this in mind, which is preferable: natural or artificial light?
Natural Light
Most food photography professionals prefer natural lighting setups or the ability to create a natural light appearance. Natural light, however, is more than meets the eye.
Studying the light in your area is the best advice anyone can give you. Keep an eye on how it changes throughout the day. Color, intensity, and, of course, the direction will all change. Once you understand those changes, you can begin to sculpt and tame the natural light beast in order to achieve the desired mood for your images.
Window Light
A constant natural light source is provided by direct light shining through the window. This has the advantage of allowing you to see how the light and shadows fall across the scene. However, it is often a harsh light that casts sharply defined shadows. That means you’ll need to shape the light with some of the tools in your kit, such as reflectors and diffusers.
Artificial Light
Even if your location has plenty of natural light, you’ll probably want some artificial light sources. Natural light may only be available for a short period of time during the day, or the shoot may have to take place at night, necessitating the use of artificial lighting.
The first rule of artificial lighting is to never use kitchen light, If you do, it will not end well for you. In fact, all indoor lights should be turned off. These will pollute your images with color casts that are difficult to remove in post-production. So, what kind of artificial lighting should you employ?
Strobe lights, on the other hand, are standard equipment for food photographers. A strobe light is more powerful than most constant light sources, and mono head strobes have a modeling lamp built into the head that provides a small constant light source.
You’ll need at least 300 watts of power on your strobes for most shoots, but 500 watts is preferable. They are not cheap, but it is money well spent. Strobe lights illuminate the entire lighting setup for food photography, allowing you to capture fine detail in your image.
Strobe light bursts, on the other hand, produce light that does not fade quickly, so pair your strobe lights with a softbox diffuser, which is a common food photography prop. Even so, it’s possible that it won’t be enough. Extra diffusers at the table’s edge may be required to soften the light even more.
Food Photography Props
You’re going to need a few props to get that perfect shot. You’ll need props to help you achieve that soft light glow, as well as scene props to complement the food you’re photographing.
You can shape the light you’re using (whether natural or artificial) and better accentuate the properties of the food you’re photographing if you use these props correctly.
Note: If you want to make some adjustments to the photo just let me know. I can do it for you at a very low cost. You can hire me to edit your photo.
Lighting Props
You’ll need some basic tools to modify your light sources, whether natural or artificial. The majority of these are not expensive or elaborate. The following items are included in a basic kit for creating a soft, glowing light for your images:
- A white foam board for light reflection
- A black foam board to add depth
- A diffuser of light
Reflective White Foam Board
To bounce light back onto the setup, a reflector can be used. This softens the shadows and makes them appear feathered, and while the highlights are bright and light, they are still tamed to just the right degree. At the craft store, a white foam board should only cost you a couple of dollars.
The placement of reflectors is an important consideration for food photography setup. Wherever the source of your light is, the reflector will be on the opposite side. You could also experiment with putting up small reflectors called bounce cards to help with light distribution.
Black Foam Board for Depth
Sometimes a harsher light is required to create a more dramatic image. A black foam board can be used to deflect some of the light from the scene, which deepens the shadows and adds contrast. The mood you want to create determines whether you want to do this or not. Again, a black foam board can be found at any craft store for a reasonable price.
Light Diffuser
This can be as simple as parchment paper (i.e., baking paper) or a muslin cloth draped across the window to diffuse the harsh light. It scatters the light and provides a soft glow to your image. Both parchment paper and muslin cloth are inexpensive and widely available.
A softbox will give you more flexibility than parchment paper or muslin cloth. It is the most commonly used light diffuser in food photography. It is not expensive, and it is worthwhile to include it as part of your basic lighting setup kit for food photography.
Scene Props
The items displayed with the food are known as scene props. Plates, glasses, napkins, silverware, placemats, and tablecloths are examples of these. They improve the image, but there are a few things to consider.
Keep an eye out for shine from some of your scene props. When using artificial light, it has a tendency to catch the shine on shooting surfaces. To avoid this, you can experiment with prop placement or use a polarizing filter attached to your lens.
When it comes to tablecloths or other background surfaces, dark surfaces make one-light setups easier. White surfaces can cause your image to appear grey until you get the hang of getting the height of your light just right. You will, however, want something white in the image to help you adjust your white balance–perhaps as simple as a napkin placed to one side or beneath the plate.
Food Photography Angles
The angle of the light is another important consideration for food photography lighting setup. There are several perspectives to consider. Side lighting, backlighting, and side backlighting are examples, but you must also consider what does not work well.
The angle of the light depends on the food you’re photographing to some extent, but it’s also important to consider the mood you want to create. Here are some things to consider when considering different lighting angles.
Side Lighting
By far the most common angle used in food photography setup is side lighting. But which side should the light be placed on?
Our eyes are drawn to the brightest part of an image, and we read from left to right in the Western world. As a result, it is most often preferable to have the light source coming from the left. As you would when reading, your eyes will begin on the left side of the image and travel across to the right. If you were shooting for someone in a country where people read from right to left, lighting from the right might be preferable.
This, however, is not a hard and fast rule. This works well in general, but it really depends on your composition. When in doubt, compare an image with the light on the right to the same image with the light on the left. Then you can decide which works best for your particular setup.
Backlighting
There is also the option of backlighting. This is especially useful for liquids like soups and beverages. It adds sheen and highlights the food’s liquid properties.
While backlighting can be effective, it can also cause uneven lighting. The back of the image may be too bright, while the front may be too dark. Alternatively, you could try to compensate by adding more light and simply washing out the entire image.
To help prevent uneven light distribution, place your diffuser between the table and your light source. Also, remember to add reflectors to the sides of your scene. You could even place bounce cards around your subject on the table.
Side Backlighting
With side backlighting, which can be done on either side, you can have the best of both worlds. With backlighting, you get the appealing surface shine without overexposing the back of the image. As a result, you won’t need to reflect as much light onto the front of the food.
It will help to experiment with the height of your light source when using side backlighting. You’ll be able to change the way the shadows fall on your scene as a result.
Bad Angles
What doesn’t work in food photography angles is an important consideration. Front lighting, which is common in portraiture, does not work well for food photography. It casts obnoxious shadows and makes your images appear flat. The same can be said for overhead lighting. These lighting angles should be avoided unless there is a compelling reason to do so.
Key Takeaways
- The lighting setup is crucial in creating enticing food images. You want natural lighting, but it frequently interferes with your schedule or location. As a result, an artificial light source, such as strobe lights, is required to enhance or recreate natural lighting effects. To sculpt the perfect light for your image, you’ll also need props like diffusers and reflectors.
- Scene props are also important for your image, but keep an eye out for shine from the props. A polarising filter, as well as simply moving the prop, can help with this. You’ll also want a dark background to avoid having a grey image.
- It is also critical to get the lighting angle correct. The best lighting angles for food photography are side and backlighting, while front and overhead lighting angles do not work well.
Finally, while post-production processing can help with issues such as restoring the vibrancy of colors in washed-out images, if you don’t turn off indoor lights, even post-production processing may not be able to help. If you follow these food photography lighting tips, you should be able to capture mouth-watering food images that will have people clamoring for a bite.
Note: If you want to make some adjustments to the photo just let me know. I can do it for you at a very low cost. You can hire me to edit your photo.
latest post
- What is Midjourney
 Discover the capabilities of Midjourney AI, learn how to effectively utilize the platform, and explore the advantages and disadvantages of the Midjourney AI image generator across its different pricing options.
 - Brand identity elements
 In the vast marketing universe, imagery is pivotal in establishing and nurturing a brand’s identity. A brand’s visual choices are not merely aesthetic decisions but strategic moves that can significantly influence perception and performance. This Picfixs article explores the intricacies of selecting imagery that complements and enhances a brand’s essence, ensuring it resonates with the… Read more: Brand identity elements
 - 100 Best Mountain Captions and Mountain Quotes for Instagram
 Ready to scale new social media heights? Look no further than this treasure trove of 100 exhilarating captions and quotes, handpicked for your Instagram mountain posts!
 - Symmetry in Photography: A Creative Approach with Examples
 Delve into the enchanting realm of symmetry in photography as we showcase mesmerizing examples on our website. Experience the allure of perfectly mirrored images!
 - 11 Quarantine Photoshoot Ideas to Try at Home for Amazing Photos
 Looking for unique photoshoot ideas during quarantine? Explore the 11 creative suggestions that will help you capture unforgettable moments at home.