1. Create a New Document
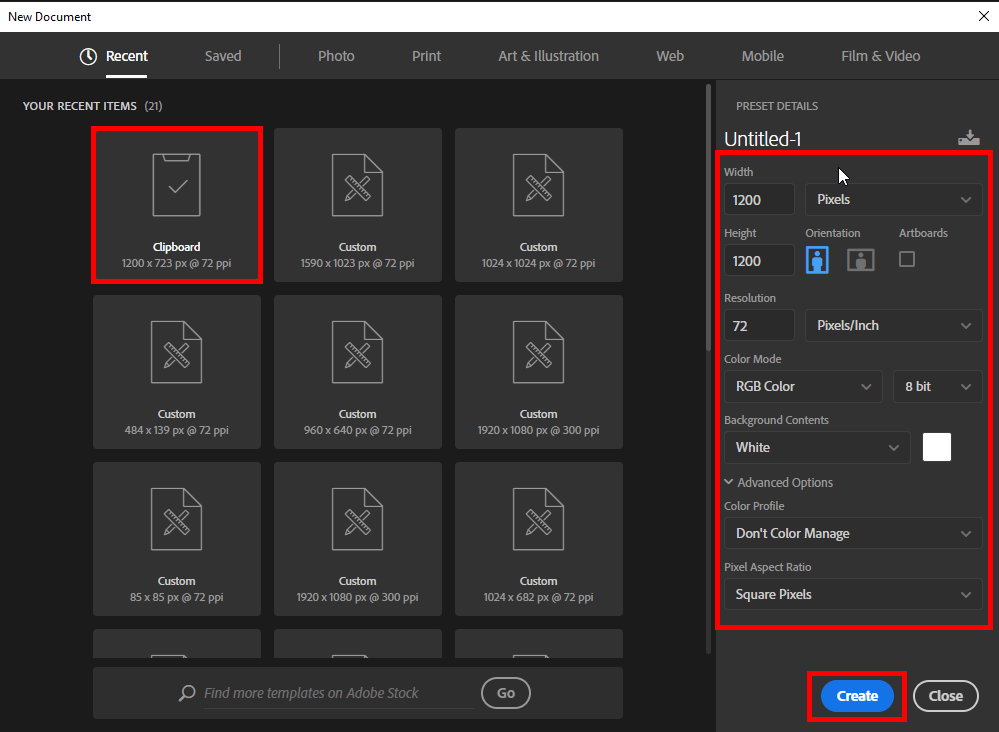
Start with launching Photoshop. Create a new document. Enter the preset details you see in a screenshot below.
2. Grab a Gradient Tool
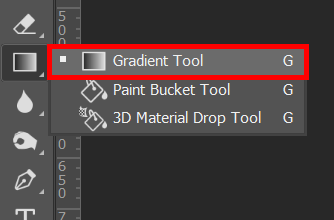
Next, grab the Gradient Tool (G) in the Tools panel.
3. Add a New Layer
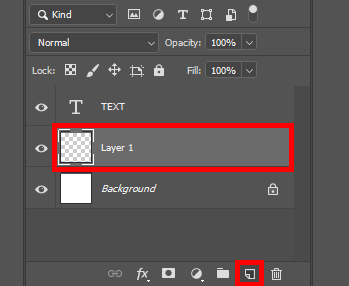
Then, add a new layer by clicking the “Create a New Layer” button at the bottom of the Layers panel. If this panel is hidden, activate it by pressing F7.
If you prefer using Photoshop keyboard shortcuts, use the Shift+Ctrl+N/Shift+Cmd+N key combination to create a new layer quicker.
4. Open More Options
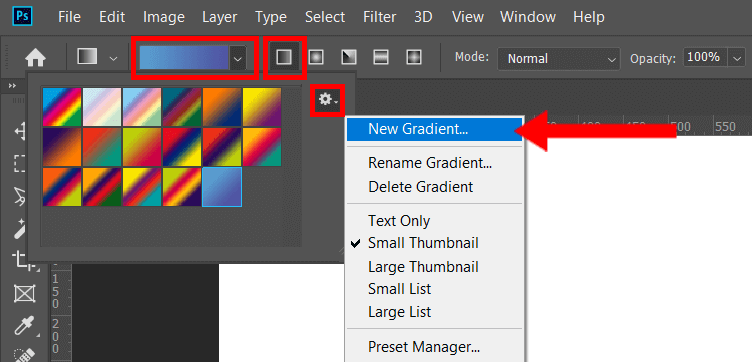
You’ll notice the “Gradient Bar” at the top of the screen. This is where you can choose one of the ready-made templates, or customize the look of your gradient. Click on the dropdown arrow next to the gradient fill dialog box.
You’ll see a selection of default gradients. To extend this selection, click the settings icon and go to “New Gradient.”
5. Name the Gradient
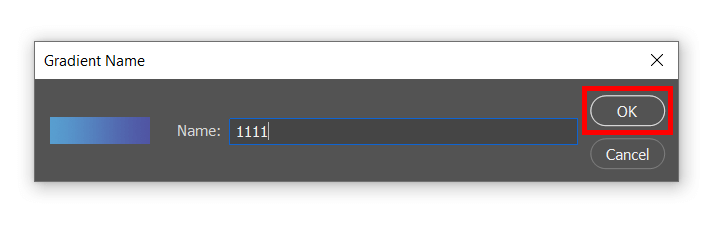
Come up with a name for your gradient. Enter the name in the window that opens and click “ОК.”
6. Choose a Color
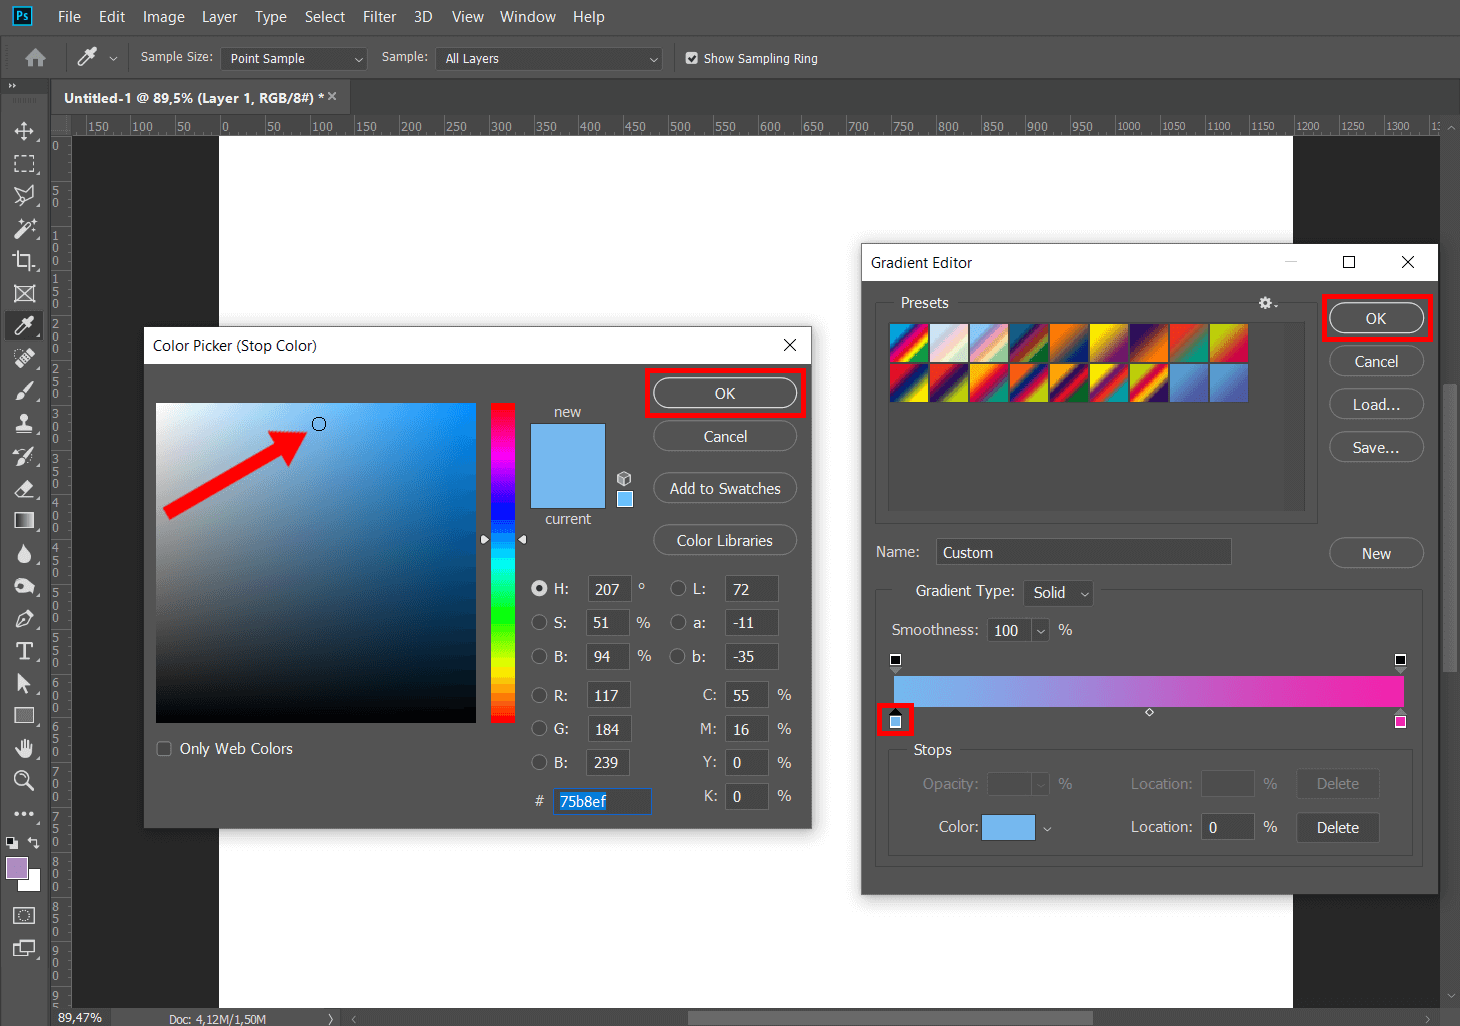
In the “Gradient Editor” window, click on a color stop. You’ll see a “Color Picker” appear. Choose the color you like.
The square on the left is the color your gradient starts with, and the color on the right is the shade it fades into.
7. Set a Starting Point
Once you have done that, click and hold to set a starting point.
8. Pick a Style
Gradients come in different types, and you can select the one you like the most. Up at the top bar, you’ll see 5 icons that stand for different gradient types.
Besides a linear gradient, which is a classic option that everyone is familiar with, there are 4 more that are less popular.
A radial gradient is when one color starts in the middle in the form of a circle and then gradually changes into the next color. It visually resembles the sun.
Angular is a counter-clockwise color sweep. It has 2 solid colors that gradually change into one another.
A reflected gradient is basically a simple linear gradient with a reflection.
Diamond resembles the radial gradient. The only difference is that here you have a diamond in the middle, instead of a circle.

9. Done! Save the Result
You’re done! You’ve successfully learned how to make a gradient in Photoshop.
To save the final result, go to the “File” tab, and navigate to “Save As.” Alternatively, use the Shift+Ctrl+S/Shift+Cmd+S shortcut.
Note: If you want to make some adjustments to the photo just let me know. I can do it for you at a very low cost. You can hire me to edit your photo.
latest post
- Visual Mastery: Crafting Imagery That Embodies Your Brand Essence
 In the vast marketing universe, imagery is pivotal in establishing and nurturing a brand’s identity. A brand’s visual choices are not merely aesthetic decisions but strategic moves that can significantly influence perception and performance. This PicFixs article explores the intricacies of selecting imagery that complements and enhances a brand’s essence, ensuring it resonates with the… Read more: Visual Mastery: Crafting Imagery That Embodies Your Brand Essence
 - 100 Best Mountain Captions and Mountain Quotes for Instagram
 Ready to scale new social media heights? Look no further than this treasure trove of 100 exhilarating captions and quotes, handpicked for your Instagram mountain posts!
 - Symmetry in Photography: A Creative Approach with Examples
 Delve into the enchanting realm of symmetry in photography as we showcase mesmerizing examples on our website. Experience the allure of perfectly mirrored images!
 - 11 Quarantine Photoshoot Ideas to Try at Home for Amazing Photos
 Looking for unique photoshoot ideas during quarantine? Explore the 11 creative suggestions that will help you capture unforgettable moments at home.
 - 10 Must-Try Spotlight Photoshoot Ideas and Tips
 Capturing the perfect shot requires creativity and attention to detail. Here are 10 fantastic ideas and tips to help you create stunning photos during your next spotlight photoshoot.